A Basic Guide To Folding Leather

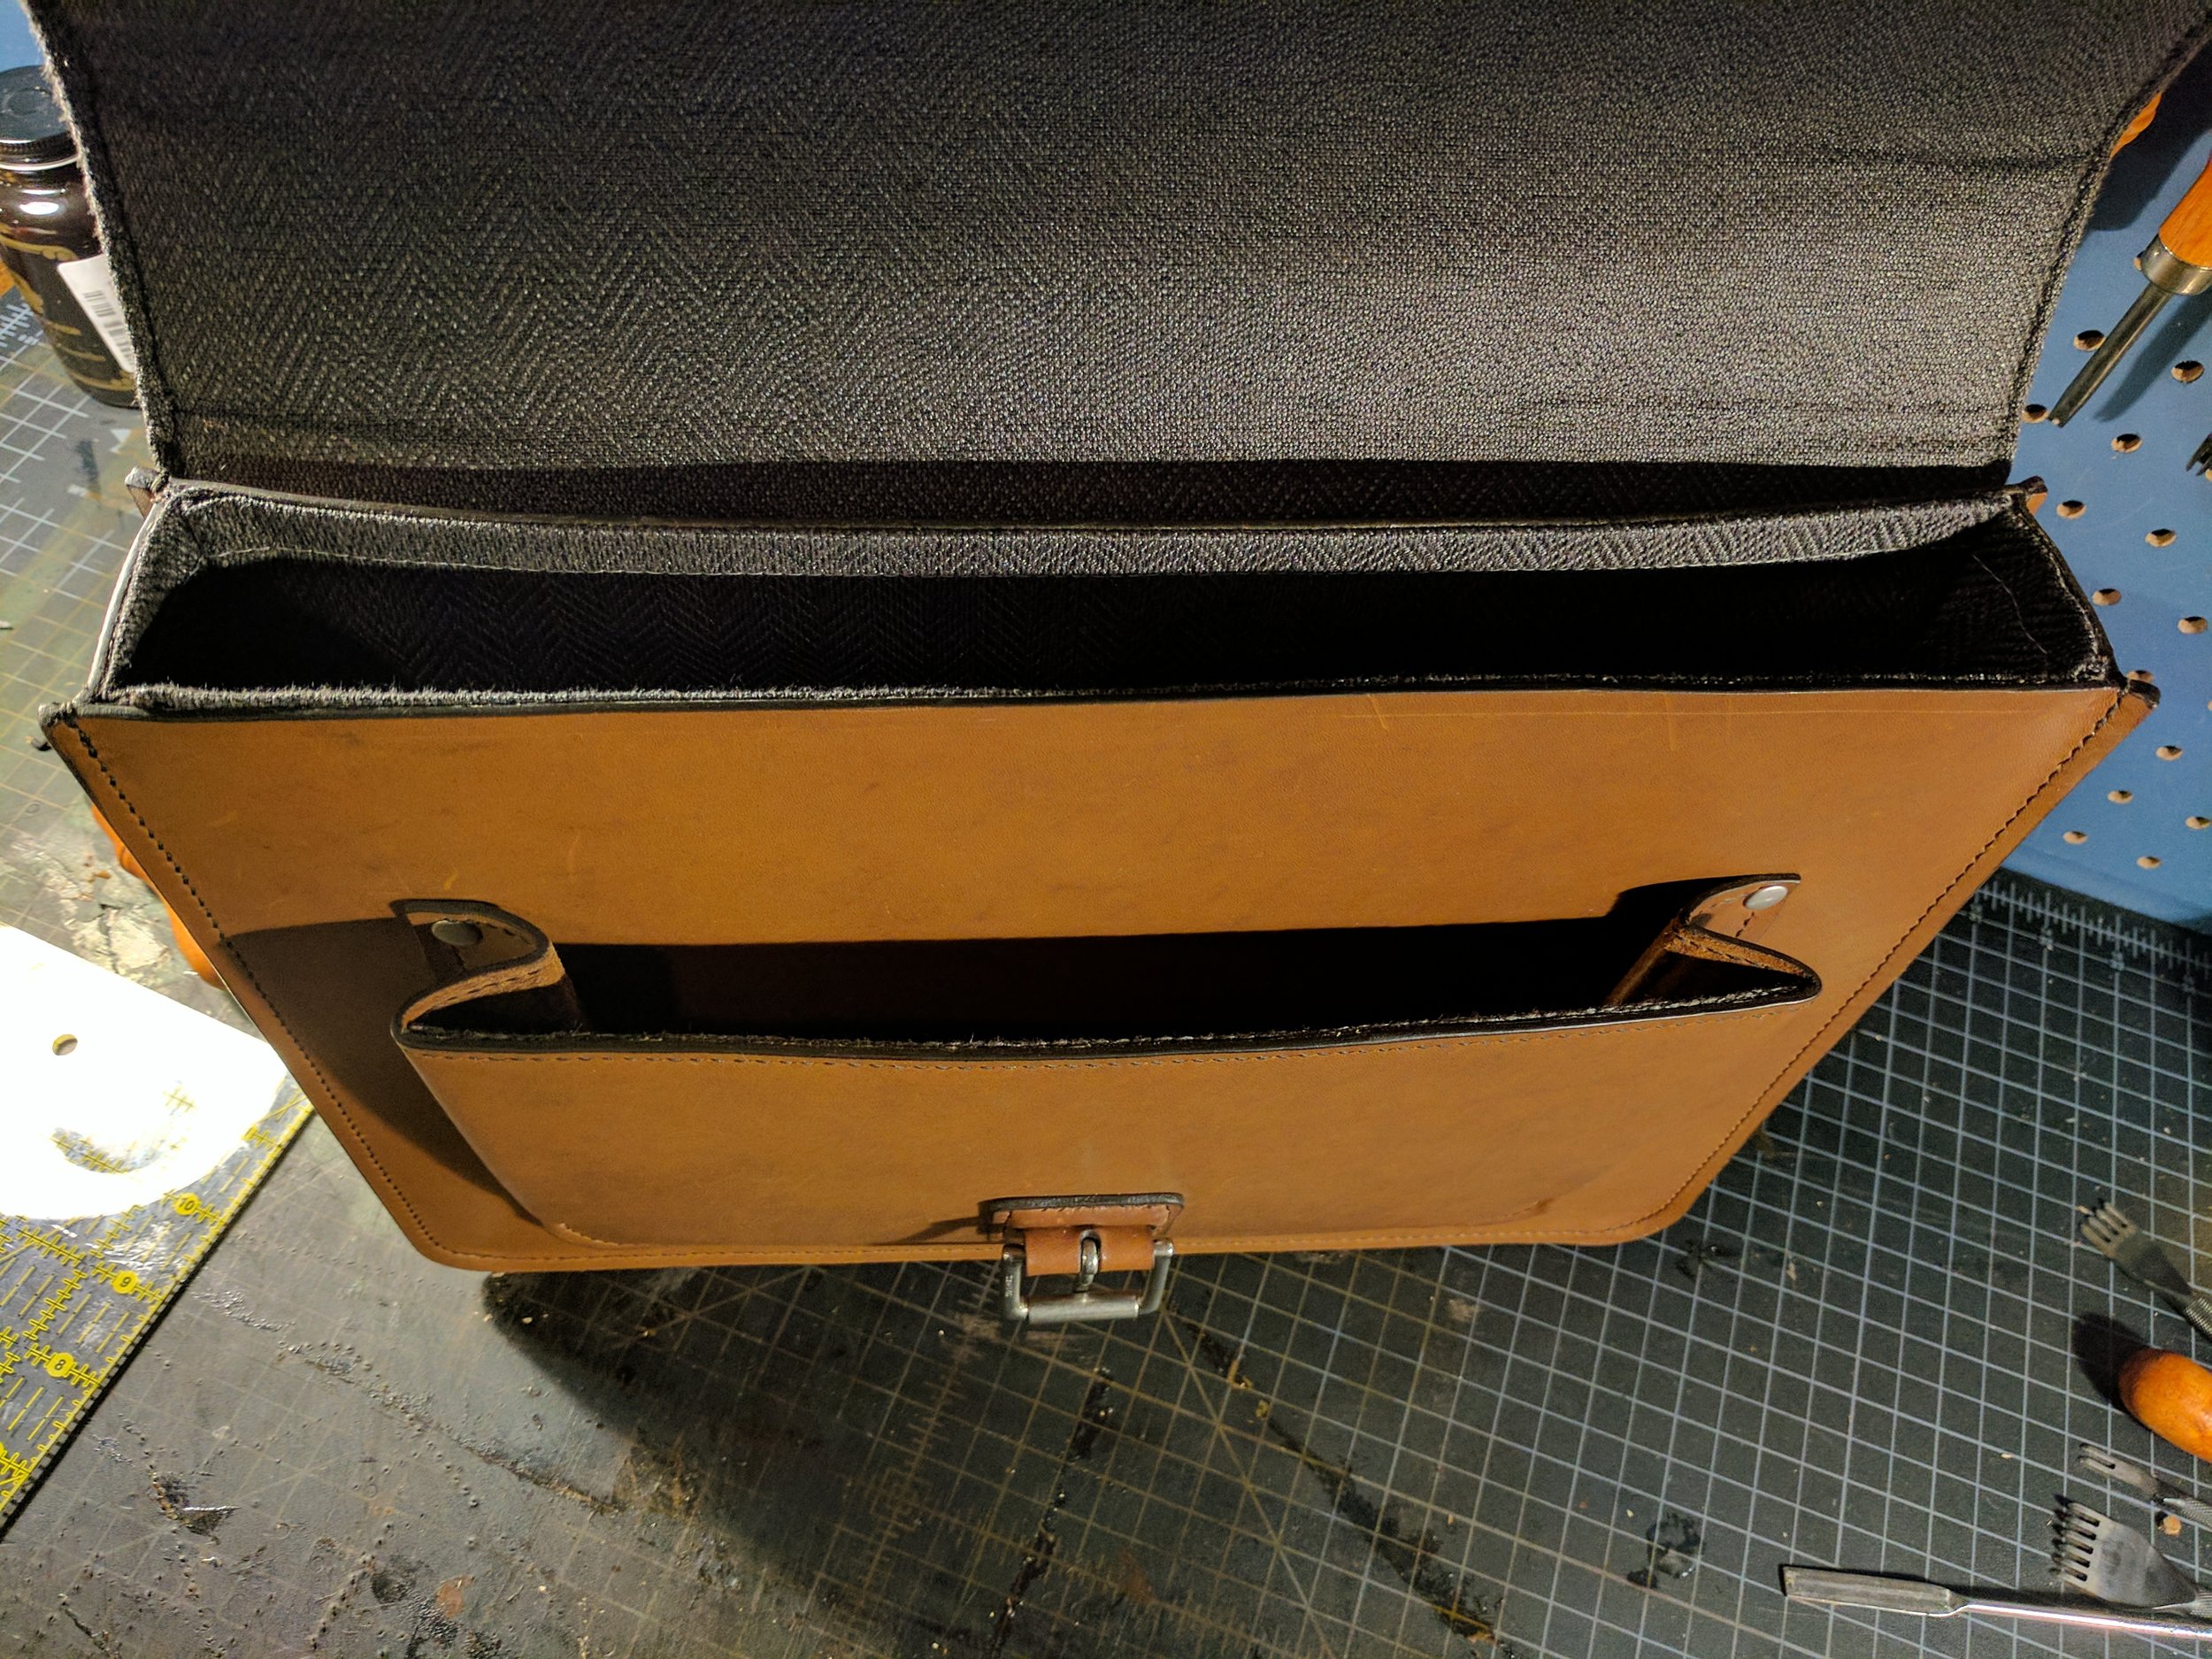
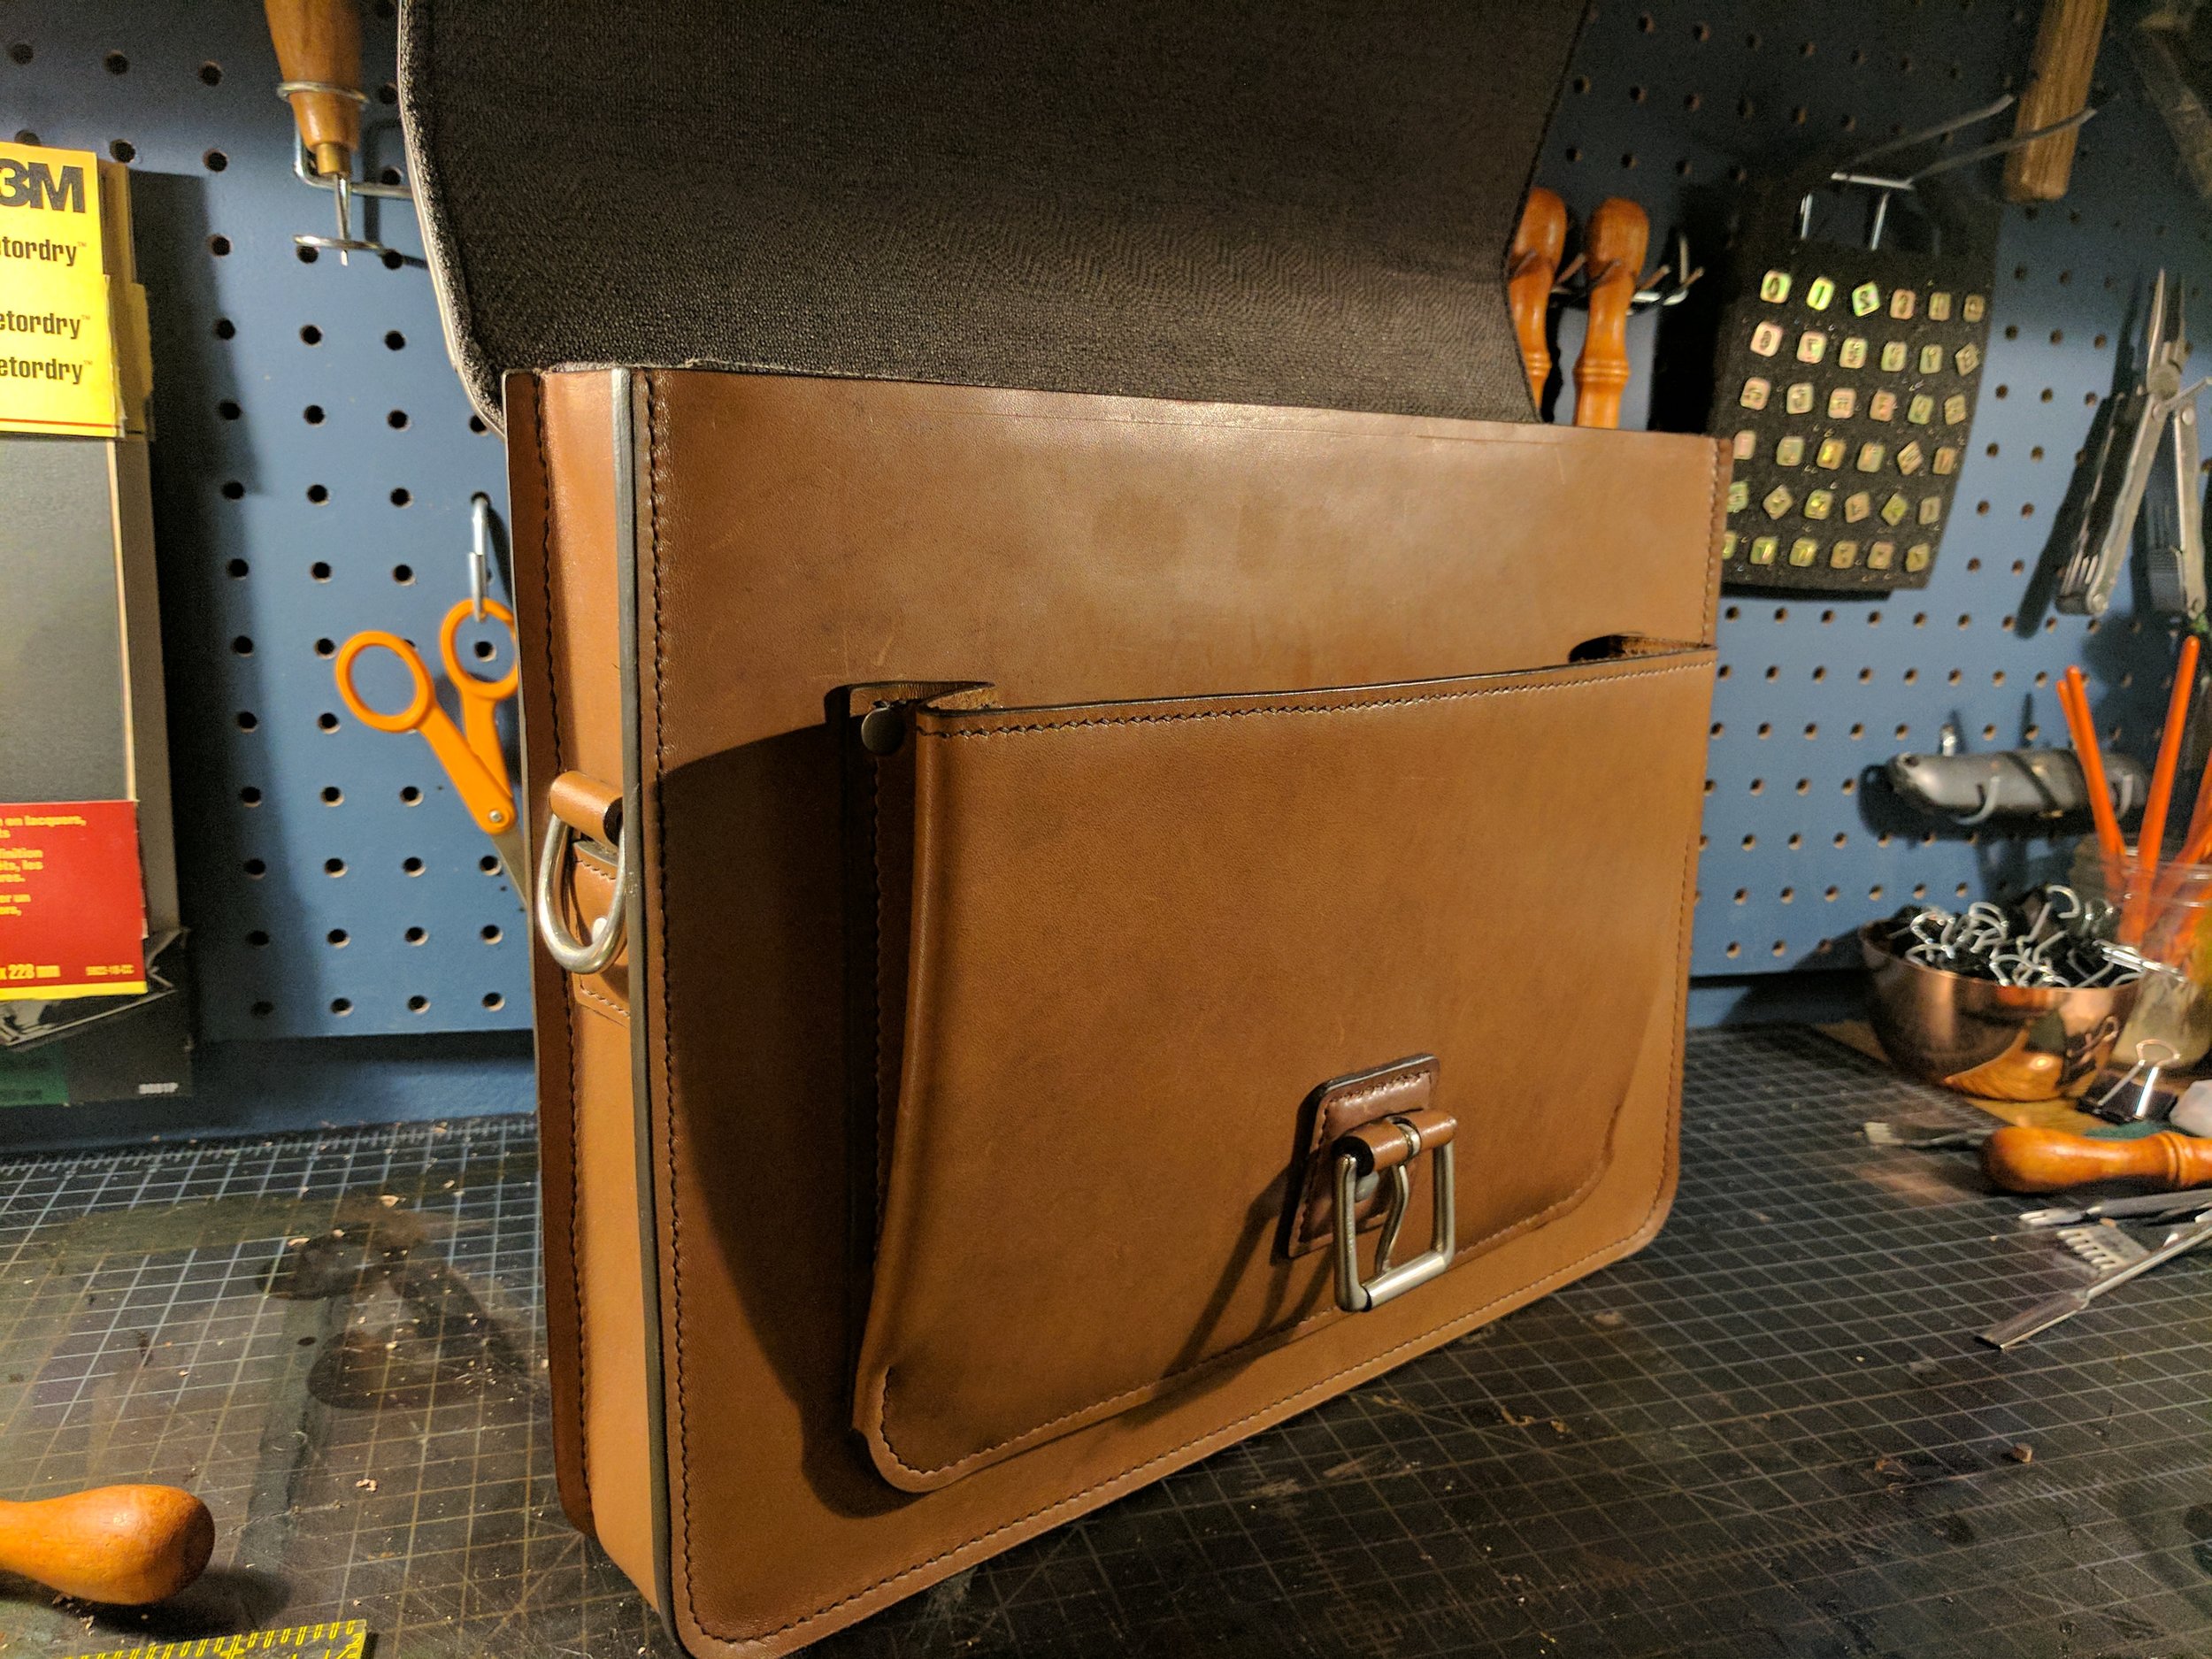
There are lots of different situations in leather working that require folding leather, and I don’t mean just bending leather, I mean a sharp clean fold. For instance, the edges of your gussets need to be folded to lay flat with the front and back panels of your project. Maybe you just want to make a folded pocket. Or you want a more shaped bag that has hard angles instead of smoothed curves. In any case, folds are super important. They’re something that appear in almost every project. Here's something I've recently been working on that required nice clean folds.

FoldingLeatherEx1.jpg
FoldingLeatherEx2.jpg

I used folds to create a the pocket on the front and also used folds on the gussets to make sure the bag very square. The gussets would look bowed or looked u-shaped if I had not wet formed the edges outward.

All that said, making sure you fold well can have a big impact on the professional look of a project. Here's a simple three step process for making sure you get clean folds every time. 

Step 1: Groove

FoldingLeatherPt1.jpg

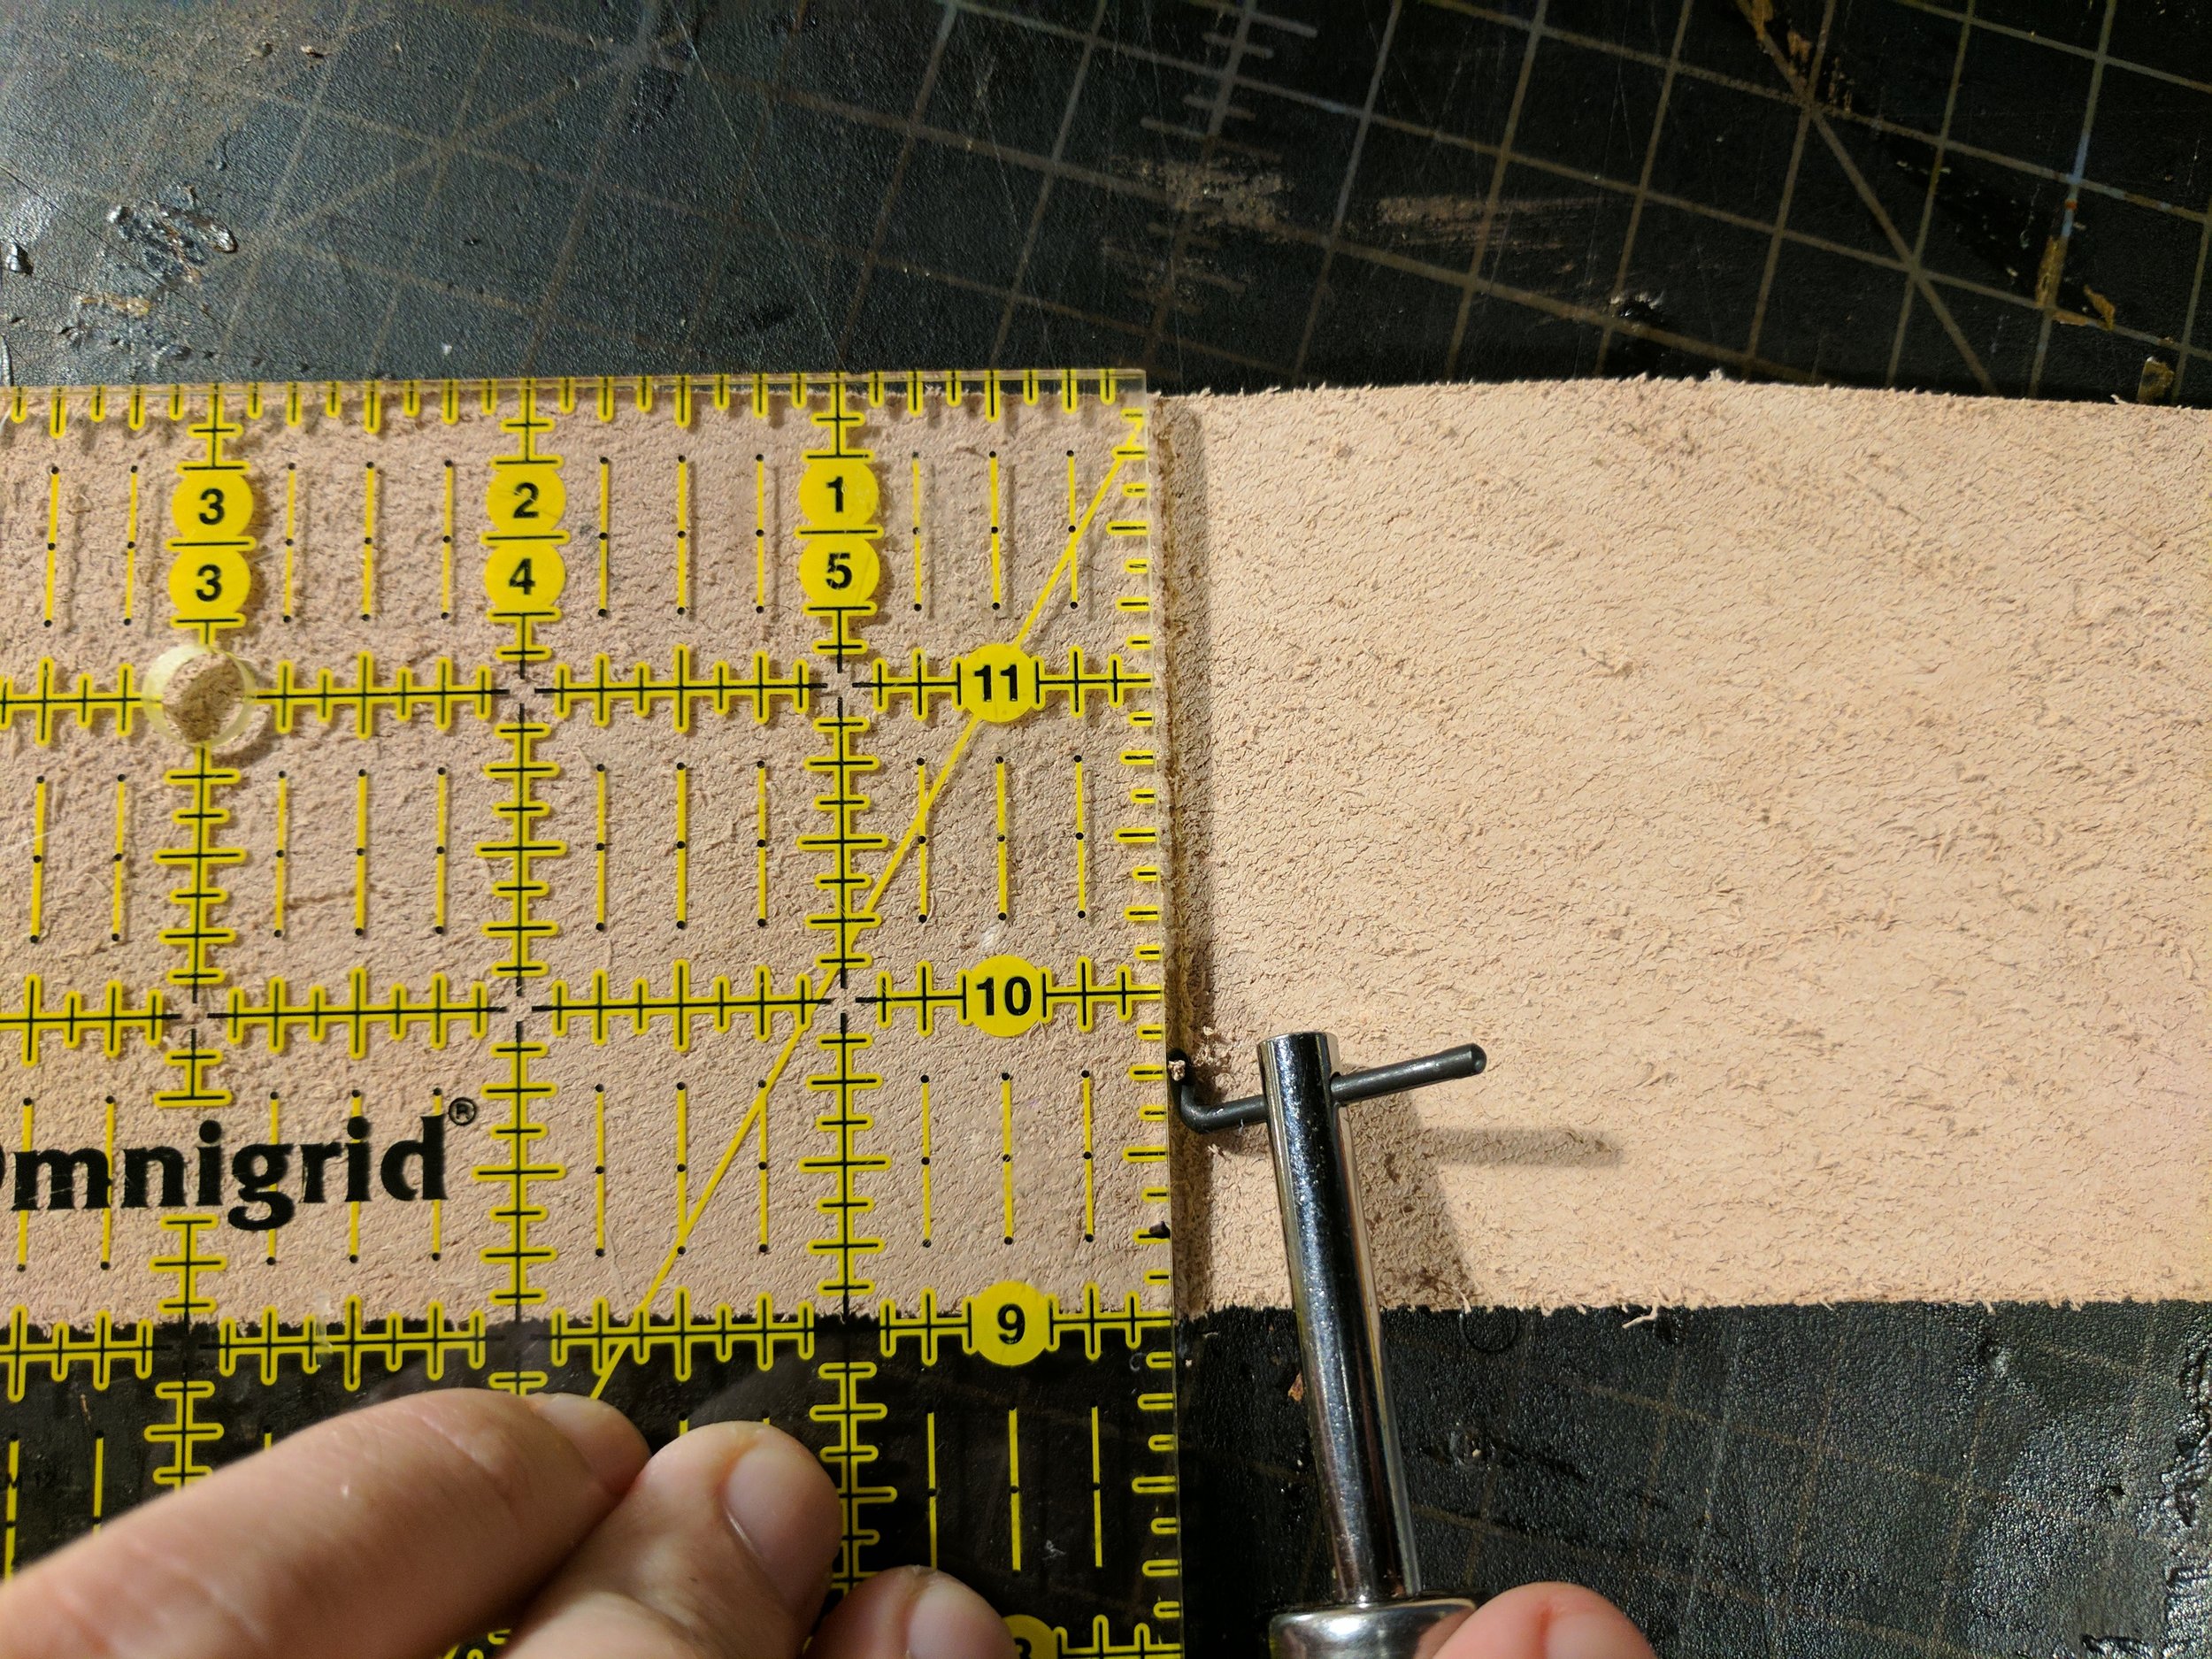
By reducing the thickness along the fold of the leather, not only does it make it easier for the fold to stay once made, it also makes sure that your fold is nice and straight. To create this groove, I use a groover on the back side of the leather. I set a ruler alongside the fold line, and then move it back about 1/16th of an inch. This is to account for the groover, which doesn't make cuts right against the ruler due to it’s shape. I then run the groover along the ruler three to four times until the groove is about 1/3rd the way through the leather. But, if your leather is thinner than 3oz, you can probably skip this step. Thin leathers are already pliable enough to fold and if it’s thin you also run the risk of grooving all the way though the leather, which, if you haven't done before, makes for a sad day.

Step 2: Wet

FoldingLeatherPt2.jpg

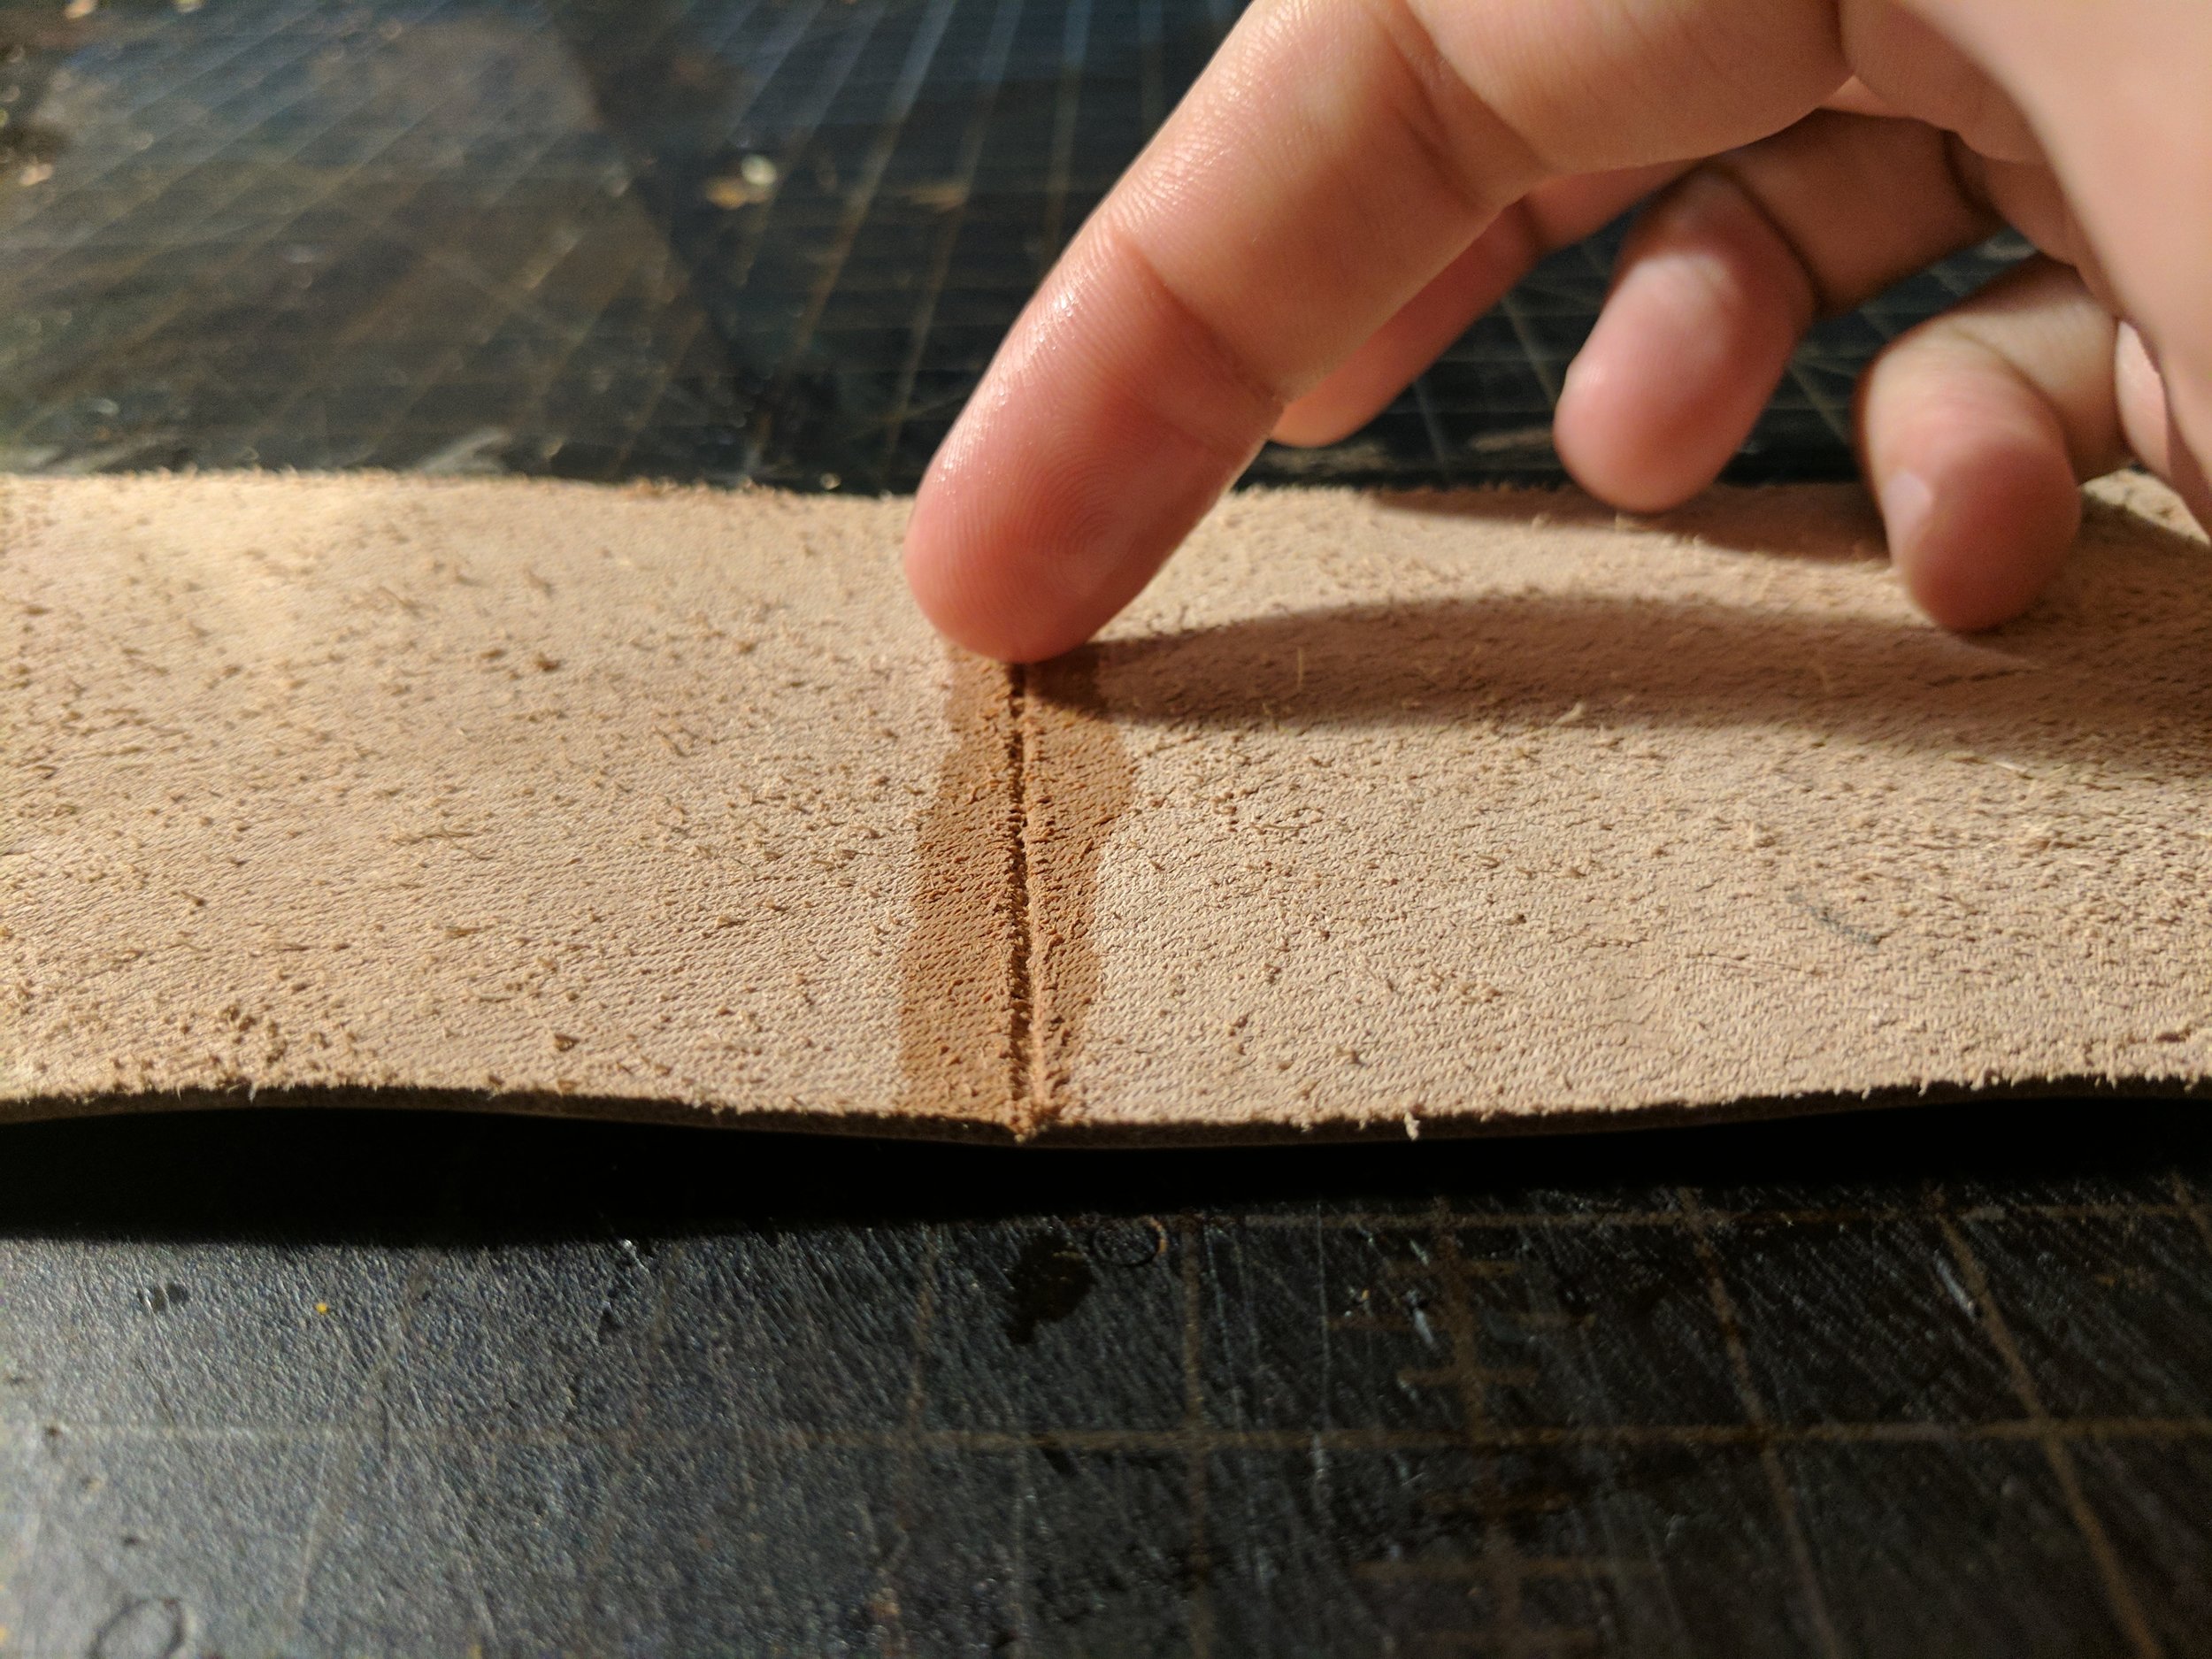
This is where the magic happens. If leather becomes wet, it will dry into the shape of whatever it’s pressed against. So if you wanted to make a crazy mask out of leather, no problem, just soak the leather and stretch it over a mold. Once it’s dried it will keep the shape.  Lots of people have done it, and what they’ve come up with is pretty impressive (http://imgur.com/a/b7J6v). But we aren’t making masks, we are just folding stuff, so don’t soak your leather just yet. Instead, using a paint brush or your finger, place water along the groove you’ve made on the back side of the leather. Repeat this process until the area is soaked through. You’ll know when you’re done when the top side, or flesh side, of the leather starts to darken. Once it starts to darken even a little, make sure to stop so you don’t over soak the leather.

Step 3: Fold and Hold

FoldingLeatherPt3.jpg

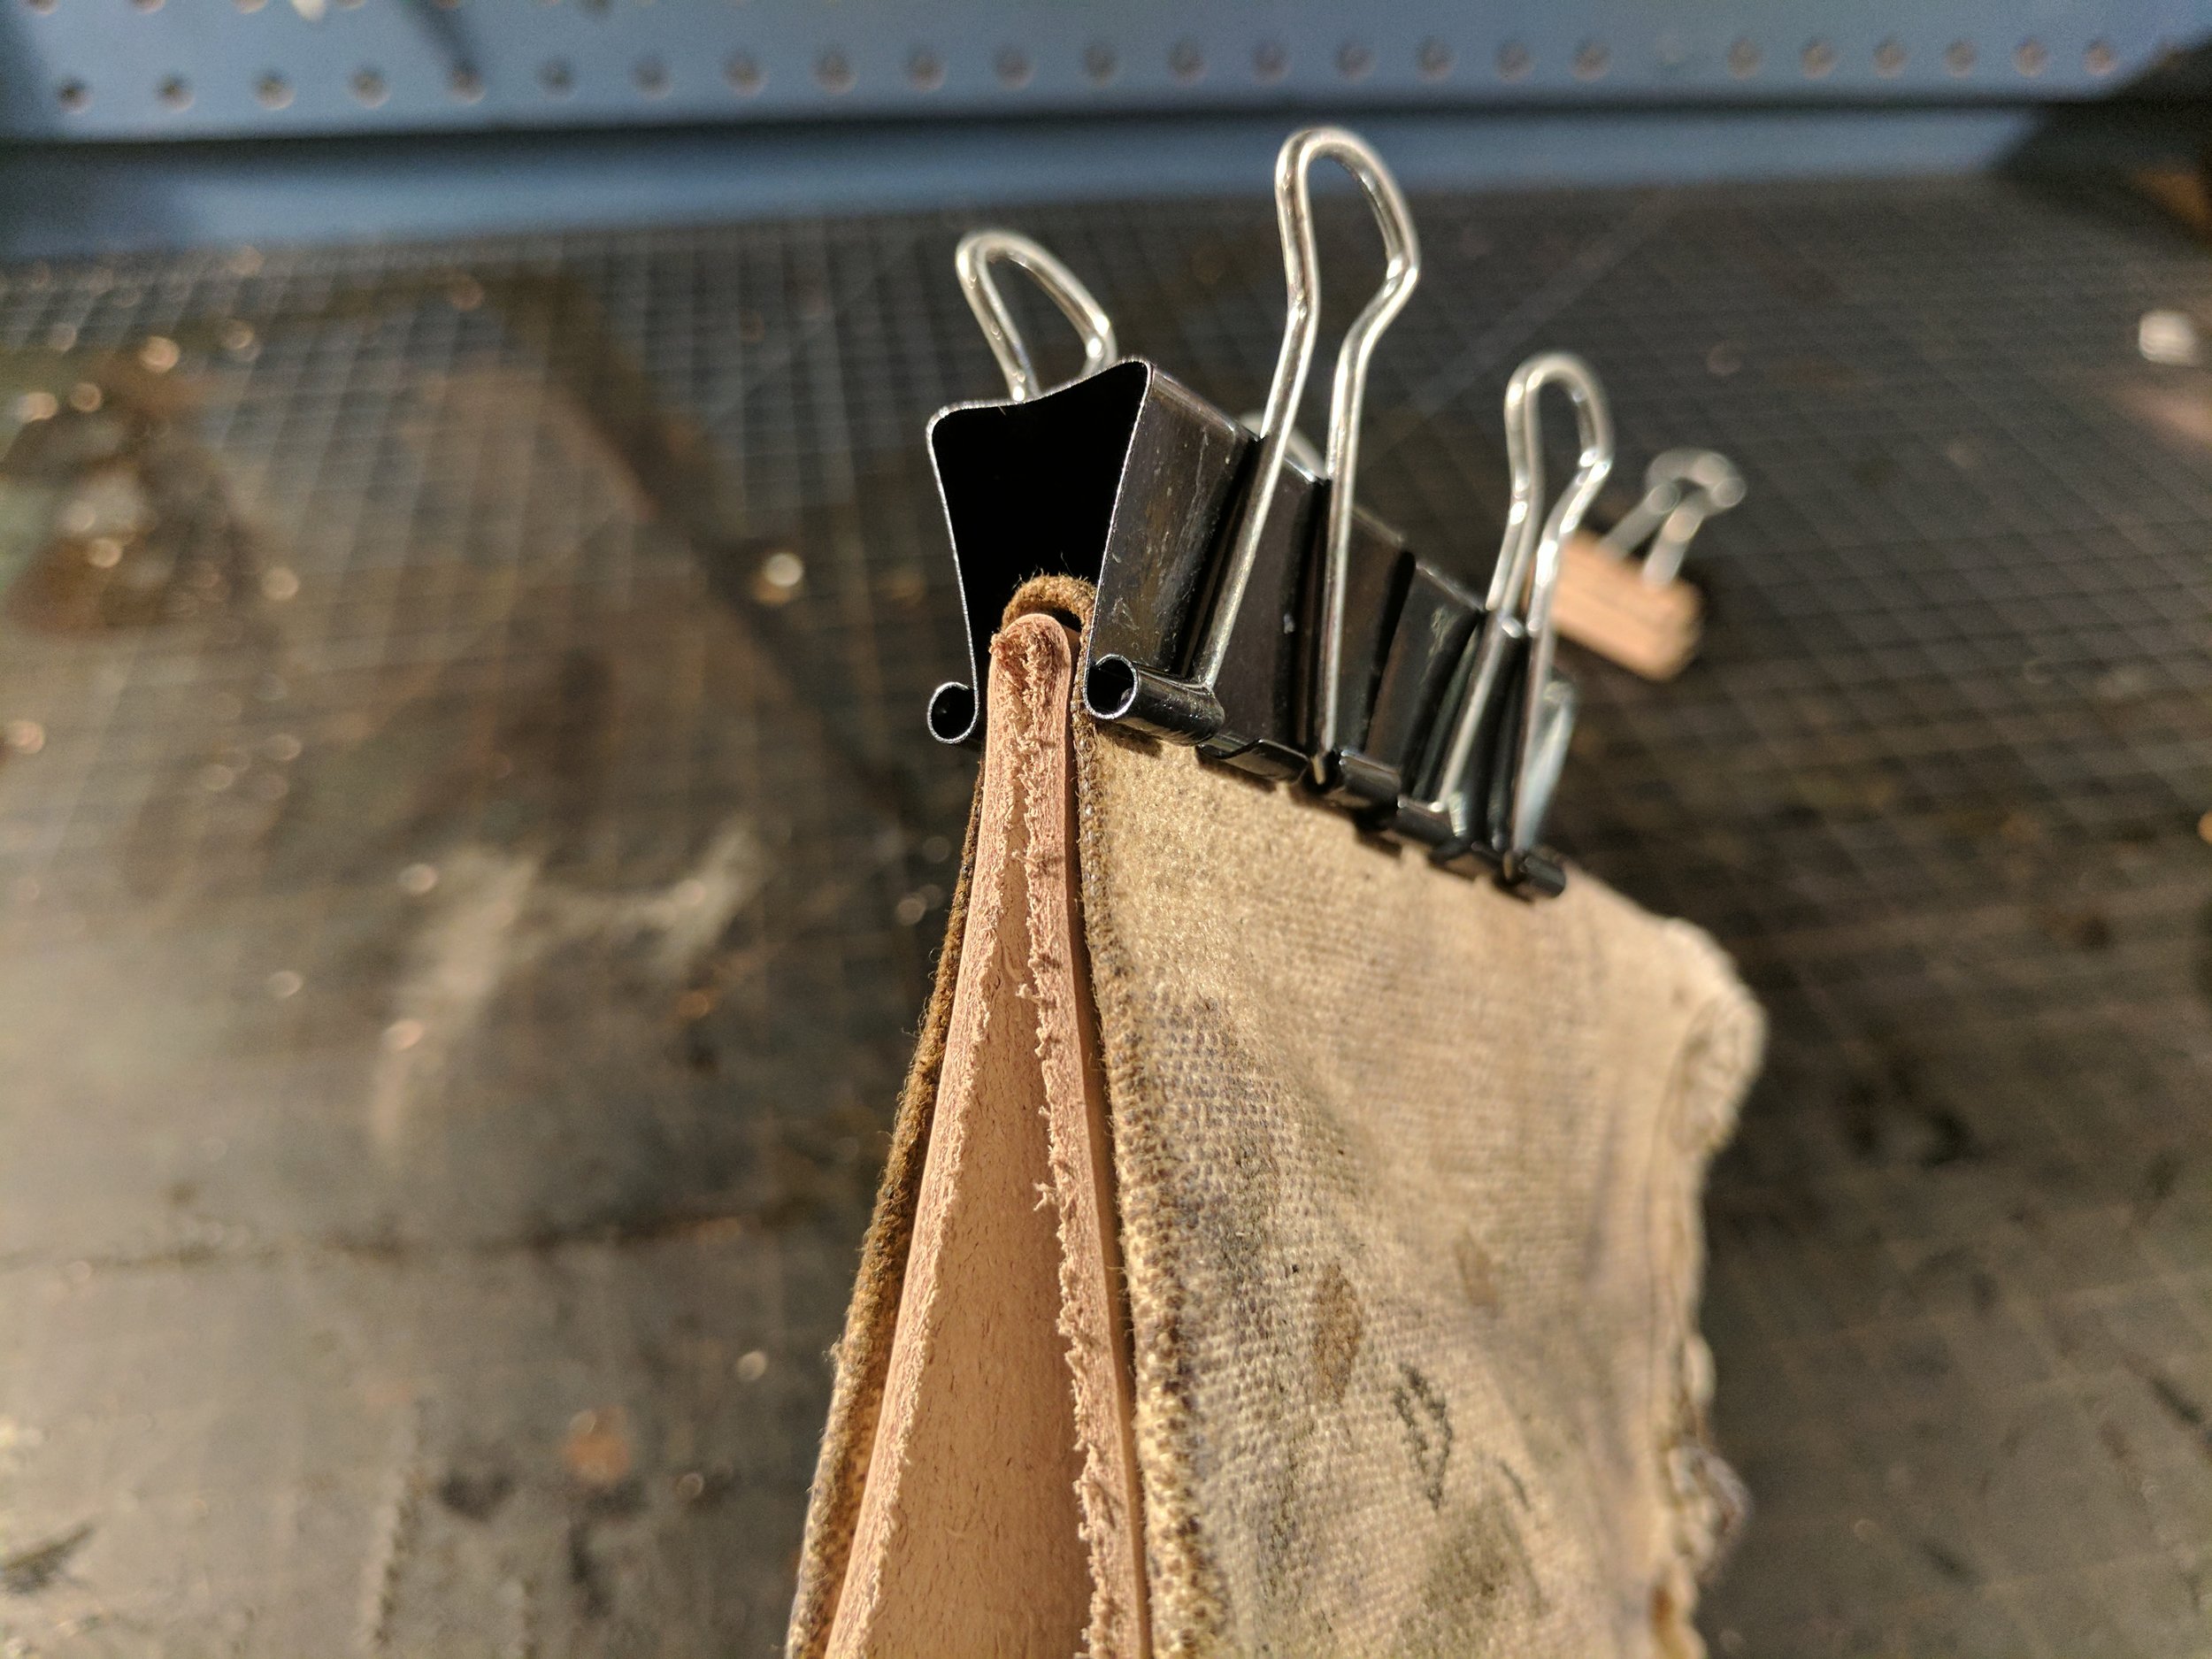
Once the groove is soaked through you’re ready to fold. Making the fold straight can actually be a little bit tricky if the fold is a longer one. To make sure the fold stays straight I always fold the leather over a bone folder and then tap it a few times with a cobblers hammer. Once I’ve done this the entire way down the fold, I think set something heavy on top (usually a few books) or clamp it down with some binder clips. If you use the binder clips, make sure to pad them or cover the fold in cloth, so the clips don't leave indentations. It’s also really important to keep the leather pressed firmly down while it dries. I then leave it sit for about 2-3 hours while the leather dries out. Depending on how much water you put on the fold, it may take longer. Just make sure the leather is completely dry when you remove the books or binder clips.

And that’s it! As I mentioned at the top of the post, there are a ton of leather working projects that require a good clean fold. I gave a few examples of when I use folds, what projects have you guys made that requires these kind of folds? Feel free to drop a link to some of your work with folds in the comments.

Basics of Cutting Leather

Cutting leather isn’t particularly tricky, but doing it right is. Cuts need to be perfect, because they seriously effect the ease of the steps that follow and result of your leather project. Even a slight slip of your ruler can mess with your burnishing process and make your stitching lines no longer straight. Small mistakes like that, get amplified with each step you take to complete your project. So, if you haven’t given some thought to how you are cutting out leather for your projects, now is the time.

Have the right tools:

Leather Tools

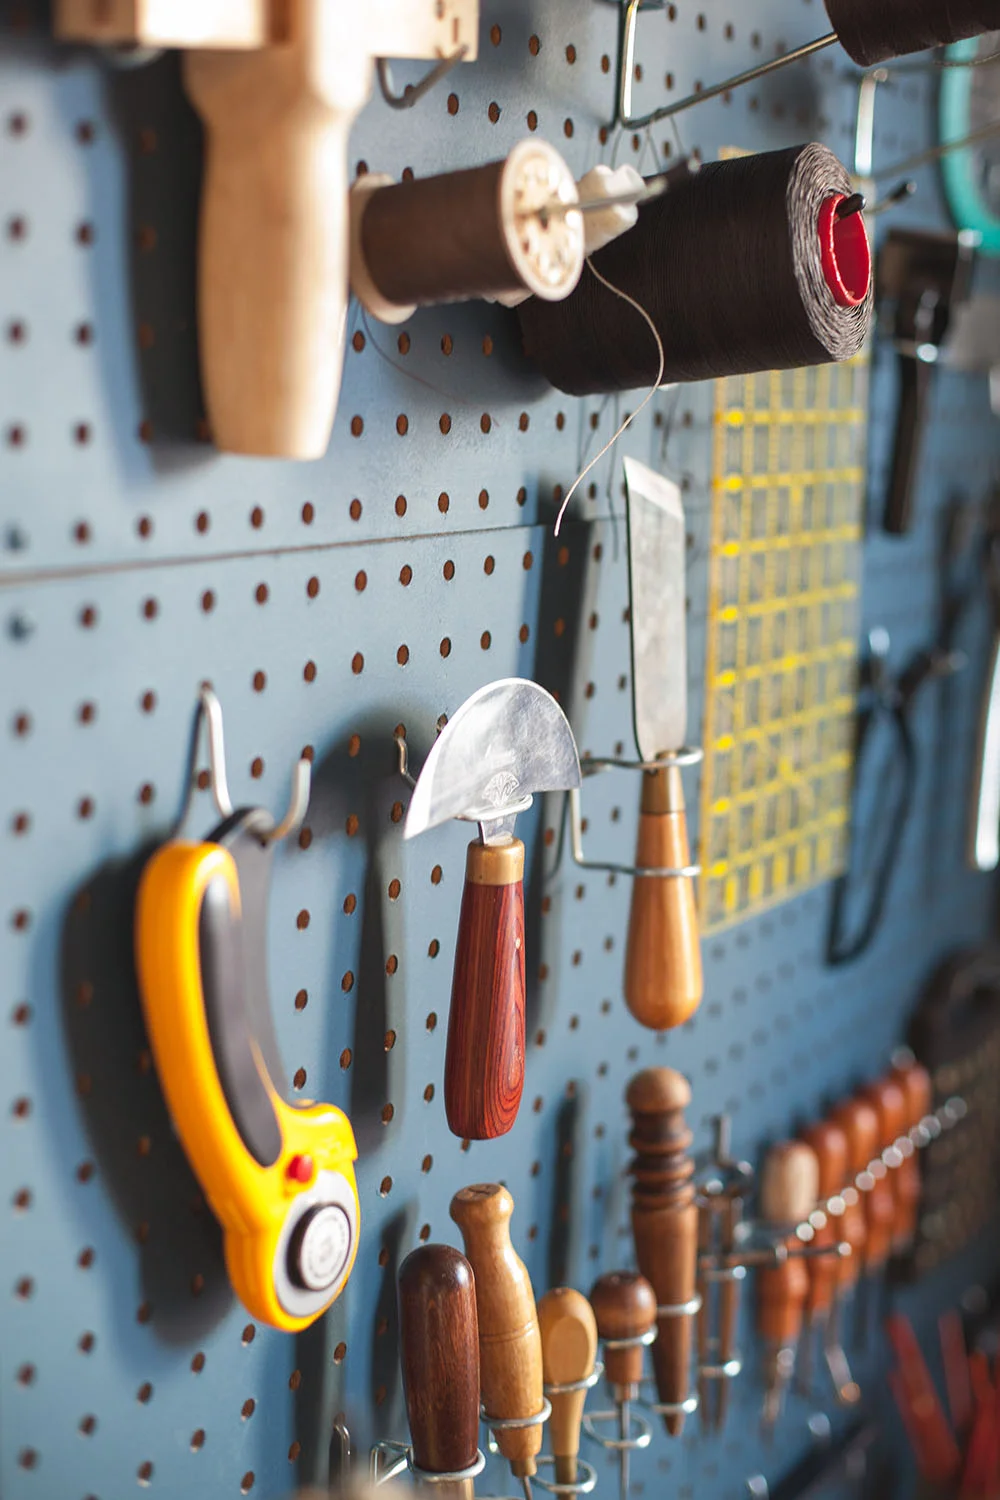
There are a lot of different knives that can be used in leather working, but let’s just focus on the main ones for now. When you’re choosing which knife you want to use, one of the big considerations should be the thickness of your leather. Thin leathers and softer leathers are notorious for pulling as you cut them. This is something you really don’t want, because your lines won’t be straight. You shouldn’t use knives that have a lot of drag on thin/soft leathers. 

Rotary knives and Japanese Knives, both work well when it comes to thin leathers. Rotary knives because of their lack of drag, and Japanese Knives because of the way you can finish a cut. The leather pulls the most at the end of a cut and Japanese knives can be pushed down at the end of the cut to prevent this drag. It’s kind of like you stamp the end, as opposed to cutting it.

On thicker leathers, most knives will work. Round knives and head knives work especially well because of their versatility. They cut both straight lines and curves well, while also being capable of skiving. Trim knives and X-Acto Knives also work well and are really easy to manage, though I will sometimes avoid using an X-Acto on very thick leathers due to the amount of effort it takes to make a cut.

Finally, make sure to chose the correct ruler. This sounds pretty obvious I’m sure. But having your ruler slip is a really common mistake, especially when you’re working with a heavily waxed leather. The issue is probably more with your ruler than something you are doing. Make sure to get a heavy ruler, and if you can, get one with something on the bottom to help prevent it from sliding.

Score: 

The obvious benefit of scoring leather (or tracing a pattern onto leather), is that it’s your best bet for not wasting leather, both when it comes to mistakes and managing the amount of scrap you have after you cut.. But the additional benefit of scoring is that it really helps with precision, because you have marked out the exact spot your cuts begin and end. And, as I already mentioned, good precise cuts mean that burnishing and stitching straight lines becomes much easier.

Know how to work around tricky corners:

While you can cut around corners any way you choose, there are methods that work better than others and methods that will prevent you from cutting too far into the leather. For cutting around curves well and even cutting 90 degree angles, check out this blog post.

Keep your knife perpendicular:

Cutting Leather.jpg

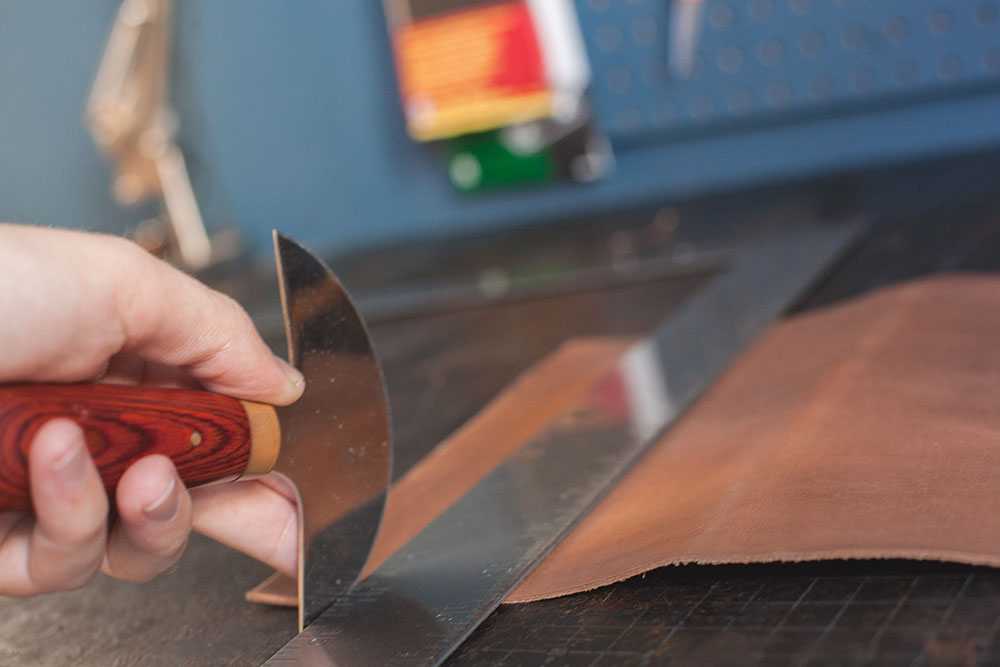
This isn’t hard to do, but it’s not something I gave much attention to when I was first starting. If you don’t keep your blade perpendicular to the leather, your cuts will look straight, but you will find out that it’s not the case when you get to the burnishing process. Keeping your blade perpendicular will ensure that your edges line up perfectly and will reduce the amount of sanding needed during the burnishing process. If you are having trouble with this, try not to over extend your arm when making cuts, because your hand naturally starts to roll as your elbow gets close to locking.

Keep your knives sharp:

Leather Working Knife

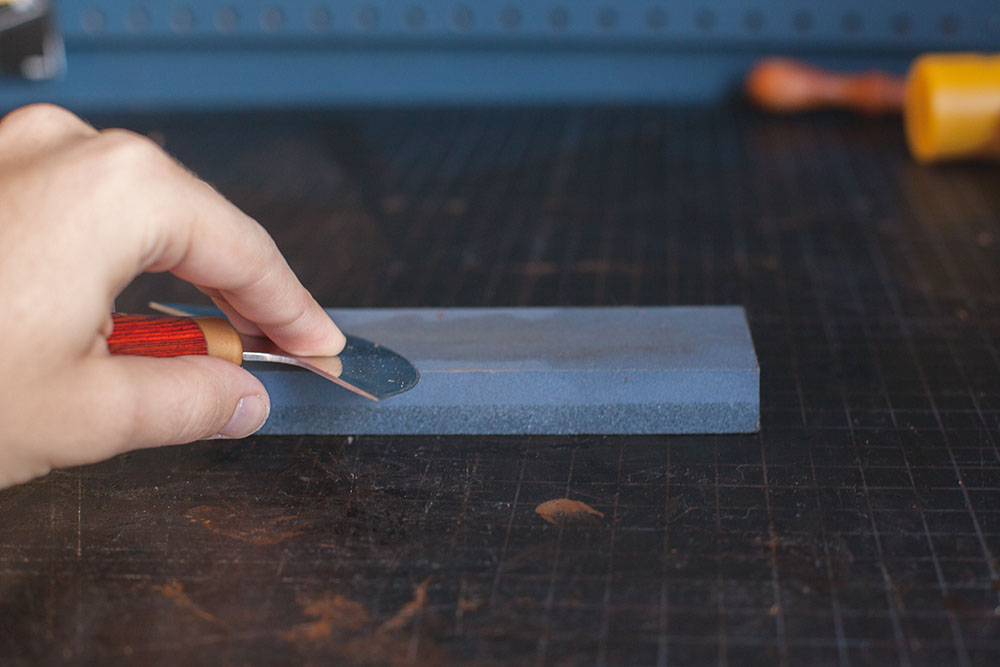
I cannot emphasize enough how important this is. Sharp knives equal clean cuts and a lot less mistakes because you’re not going to struggle to make the cut. If you’re not doing so already, get in the habit of stropping your knives before or after each time you sit down to work. Stropping isn’t even hard to learn. This will ensure that your knives stay sharper much longer. Eventually you’ll also need to spend sometime sharpening your knife. This is admittedly harder to learn, but this guide will get you started on the right foot.  One last thing, the knife in the picture above is stainless steel, and I find myself sharpening it all to often. It’s important to make sure your knives are high enough quality to hold an edge, if not you’ll find yourself needing to sharpen your blade far too often, and getting worse cuts.

DIY English Point

This is an english point

This is an english point

English points are a great way to finish off the belts or straps that you make, and is one step you can take in making you work look a little more ‘classic.’

Many places sell punches that will punch out english points with the hit of a hammer. It’s nice and easy. But quality english point punches will cost about $30+ and they aren’t a ;one size fits all’ kind of thing. Usually sets are sold going up by 1/4” increments. This means that if you want to buy a set it’s going to cost you $150+. And that’s not a bad price, but it’s probably not worth it if you’re not selling belts regularly.

Now that I’ve thoroughly stressed you out, let me destress you by letting you know that, there is actually a really simple way to make english points with out a punch. And while it isn’t as fast as a punch, it actually doesn’t take much longer. All you need is a divider and a knife.


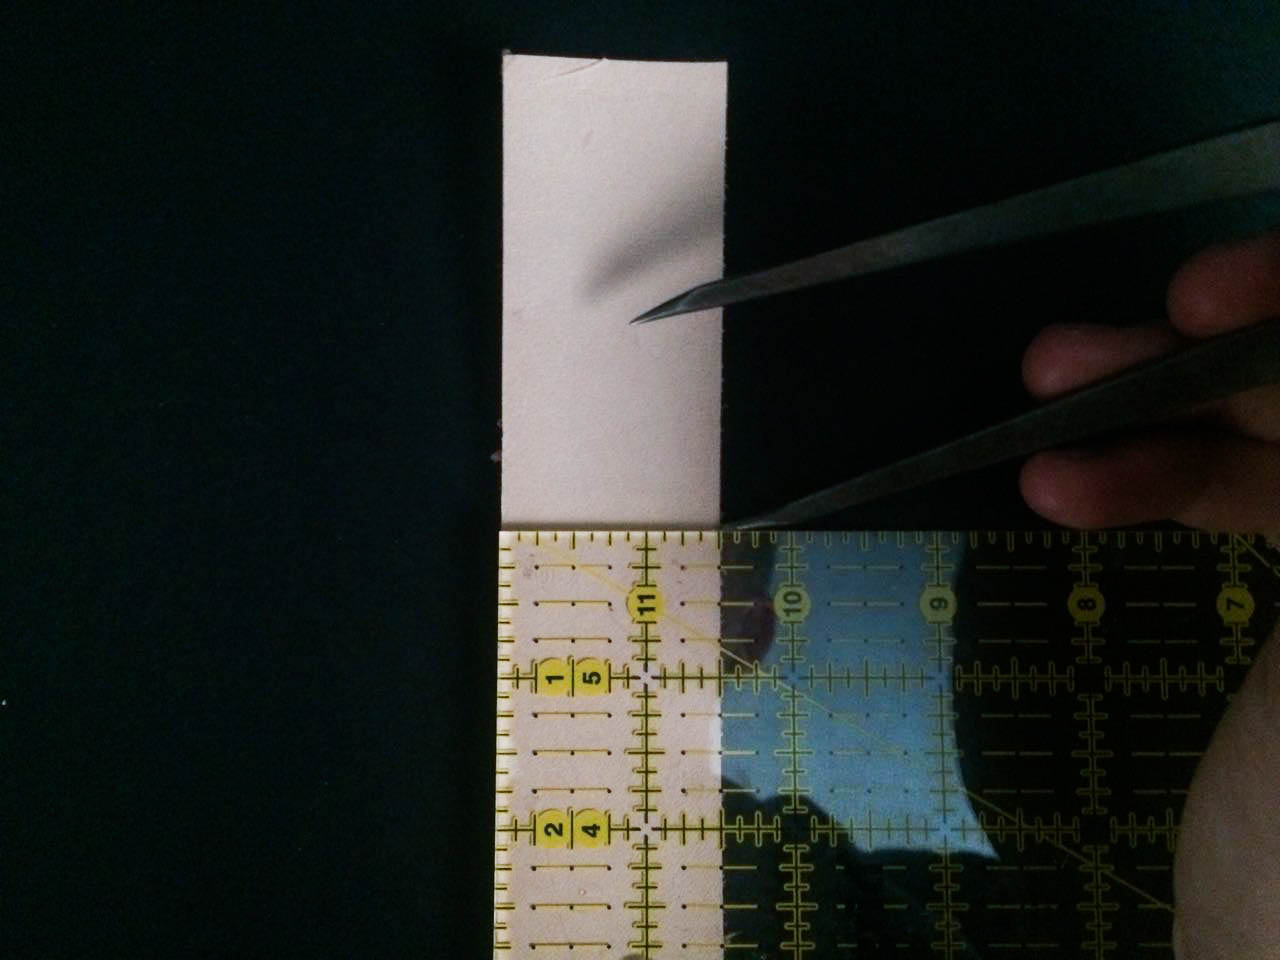
Step 1: Using a ruler mark where you want your english point to begin on both sides of the strap. When you’re finished the english point will be barely shorter than the width of the strap. 

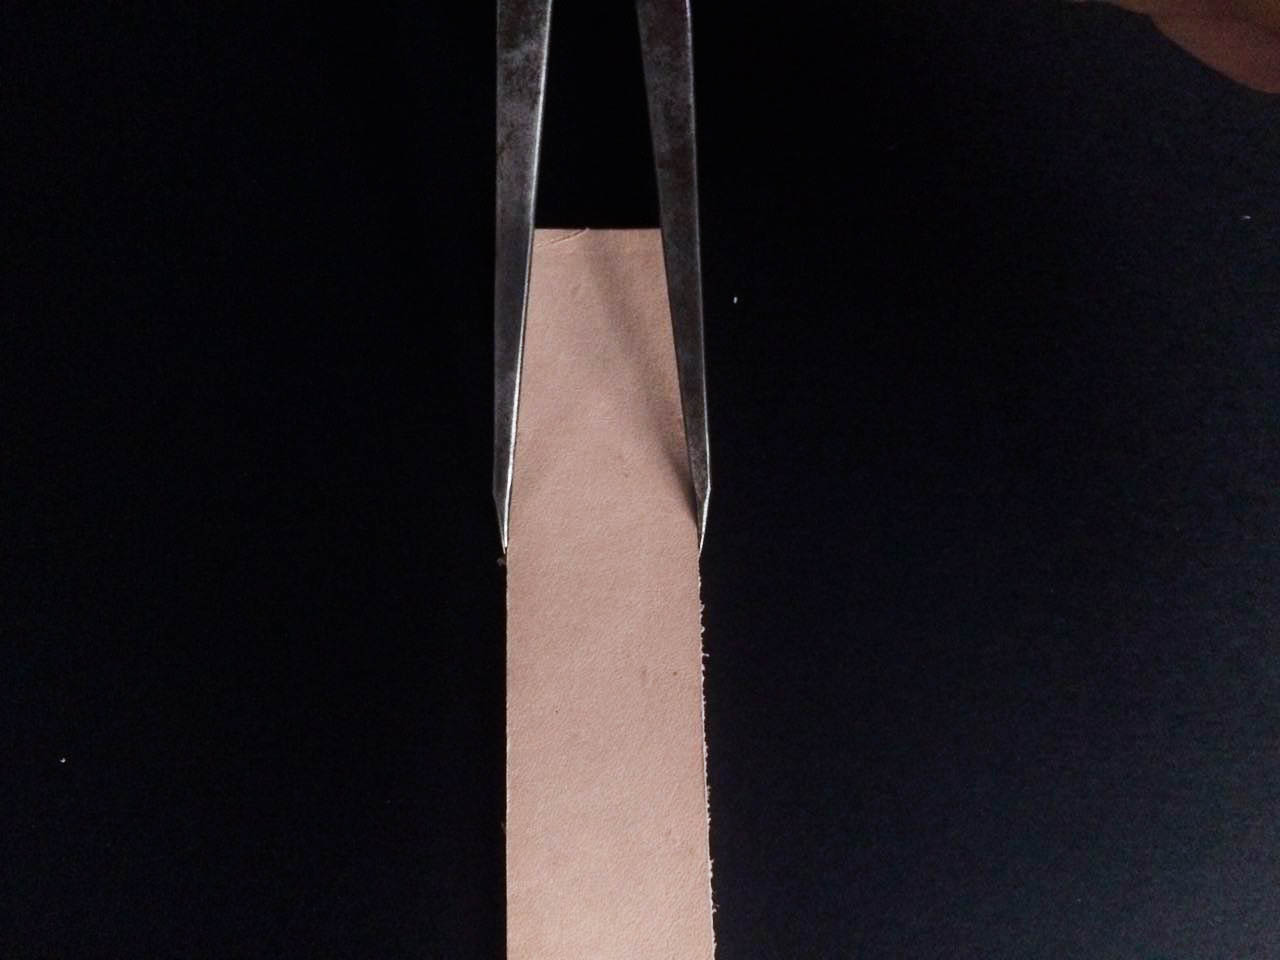
Step 2: Set the divider to the width of the strap.

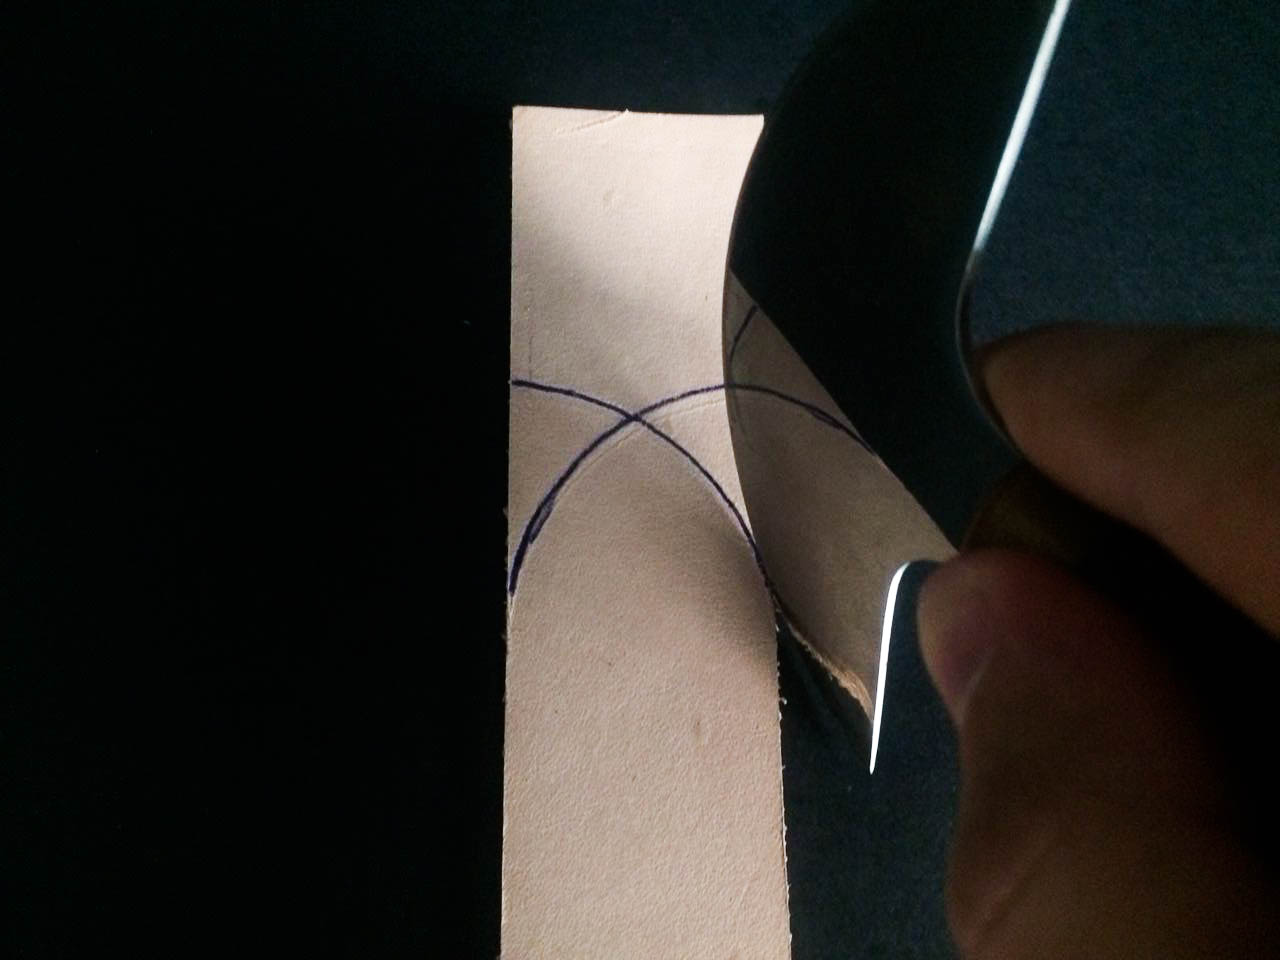
Step 3: With the wing divider set in place to where you made your marks in step 1, keep one arm firmly pressed down while you drag the other arm of the divider upwards and across the strap.

Step 4: Put both arms of the wing divider back in place, where you made your marks in step 1, and repeat step 3 but in the other direction.

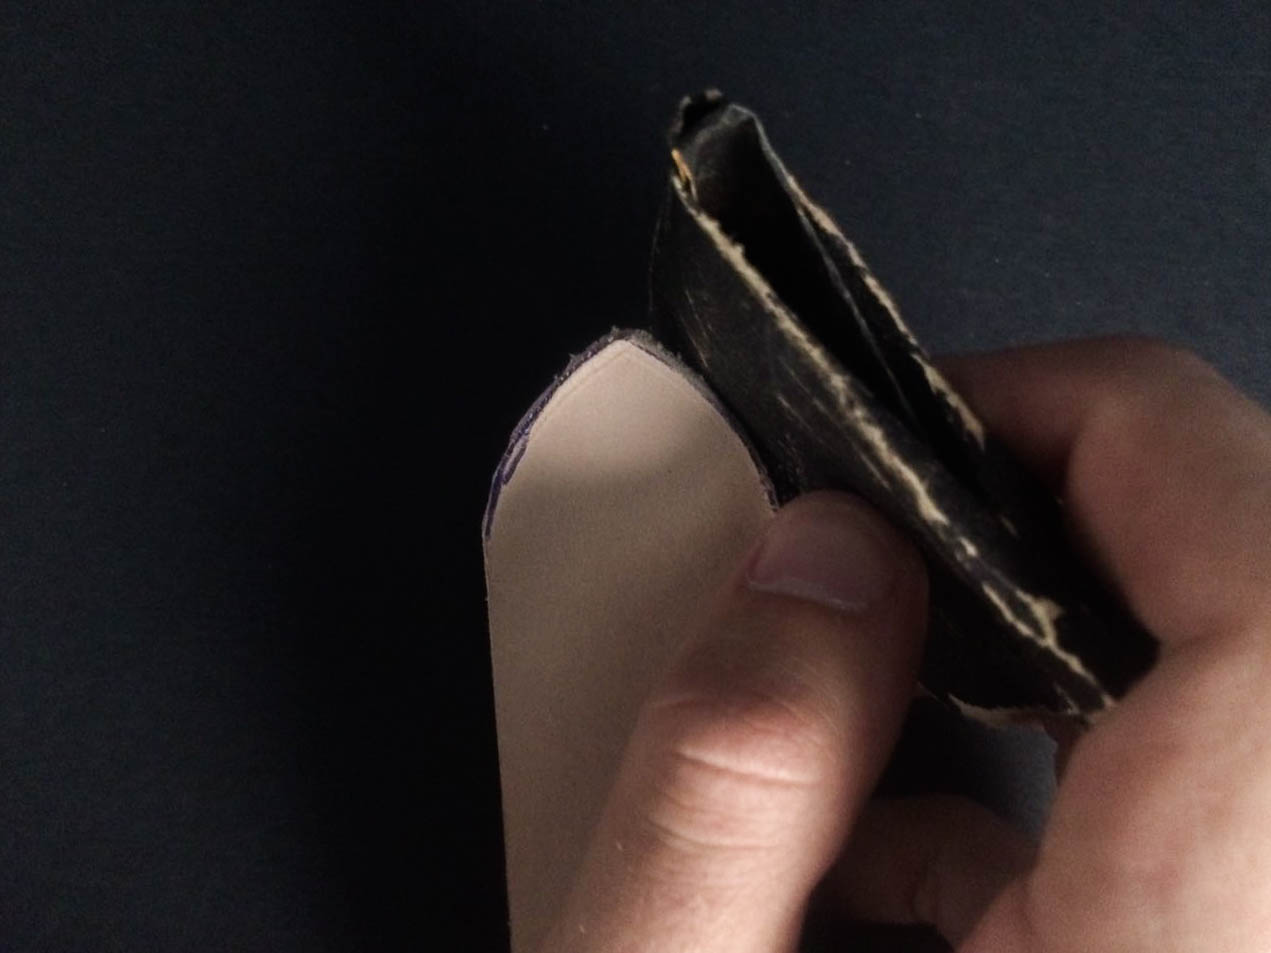
Step 5: Now that you’ve traced the english point, cut it out. There’s a number of ways to cut out something with a curved edge. You can check out different ways to cut out curves here.

Step 6: Sand out any irregularities and then your english point is ready to be burnished.


A Basic Guide on How to Dye Leather

Dyeing leather is tricky (Yes. I’m still working on it.) Getting a nice even coat of dye on leather takes not only the know how, but also the skill that comes with lots and lots of practice. After trying out a number of different ways to dye leather, this is the one that I’m most happy with.

Step 1: Prep the Leather

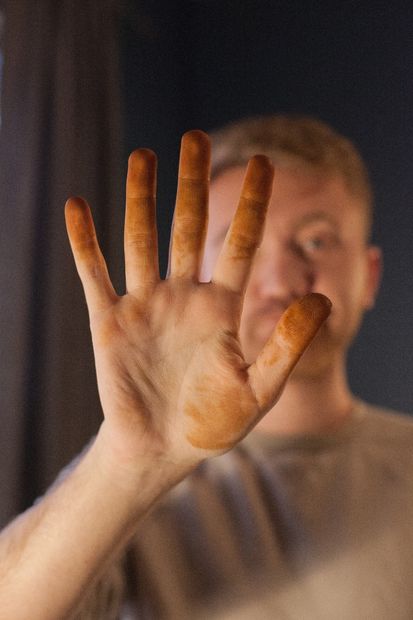
This is what your hands will look like if you don't put on gloves. People will look at your weird. 

This is what your hands will look like if you don't put on gloves. People will look at your weird. 

Put on Gloves 

Sure this is obvious, but I cannot tell you the number of times I thought "I’ll just be careful and won’t get anything on my hands.” That has not once worked out for me. Don’t be dumb like me. Wear gloves.

This is what it will look like if you put gloves on. This is better.

This is what it will look like if you put gloves on. This is better.

Ventilate the Room

This isn’t an insta-death situation, but the fumes of the oil dyes are seriously not good for your to be hanging out in for a few hours. So figure out some way to ventilate the room. A fan in the window does the trick.

Select the Correct Leather.

You can dye any un-dyed veg tanned leather. In fact, you can probably dye pre-dyed veg tanned leather… but why? (serious though, if you do this, just be aware that there are waxes on top of finished leathers that will not allow the dye to penetrate the leather well). That said, there’s not a ton of considerations when it comes to choosing leather. Just know, that if you’re using 100% top grain leather, you’re going to see all the marks and different shades on the leather. 100% top grain leather is great for quality, but it does mean that the top layer (and imperfections that come with) have not be removed. This is going to really show up when you use a dyeing using this method (instead of the method most industrial places uses, which involves submerging the leather completely in dye. This takes a lot of dye, but is more penetrating and offers a smoother finish). So, if you use an inexpensive piece of leather, that has more marks and inconsistencies, just know that it is going to show up no matter how great you are at dying.

From left to right: Water Based Dye, Oil Based Dye, Dye Reducer, and finally Tan-Kote Leather Finish

Wipe Down the Leather

If your leather has been in your shop for more than a day, there’s a good chance crap has accumulated on it (especially if you’re sanding your edges). Wiping it down quickly with a dry rag prior to dying will help create an even coat. Some suggest using a deglazer on the leather, which will remove any oils that have gotten on the leather from things like your hands. I’ve not used this before, but I’ve seen it recommended many times. Fiebings offers this.

Loading up the sponge with dye.

Cut Your Dyes

I use Fiebings Pro Dye when using an oil based dye and Tandy's Eco-Flo for water based dyes. I like the Pro Dye from Fiebings. Out of everything I’ve used it’s given the most consistent coat, but both work well. I do really suggest cutting it though. If it's an oil dye, Fiebings sells a dye reducer, and if it's a water based dye, you just add water. The more coats you do, the smoother your dye is going to look. So if you achieve the color you want on your first pass of dye, you won’t be able to apply more dye to help even out dye. Instead, you’ll get a very marbled look… which is okay if that’s what you’re going for. As a side note, doing multiple passes of water based dyes will eventually dry out your leather. When you are done dying with water based dyes, it's best to apply some Neatsfoot Oil to put oils back into the leather. Okay, now on to the actually dying process. 

Step 2: Apply a Base Coat in Circles

I always do the first coat in a circular motion. Notice how I start to squeeze the sponge to release more dye as it dries out. 

This is easily the most important coat. First you’ll dip your cloth or sponge into the dye. Now rub it into the dye in circular motion until the leather is covered with dye. Then allow to dry.

Here’s a few things I’ve learned along the way to applying this coat consistently.

  1. When you first set your cloth or sponge onto the leather it is going to be loaded up with dye, and if apply pressure when you first set it onto the leather that one spot is then going to be loaded up with dye. When you first start apply little to no pressure, as you keep going and less dye is being released from the cloth/sponge begin applying more pressure to release an equal amount of dye as before.
  2. When the dye starts getting spotty, reload the cloth/sponge with dye. Basically when the area you just passed over isn’t completely covered in dye, it’s time to get some more.
  3. Overlap a half at a time. As your dyeing in these circles I usually overlap 1/2 of the previous circle with the new circle. 1/2 isn’t some magic number, it’s just what I do. Whatever you do, make sure you’re consistently doing it with each circle you make.
  4. Don’t shy away from the edges. Make sure you dye the leather on something you don’t mind getting dye on, because you should be dyeing beyond the edge of the leather. If you treat the edge of the leather like the end of where you should dye, you’ll approach it timidly and the edges will look less dyed than the rest of the project.

Second and third coats are applied diagonally. Make sure to go beyond the edge, as is shown in this gif. 

STEP 3: Apply a Second Coat Diagonally to the Right

I do this one in back and forth diagonals. Then allow to dry.

STEP 4: Apply a Second Coat Diagonally to the Left

I do this one in back and forth diagonals as well, but in the other direction. This way, between the 3 coats, the grain has been hit from every direction and there should be un-dyed part of the project.

Buffing the finish with a cloth once it has dried.

STEP 5: Apply a Finish and Buff

Once this final coat has dried, you need to put a finish on the leather. If you decided to skip this step, whoever is using the item you made will end up with dye on their clothes. This is bad, so use a finish. I use Fibbing’s Tan Kote, which can be purchases as either a gloss of matte finish. This can be applied in one coat, and I just work it into the leather using the same circular motion from before. Once you’ve worked it in evenly, leave it alone and let it dry. Touching it at all during the drying process will ruin the finish. After the finish has had time to dry, buff it with cotton cloth.

Dying and finishing process complete!

At this point your project should be dyed and ready to go. Hopefully your got a beautiful and completely smooth finish. If you did not however, don't worry, with practice we'll get there. P.S. I swear this isn't a paid advertisement for Fiebings, I just really like their dyes, hah.