A Basic Guide to Stitching Leather

TIPS TO BEGIN AND TIPS TO IMPROVE

Stitching is one of those things that is fundamental to leatherworking, and is pretty hard to explain through text. So, I figured instead of trying to explain everything through writing, I'd switch it up a little and throw a video in this time! If you don't know how to stitch leather yet, this video will walk you through step by step. And if you've already learned to saddle stitch but aren't 100% happy with how it looks, I'd encourage you to still check out the video because there's some tips in there for you as well.


SO WHAT'S A SADDLE STITCH?

Saddle stitching is the most popular way to sew leather by hand, and it's for good reason too. It is one of the most durable ways to stitch leather because it locks at every stitch you make. This way, if the thread breaks somewhere, only one stitch will come undone, as opposed to the entire line of stitching, like it does with a machine stitch. You can see how the thread locks at every stitch in this image below provided by Kinz Leather.


THREADING THE NEEDLE

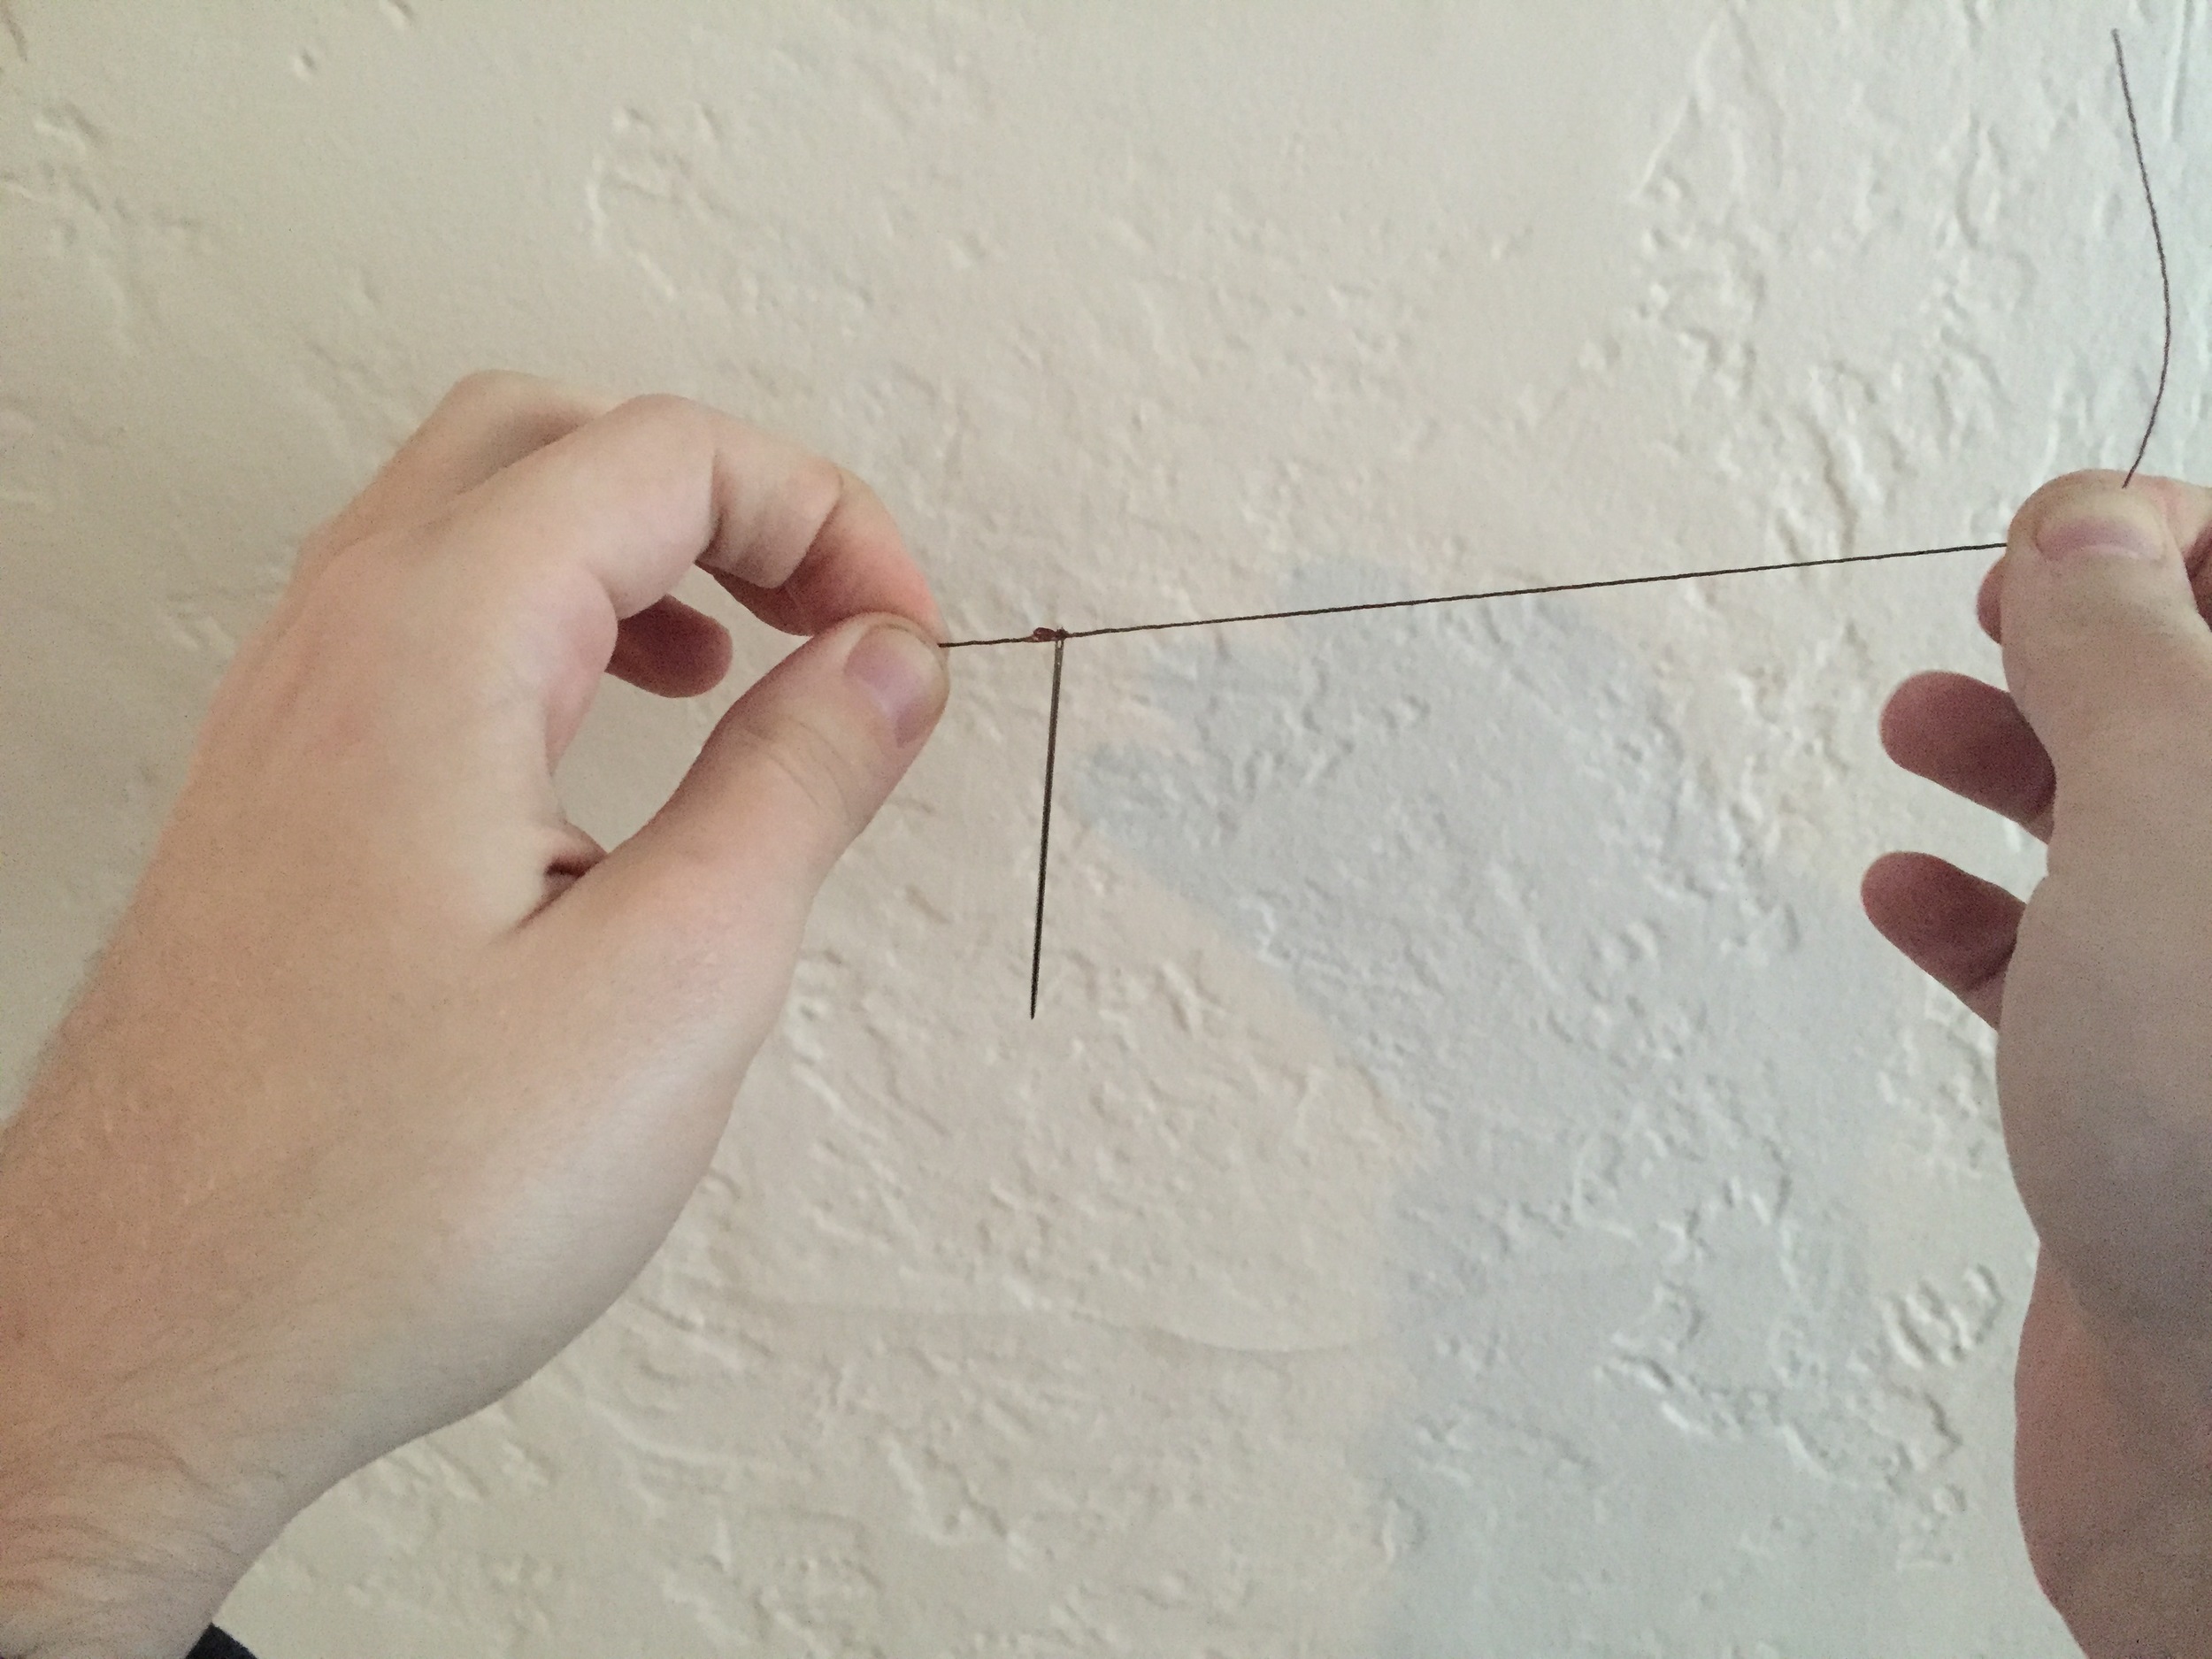
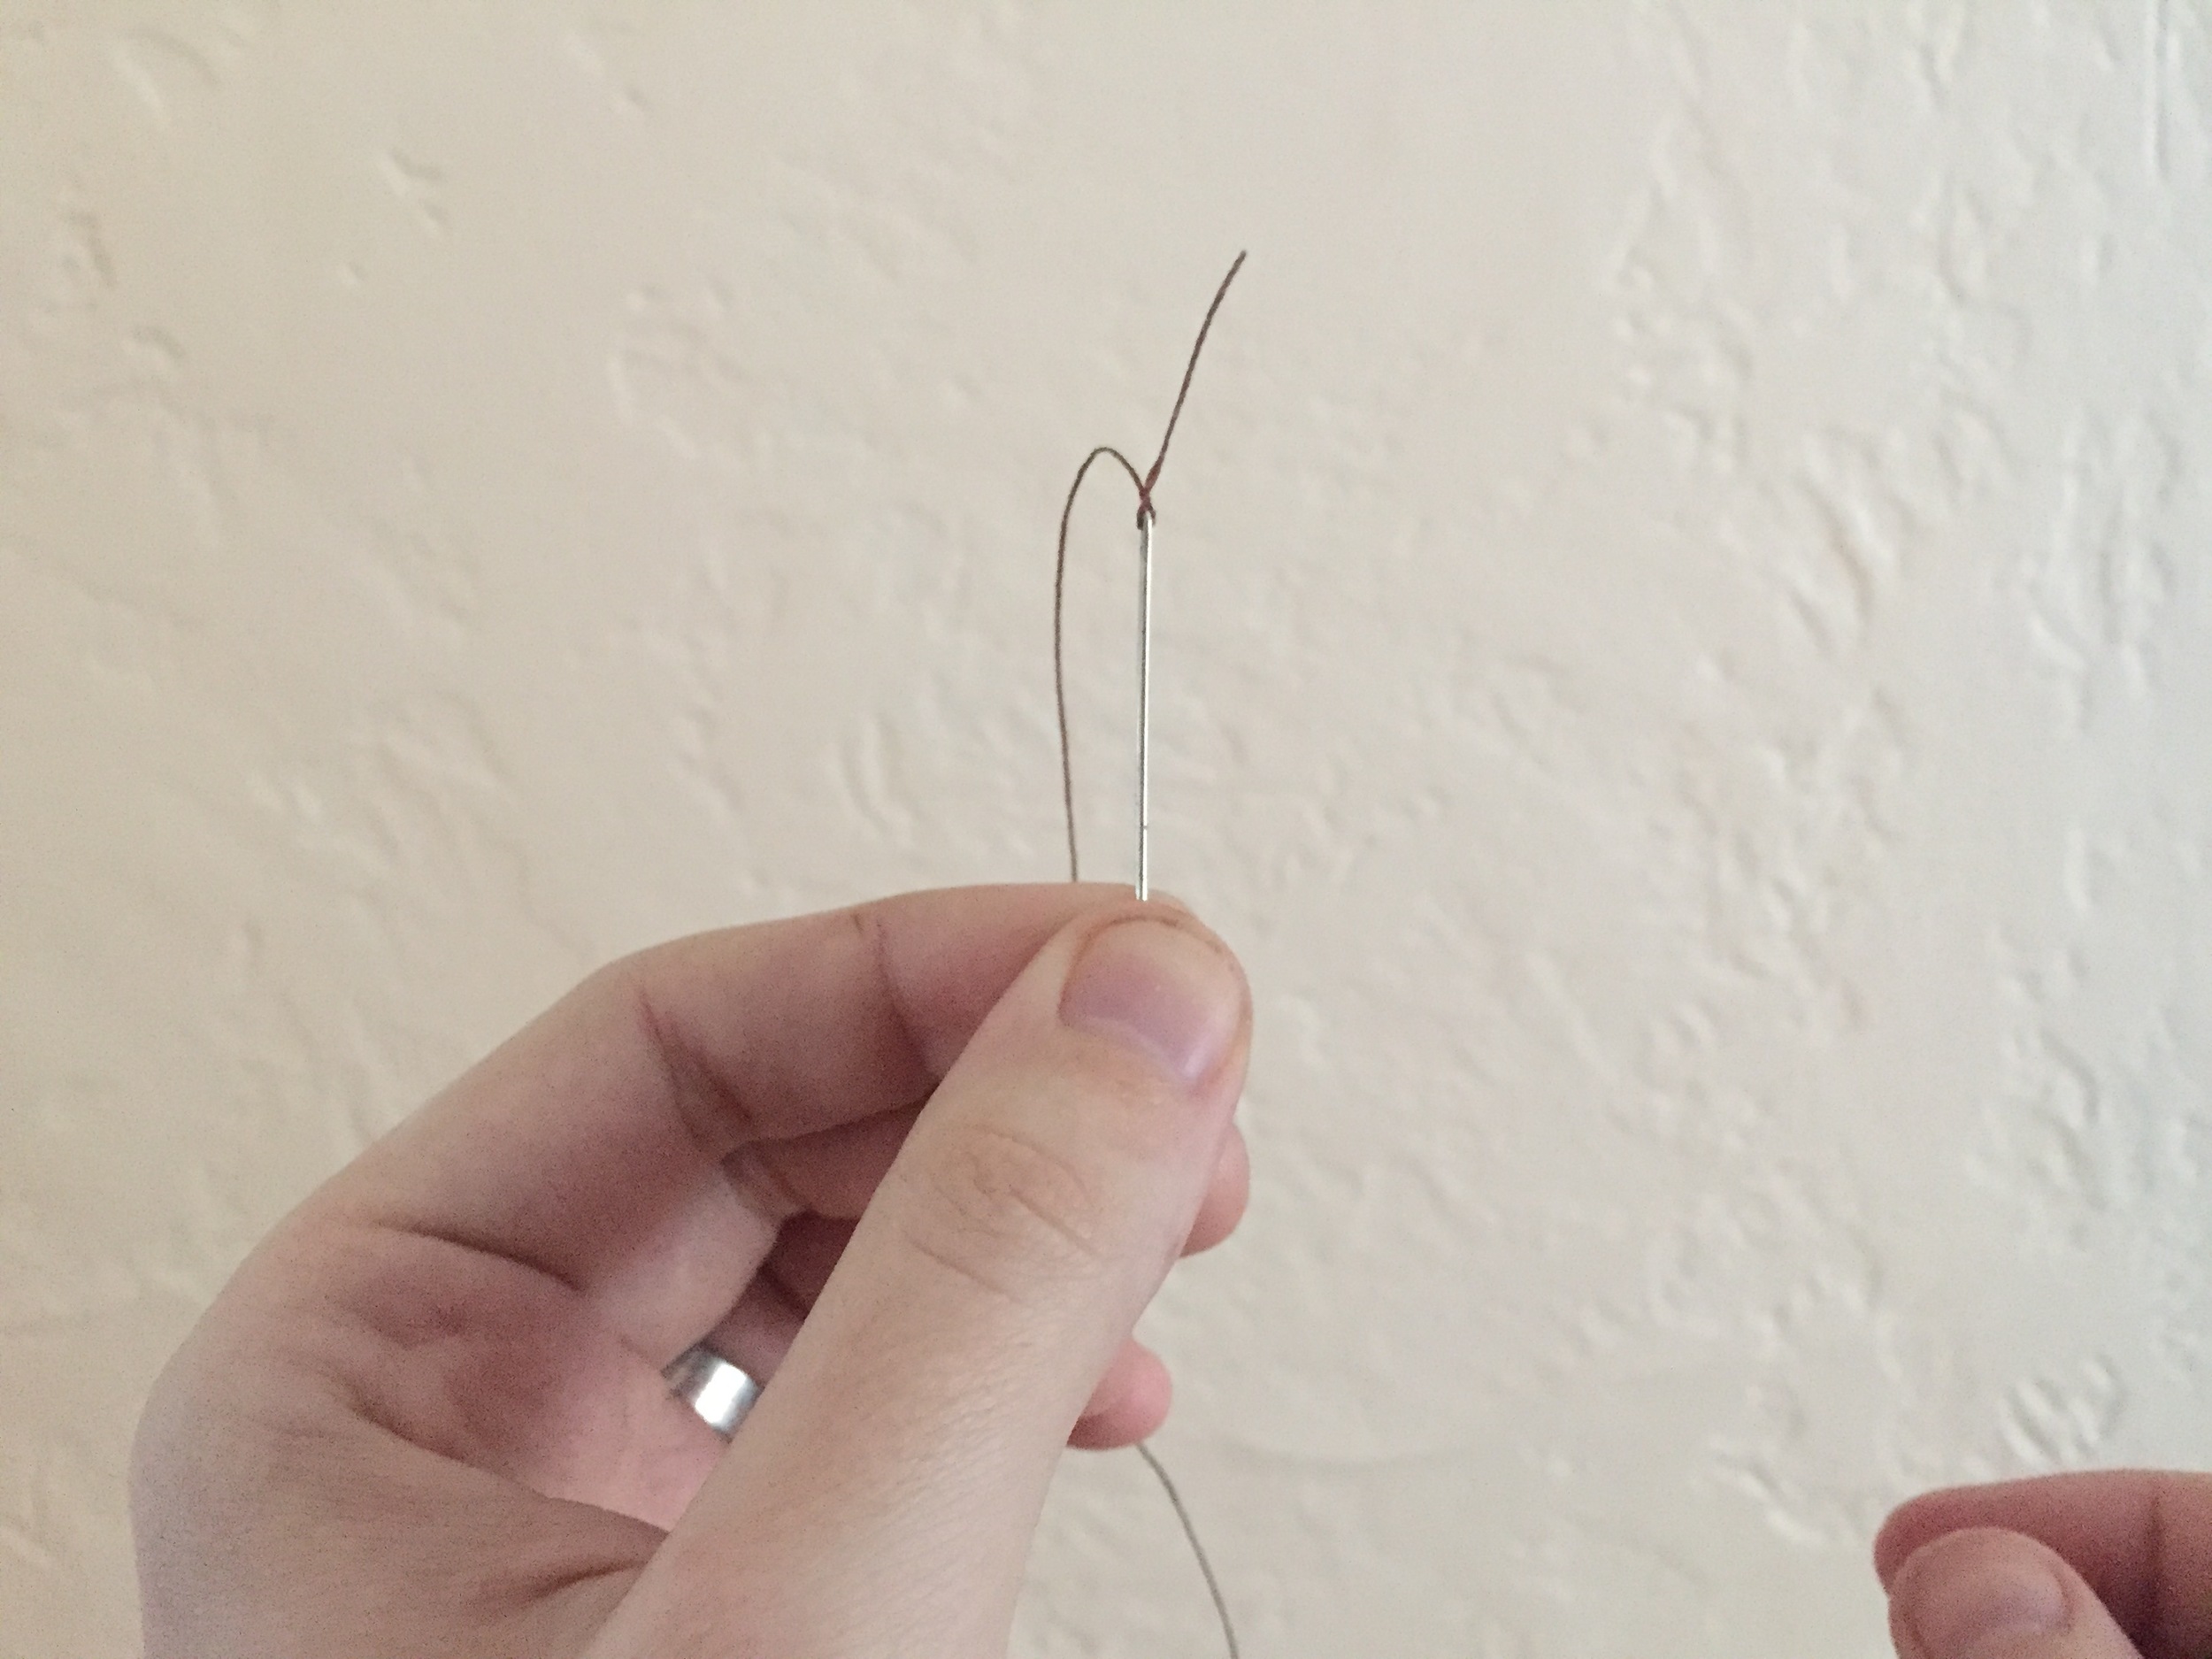
Before we jump right into stitching, let's first talk about how to thread your needle. It's nothing too hard, but here's some pictures to start off on the right foot.


SADDLE STITCH

This tutorial assumes that you've already created your stitching holes. To make sure that your make your stitching holes nice and straight, check out this post!

And that's it! Like I said, not that hard, right? Let me know what you think of the video, and please let me know if I can do anything to make it more helpful for you! If you'd like to learn about something else that would be best learned in video form, drop a suggestion in the comments below.

Making Your Stitching Holes Perfect

I’ve mentioned this before, but using diamond chisels will make a huge difference in your stitching early on.

They create consistent, accurate, and evenly spaced/sized holes. When learning, this is great because it puts all the attention on your stitching, not the holes. If you’re not happy with your how your stitching looks after using a chisel, you know it has something to do with the way you’re stitching and you can focus in on that. When trying both at the same time, it’s hard to know what is at fault because there are too many variables.

And even though diamond chisels make such great stitching lines, there are still are few circumstances where it is easy to mess them up. Unfortunately, with the great accuracy chisels offer, when you make these mistakes they stick out pretty noticeably, so here are a few tips to make sure your entire stitching line looks perfect.

I'll use this piece of scrap leather, that I've already created a stitching channel on, to help explain these three problems.

The most common places you will run into a problem is when starting your stitching line, creating holes approaching a sharp corner, and creating holes when going around a curve.


How to Start your Stitching Line

Generally, knowing where to start your stitching line is pretty simple. In some projects however, you want the stitching to go over the edge to prevent two pieces of leather from coming apart at a seam. Sometimes you can start the stitch too far away from the edge or too close, creating an uniform look when compared to the rest of the stitching. To fix this problem, you need to find where to place the first hole. To do this, set the diamond chisel in the channel you’ve already created with your groover, leaving the last tooth on the chisel just over the edge. Notice where the second tooth rests in the channel, now move the first tooth to this point. You've found your starting point.
 

Place the first tooth over the edge to find out where to start your stitching holes. (click to enlarge)

Move the first tooth over to where the second tooth was. This is where you want to start. (click to enlarge)

How to Create Stitching Holes Approaching a Sharp Corner

You always want the the stitching hole to rest in the corner of a 90 degree turn. If you do not do this, your thread will not follow the shape of your edges. But sometimes, when approaching a corner you realize that the natural spacing of your chisel is not going to create a hole that sits in that corner. So you have to adjust the spacing while still making it look natural. To do this, punch within three or four holes of the corner and then punch a hole at the corner. Using chisels with different amount of teeth, find out how many holes is too many. Then using a chisel with only one tooth, evenly space out the number of holes that is one less than what you decided was too many (i.e. if four was too many, create three holes) between the last hole you made and the hole at the corner.

Stop creating stitching holes before you reach the corner. Then put a hole in the corner. (click to enlarge)

Determine how many holes is too many by using chisels with different amounts of teeth. In this case 3 is too many. (click to enlarge)

Place the appropriate amount of holes in the space you've left (one less than what you decided was too many). I only created 2 in this case. (click to enlarge)

How to Create Stitching Holes Around a Curve

Punch holes along your stitching line until your chisel no longer rest within the stitching groove as you approach the curve. At this point, switch to a chisel with only two teeth. Setting one tooth in the last stitching hole you made, place the stitching groove as it follows the curve of the edge. Instead of using a hammer to create a hole at this point, press down to leave only an impression. Continue this process until you’ve go all the way around the edge. Then go back and create the hole using a chisel with only one tooth, keeping the top and the bottom of the diamond shape in line with the edges of the groove.

Stop creating stitching holes before you hit the curve. (click to enlarge)

Use a chisel with two teeth to mark out the distance between holes without actually creating them. (click to enlarge)

Come back with a one tooth chisel to make the holes making sure the top and bottom of the diamond match the edges of the stitching channel. (click to enlarge)

Most of these holes have not been punched through to their entirety. The three highlighted holes have been, and the difference is noticeable. (click to enlarge)

An Extra Tip for Perfecting Your Stitching Line

Sometimes I notice that the front of my stitching looks angled, just like it should be, but the back side looks flat, like a machine stitch. And if I'm going to spend all that time hand stitching, I want people to know. One cause of this can be the way that you are using your chisel. Often times I will fail to punch my chisel far enough through the leather. If you take a look at your chisel you can see where the blade of the chisel gradually turns into the diamond shape. It is not until that diamond shape is past the other side of the leather that the hole has been properly created. If you don’t push the chisel far enough through, the holes will look more like slits and less like diamonds. You can see the difference in the picture.


Working around curves, approaching a corner well, punching your chisel all the way through the leather, and starting your stitching lines right, should all go a long way in improving the overall look of your stitching lines. As always, I’m still learning and I know there are many other tips out there for making your stitching even better. If you have your own tip and want to help everyone who is part of this community get better, I invite you to put it in the comments below. I’d really love to hear from you. 

4 Awl Tips to Clean Up Your Stitching

Some of my first stitching looked like this (Click to Enlarge).

Now it looks like this (Click to Enlarge).

I’m not saying that my stitching is perfect, but it has definitely come a long way. All the mistakes that you see in the first picture are from using my awl incorrectly. It’s obvious that the stitching isn’t great, but what's really hard to tell is why it isn’t great. In other words: sure I held my awl wrong, but how do I hold it the right way next time?

If you don’t like how your stitching looks, there’s two main sources for the problem. One being the awl, as I’ve already mentioned, and the second being your stitching technique. Stitching technique deserves a post of its own, and probably more than just one. We will just be looking at issues caused by your awl in this post. The good thing is, if you don’t like your stitching chances are it’s your awl use. And I promise that if you give attention to these four things your stitching is going to get noticeably better. First let’s take a look at what good awl work looks like

Awl Work Done Right:

Notice that all the diamonds are in a row, each angled the same, and each the same size. When these holes were created using an awl, they were done correctly. And because of this, the stitching rests in the correct spot and looks neat as well.

Problem 1: Flat Stitching

One common problem to have is that the front side (the side you stick the awl through) is neat, but the back side (the side the awl comes out of) is not. When this is the case the stitch on the back side usually looks like this.

This is actually a pretty simple fix. The problem is that the awl is not being pushed far enough through the leather. When the back side looks like this it is because only the point of the awl made it though, and wasn’t enough to create the diamond shape you want for nice stitching. This causes the stitching to flatten out and the holes to look odd. This can also happen when using a chisel. Take a look at your awl or your chisel and see how far along it is along the blade before the diamond shape fully forms.

Problem 2: Stitching Holes are Unaligned

Another problem that usually happens on the back side of your stitch is that the stitching holes don’t line up and not all of them sit in the stitching grove you created. It looks something like this.

This happens because the awl is being held at the wrong angle, and is easier to mess up the thicker your leather gets. When you stab the awl through the leather, the awl needs to be perfectly perpendicular to the leather. If you angle the awl slightly high or low as you stab it through the back side of the hole will not sit in the stitching line. If the project your working on can be held by an stitching pony use it. It will allow you to give full attention to creating the hole at the right angle.

Problem 3: Stitching Holes are Different Sizes

This next problem took a long time for me to figure out. I had spent the time learning to get my holes straight and kept them at a consistent angle, but they were all different sizes. It looks like this:

The sizes are definitely exaggerated in this image, but you can see how even variation in size can make the stitching look pretty ugly. This is for two reasons. Unlike problem #1 the awl is being pushed through far enough to create the diamond shape, but not pushed through consistency. A chisel blade quickly goes from point to diamond shape, but with the awl this transition is gradual. In most awl blades it’s not until 1/3 to 1/2 way down the blade that the maximum thickness is reached. This is a good thing because it means you can adjust diamond size, but creates a problem if you aren’t consistent. The second reason this happens usually has to do with the way that you remove the awl. If your awl isn’t sharp enough it can be tricky to remove from the leather once you’ve created a hole. I would sometimes rock my awl back and forth to loosen as it was removed. Avoid doing this is you can as it will stretch the leather a create a larger than normal hole. It is, however, a great technique to use when widening a hole for a backstitch.

Problem 4: Stitching Holes are Crooked

This next problem happens when the tops of your diamond holes aren’t all flat. Your stitching will end up looking like this.

This happens because the awl rotated forward or backward when used. When you use the awl you need to keep the flat side of the diamond blade parallel with the edge of the leather. A small rotation of your wrist as you stab the leather will mess this up. For me, this was the hardest part to master when using an awl. The best way to fix this is to be attentive of each hole you create. Yes, it’s going to take you a lot longer, but you need to spend the time identifying what the awl looks like when held at the right angle. Vergez Blanchard sells an all with a flattened handle to help you see and feel when you’re holding the awl incorrectly.


Nice stitching takes awhile to master, but knowing what to look for is a great place to start. I’d really love to see some of your guys’ before and after pictures of your stitching. Please post them in the comments below.