clean

Making Your Stitching Holes Perfect

I’ve mentioned this before, but using diamond chisels will make a huge difference in your stitching early on.

They create consistent, accurate, and evenly spaced/sized holes. When learning, this is great because it puts all the attention on your stitching, not the holes. If you’re not happy with your how your stitching looks after using a chisel, you know it has something to do with the way you’re stitching and you can focus in on that. When trying both at the same time, it’s hard to know what is at fault because there are too many variables.

And even though diamond chisels make such great stitching lines, there are still are few circumstances where it is easy to mess them up. Unfortunately, with the great accuracy chisels offer, when you make these mistakes they stick out pretty noticeably, so here are a few tips to make sure your entire stitching line looks perfect.

I'll use this piece of scrap leather, that I've already created a stitching channel on, to help explain these three problems.

The most common places you will run into a problem is when starting your stitching line, creating holes approaching a sharp corner, and creating holes when going around a curve.


How to Start your Stitching Line

Generally, knowing where to start your stitching line is pretty simple. In some projects however, you want the stitching to go over the edge to prevent two pieces of leather from coming apart at a seam. Sometimes you can start the stitch too far away from the edge or too close, creating an uniform look when compared to the rest of the stitching. To fix this problem, you need to find where to place the first hole. To do this, set the diamond chisel in the channel you’ve already created with your groover, leaving the last tooth on the chisel just over the edge. Notice where the second tooth rests in the channel, now move the first tooth to this point. You've found your starting point.
 

Place the first tooth over the edge to find out where to start your stitching holes. (click to enlarge)

Move the first tooth over to where the second tooth was. This is where you want to start. (click to enlarge)

How to Create Stitching Holes Approaching a Sharp Corner

You always want the the stitching hole to rest in the corner of a 90 degree turn. If you do not do this, your thread will not follow the shape of your edges. But sometimes, when approaching a corner you realize that the natural spacing of your chisel is not going to create a hole that sits in that corner. So you have to adjust the spacing while still making it look natural. To do this, punch within three or four holes of the corner and then punch a hole at the corner. Using chisels with different amount of teeth, find out how many holes is too many. Then using a chisel with only one tooth, evenly space out the number of holes that is one less than what you decided was too many (i.e. if four was too many, create three holes) between the last hole you made and the hole at the corner.

Stop creating stitching holes before you reach the corner. Then put a hole in the corner. (click to enlarge)

Determine how many holes is too many by using chisels with different amounts of teeth. In this case 3 is too many. (click to enlarge)

Place the appropriate amount of holes in the space you've left (one less than what you decided was too many). I only created 2 in this case. (click to enlarge)

How to Create Stitching Holes Around a Curve

Punch holes along your stitching line until your chisel no longer rest within the stitching groove as you approach the curve. At this point, switch to a chisel with only two teeth. Setting one tooth in the last stitching hole you made, place the stitching groove as it follows the curve of the edge. Instead of using a hammer to create a hole at this point, press down to leave only an impression. Continue this process until you’ve go all the way around the edge. Then go back and create the hole using a chisel with only one tooth, keeping the top and the bottom of the diamond shape in line with the edges of the groove.

Stop creating stitching holes before you hit the curve. (click to enlarge)

Use a chisel with two teeth to mark out the distance between holes without actually creating them. (click to enlarge)

Come back with a one tooth chisel to make the holes making sure the top and bottom of the diamond match the edges of the stitching channel. (click to enlarge)

Most of these holes have not been punched through to their entirety. The three highlighted holes have been, and the difference is noticeable. (click to enlarge)

An Extra Tip for Perfecting Your Stitching Line

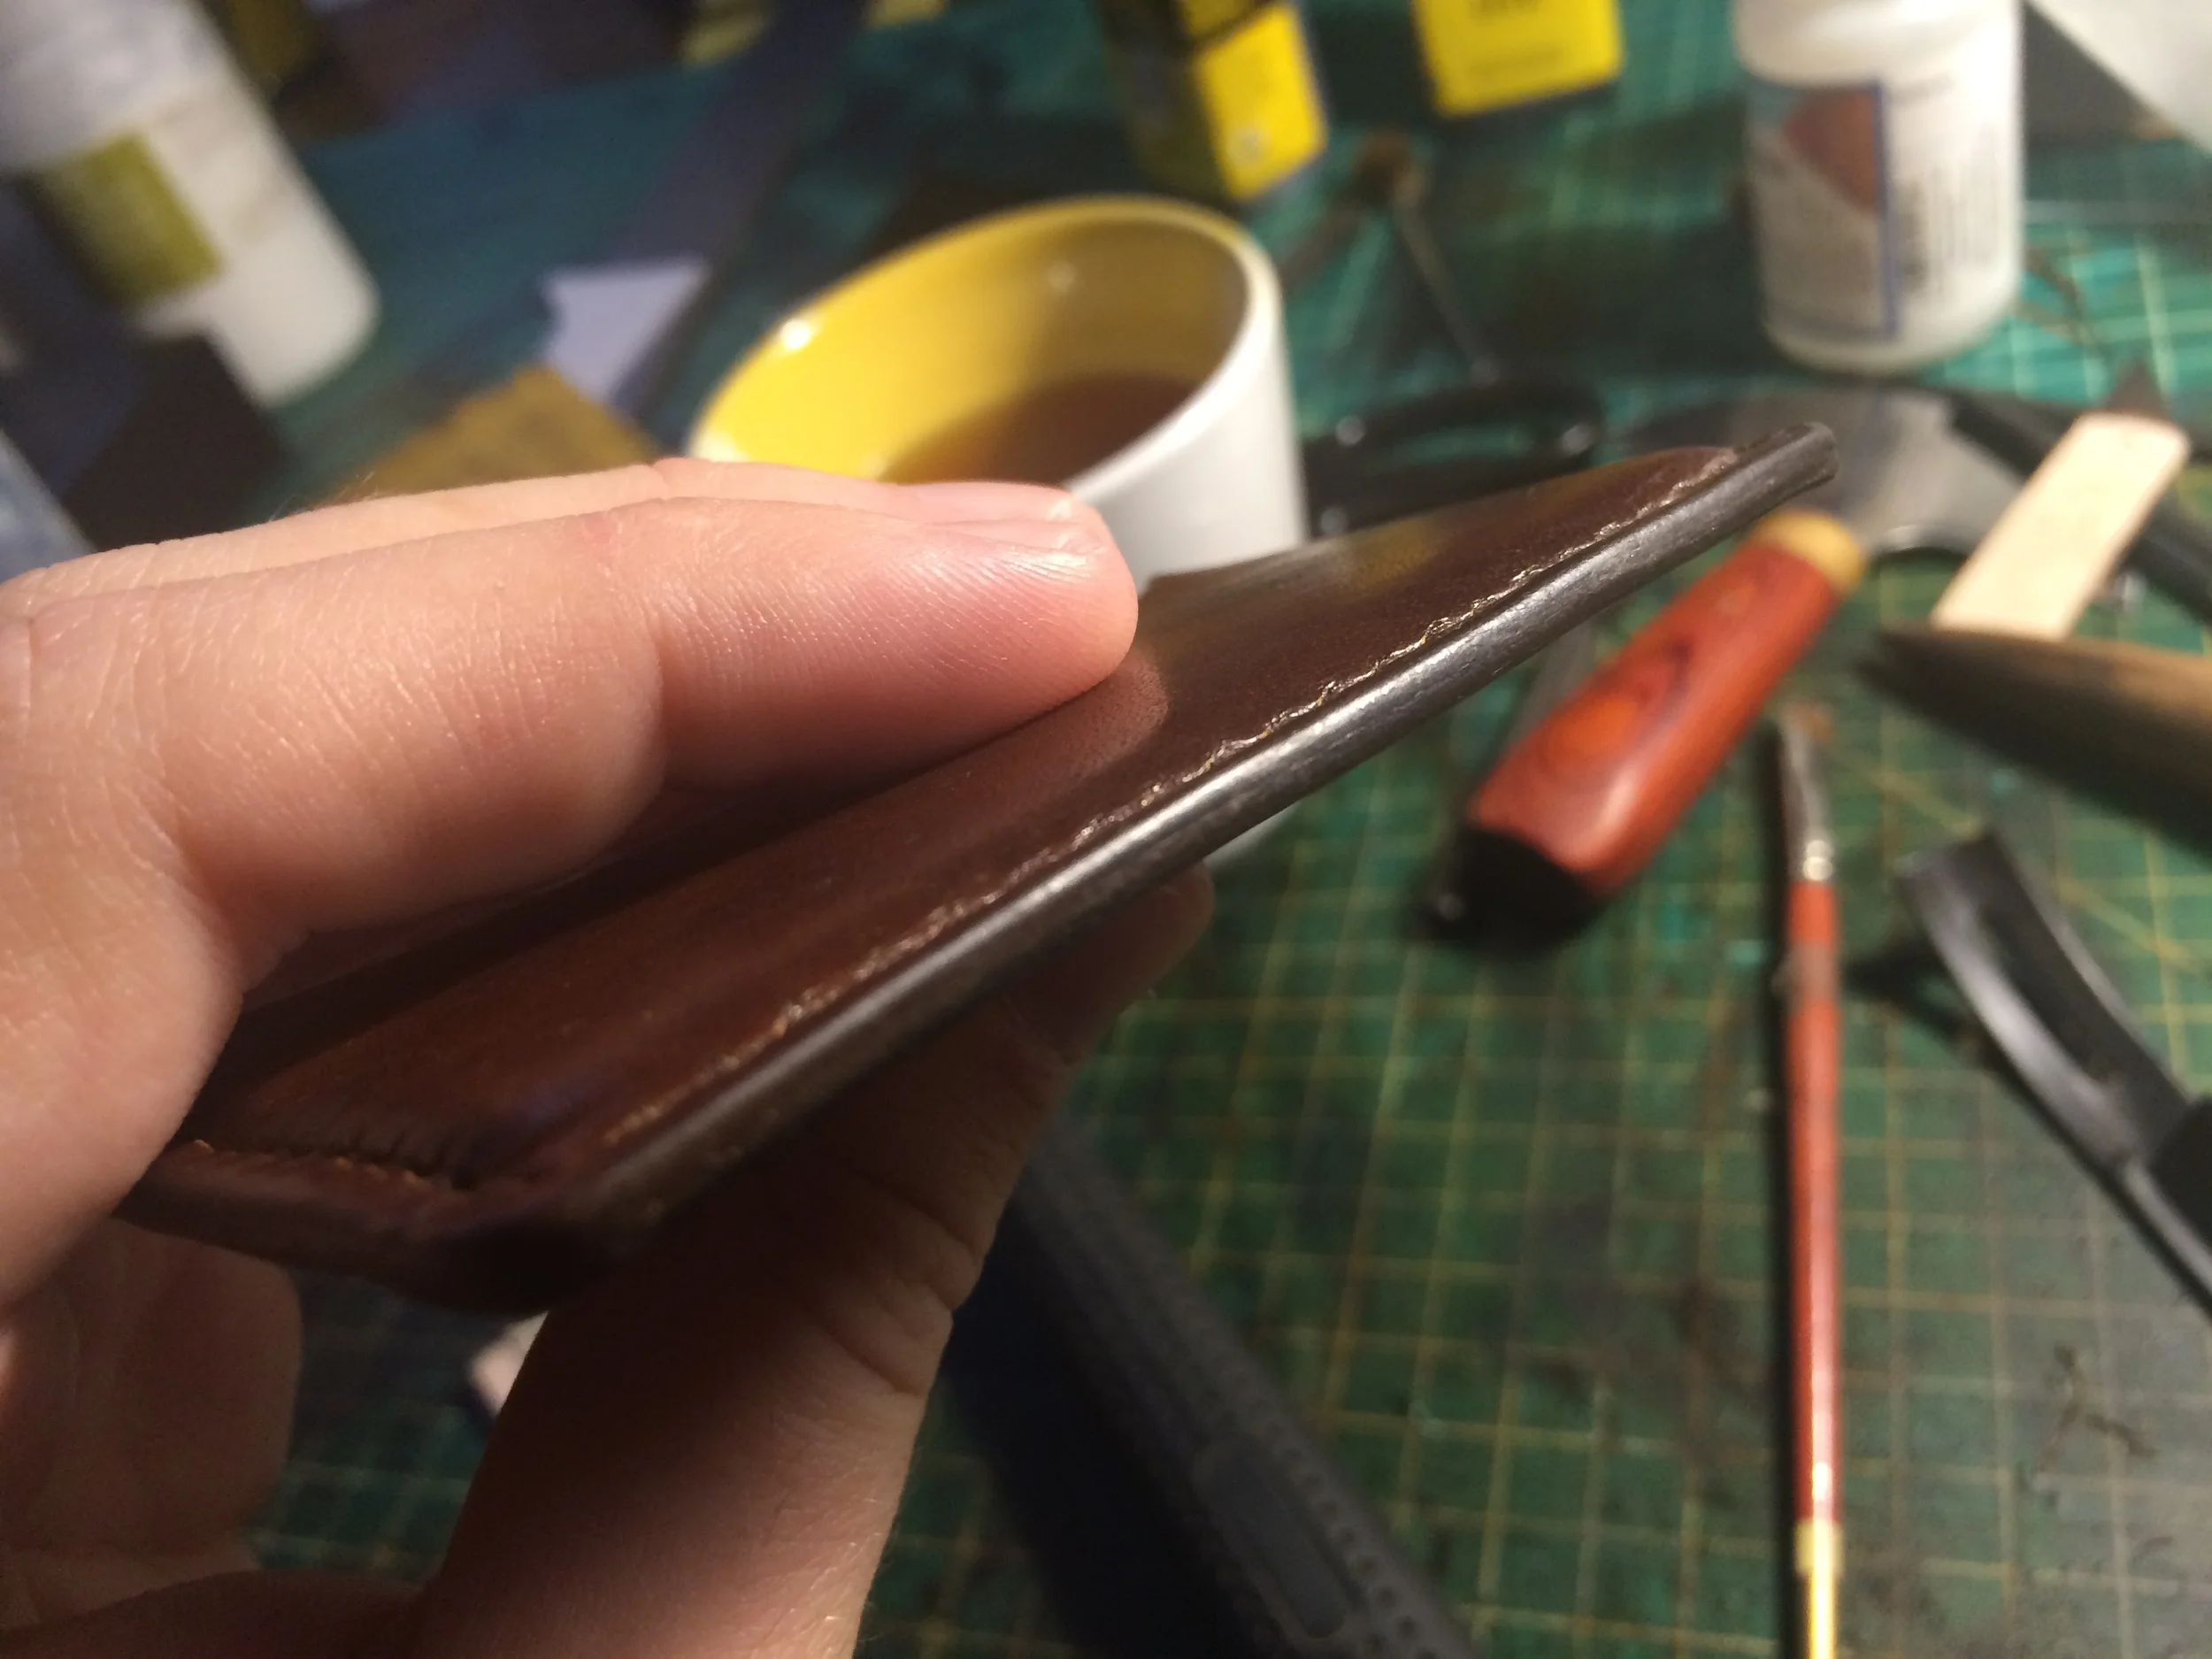
Sometimes I notice that the front of my stitching looks angled, just like it should be, but the back side looks flat, like a machine stitch. And if I'm going to spend all that time hand stitching, I want people to know. One cause of this can be the way that you are using your chisel. Often times I will fail to punch my chisel far enough through the leather. If you take a look at your chisel you can see where the blade of the chisel gradually turns into the diamond shape. It is not until that diamond shape is past the other side of the leather that the hole has been properly created. If you don’t push the chisel far enough through, the holes will look more like slits and less like diamonds. You can see the difference in the picture.


Working around curves, approaching a corner well, punching your chisel all the way through the leather, and starting your stitching lines right, should all go a long way in improving the overall look of your stitching lines. As always, I’m still learning and I know there are many other tips out there for making your stitching even better. If you have your own tip and want to help everyone who is part of this community get better, I invite you to put it in the comments below. I’d really love to hear from you. 

A Basic Guide to Burnishing

There are literally hundreds of ways to clean up the edges of your leatherworking projects. And most established leatherworkers have their own unique way to do their edges. Some spend a really long time getting a nice glossy and smooth finish, others prefer a more matte look that usually comes with using some sort of heating and edge paint, while others just keep them the way they are for a rugged look (I generally steer people away from unfinished edges, while some like the look, those edges will quickly fray). To find what you like, I really encourage you to do some google/instagram searching on different leatherworkers' shops and find a product you like. A lot of leatherworkers have posted guides on how they do their edges, and if they haven’t, most are easily accessible. The leatherworking community is a extremely helpful and generally willing to offer advice to others learning the skill, so don’t be afraid to reach out. You wouldn’t believe the countless people I’ve asked for help, and the immense help I’ve gotten while learning.

Even though everyone has their own flavor, below is a basic guide to burnishing edges.  A lot of people will add to this process and some do less than it, but doing this when your starting will keep your edges looking great and ensure you’ll be developing the skills you need to have when making your own edge formula.

Step 1: Cut Correctly

When you don’t make good, clean, and well measured cuts, your pieces won’t line up when you go to glue them together. This is common sense, but when just starting, there is a big temptation to rush it because 'cutting things out should be easy' and you’re eager to see the finished project. I get it, I’ve been there. But slow down, endure the frustration that sometimes accompanies learning something new and make good cuts. This is going to save you a lot of time and frustration later. Here’s a post that has some good tips for getting clean cuts.

Step 2: Glue

This is another thing that seems simple because you’ve been doing it since the first grade. And don’t worry, it's as simple as it seems. There are few things to be mindful of when you’re glueing though. One is to glue all the way to the edge. If you haven’t done this, your edges will start splitting apart during the burnishing process. The second is to keep in mind that the glue dries pretty fast, so don’t glue the entire project, and then put it together. Do a bit of gluing at a time, then place the pieces together, and then glue some more. Finally make sure to keep your glue straight. If you’re sloppy and over glue the item you're making (especially if it’s something like a wallet or bag than opens up) will not have the dimensions you'd planned for. If you do accidentally do this, you can rip it back apart but it’s not great on the leather. Cement glue is used for glueing leather. I use Seiwa Leathercraft Glue. 

Step 3: Cut again

At this point check your edges to make sure everything pretty much lines up. If things aren’t perfect that is okay because it will be cleaned up during the sanding process. Do make sure there isn’t an edge where one piece is noticeably longer than the other. If you find one, now is the time to take a knife and cut it back so the edges are flat.

Step 4: Bevel

If I’m going to use a stitching groover I use it before I bevel, when the edges are flat and lined up well. After I’ve done that I use a beveler. This helps to round out your edges. They won’t be perfect at this point, but it preps the leather to be rounded out by sand paper. If you don’t use a beveler before you burnish, the edges will start to fold over on themselves during the burnishing process. If you’re not sure what these two tools are or you don’t know what they do, you can read more about them here.

Step 5: Sand like a Maniac

This is what glue looks like when it needs to be sanded off. Click to enlarge photo.

Some people are pretty fanatic about how much they sand their edges, using lots of different grits to create their edges.  I use three different grits and I’ve been pretty happy with the result. When sanding make sure to only sand a short distance. This will help to keep your hand flat while sanding. As with beveling and cutting, the further your hand gets from your chest the more it starts to roll. I start with a 150 grit sand paper to shape the edges. This takes your edges from being more angular (from the beveling) to a round shape. While using this grit of sand paper there are two things you need to focus on. First the two pieces of leather that make your edge are sanded down to the same level and that they are rounded out. The second is that you sand off any access glue. You can see the glue when sanding because it will darken the color of the edges. Make sure you sand until the glue is completely gone. Any glue that is left won’t take the dye. After that I use 600 grit to get rid of any fibers that are sticking up. And finally I use 800 grit to get it nice and smooth.

Step 6: Dye

Generally I use the same dye that I used on the top side of the leather because edges naturally darken when being burnished. Applying dye to edges is a bit tricky because you only want to hit the edges and not the already dyed leather. Tandy has wool daubers that work alright, but I find it hard to control where the dye goes sometimes. Alternatively you can cut a small square piece off a sponge and clamp it with a wooden clothespin. 

Step 7: Burnish with A Wood Slicker

This is the part that is going to take some practice. Don’t worry though, you’ll feel like a champ once you get it down! Wet a short distance of your edge with a small amount of gum tragacanth. Set the edge inside the notch on your burnisher, making sure the notch you choose doesn’t pinch the leather as you are trying to burnish. Then run the burnisher briskly back and forth across the edge with out over extending your hand. Make sure to not put too much pressure on the edge itself. All you are trying to do is create heat through friction, not mash your edges. Do this until you hear a tacky sound. The sound is hard to describe, but you will know it when you hear it. Once you hear it you’ll know your edges have been burnished well. They should look glossy at this point.

Step 8: Apply Beeswax

I find this last step adds a nice shine to your edges. It doesn’t take long to do it and beeswax is really inexpensive. All you need to do is rub beeswax on all the edges and then buff it out with a small piece of canvas. At this point you've finished and your edges should look similar to the picture below.

The edge of a card holder I recently made. You can still see imperfections on the edge, but they're getting there. My desk, however, is a complete mess. 

The edge of a card holder I recently made. You can still see imperfections on the edge, but they're getting there. My desk, however, is a complete mess. 

Burnishing edges are difficult and was definitely a source of disappointment on my early projects. Finding edges that I liked and keeping those in mind as I wrestled with my crappy looking edges really helped me push through to learn the skills I needed for good looking edges. Keep being mindful of the details as you practice and learn and you'll soon have impressive edges.

As I mentioned above, I know there are a lot of ways to do edges well. If you have your own unique edge process I’d really love to check it out. Send me a link through email or drop it in the comments below.