The second thing that I ever made was a purse for my wife. She had a cheap purse she’d bought from H&M. It had fallen apart after some use, but she still really liked the design and asked if I could make a new one. To be honest, I didn’t really know if I could make a new one but I figured why not try.
I was just beginning and didn’t have a lot of money, so I used the only leather I had ever bought to make it: an 8oz piece of Craftsman Oak. If you’re familiar with leather sizes, you know that is way too thick for a purse. So I tried my best to skive it down to about 5oz. Skiving is one of those things that takes a bit of skill though, so I took it slow and did the best I could. I’d say it turned out ok at best.
I knew skiving was tricky, but I had never really tried to rivet before and it sounded easy. At this point the bag was mostly finished. I had stitched most of it together and burnished my edges. One of the few things I had left was to rivet the straps on. So I punched my holes, placed in the rivets, and started hammering them closed using a rivet setter. And...
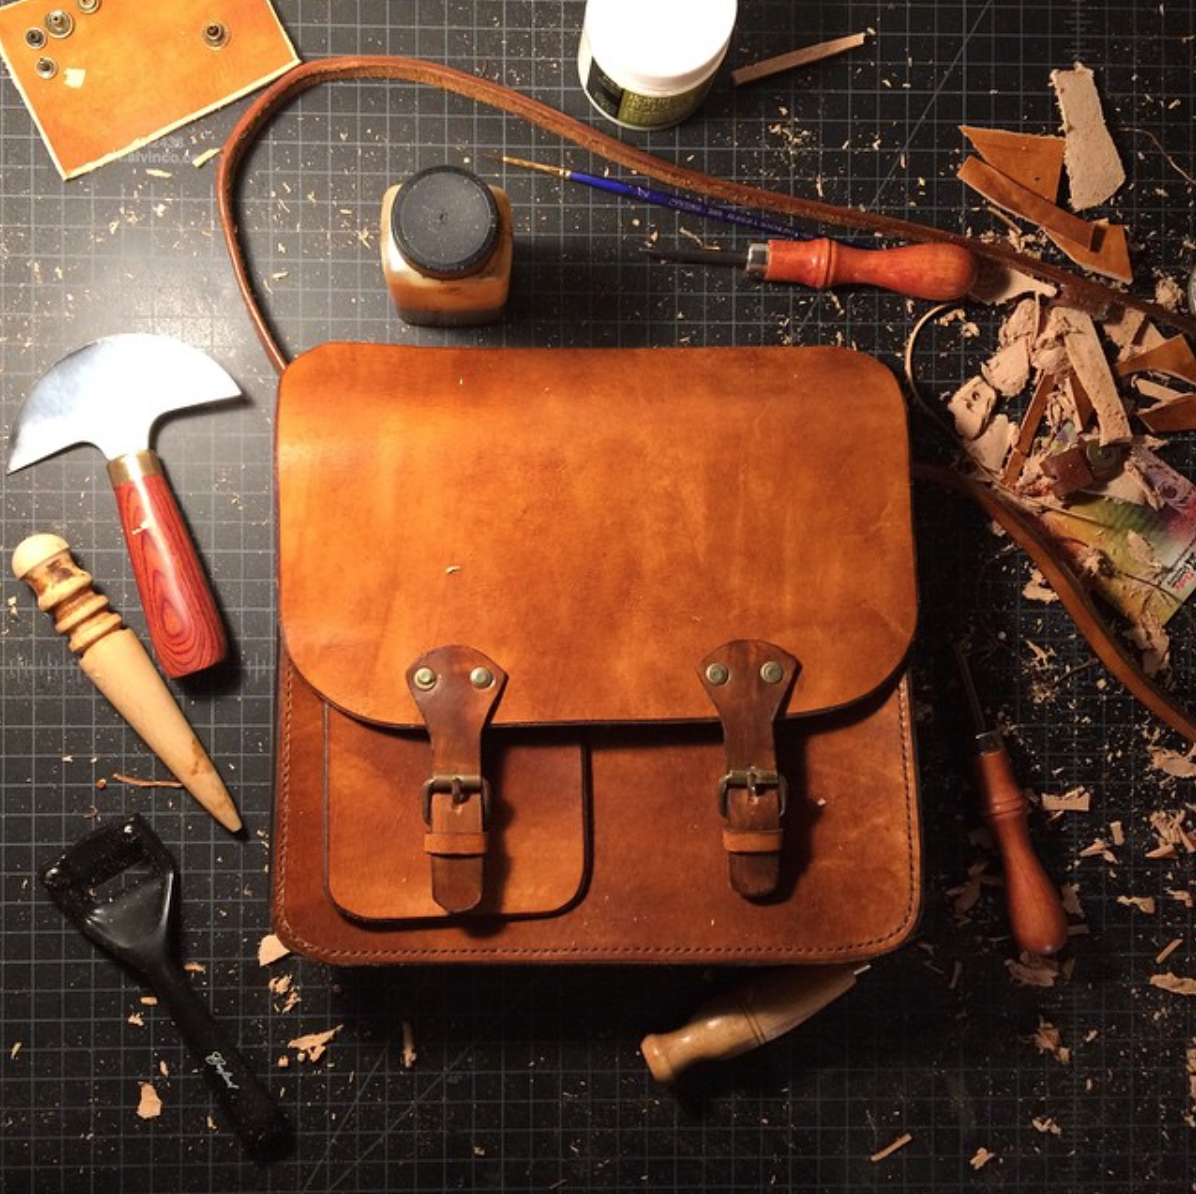
This is what smashed rivets look like.
They were horribly mangled. So mangled in fact that you can see it from a distance. I had spent all this time trying my best to make this bag good, only to have it ruined in about two minutes. I tried to remove them, but rivets aren’t meant to be removed. And after some searching on youtube there are tutorials to removing them, but it’s much harder to get them off than on. What I’m trying to say is riveting sounds easy, but just like everything else in leather working, there is a skill to it. Ruining your wife’s birthday gift is not a good thing, so here’s some tips for a happy marriage and a well set rivet.
Use an anvil. If you are using a rivet setter like the one to the right, they are also sold with anvils (for a little more). Anvils are nice for two reasons. First they provide a nice hard surface to hit the rivet on to. But when it comes to a small anvil, I think the more practical purpose is for setting double sided rivets. Some anvils come with rounded out dips in them to set the other side of the rivet in it. This way neither side of the rivet is damaged in the setting process.
This brings me to my second point: Rivet on a hard surface. I thought the small anvil I was using would suffice, but I was hammering with this small anvil on a wooden desk. The anvil would jump around when I hammered and leave dents in the other side of my rivet. Once I moved to a concrete floor this stopped happening because the surface was less bouncy and the anvil stayed in place.
Practice. I know this sounds obvious, but seriously rivets are inexpensive. Don’t be afraid to waste a few on a scrap piece of leather for the sake of saving a project. Do this especially if you are either trying rivets for the first time or trying a brand of rivets you have never used before. They might dent easier and require you to use less force. Or they might not fit into the rounded dips in your anvil as well as other brands and it may be more difficult for you to set them correctly.
Make sure your stem isn’t too long. If the leather you are using does not completely fill the space between the two caps, you run a good chance of messing up the rivet in the setting process. Instead of the stem closing around itself, it will slip and bend diagonally making it so your rivets don’t actually close and the caps no longer line up. There’s two easy fixes for having too long of stems. You can either cut them and shorten them to the correct length. Or you can do you best to make sure to come straight down on top of the rivet with you swing the hammer. If the force of your hammer doesn’t come from directly above, the rivet will slip though, so it’s just better to have the stem at the right length.
Luckily my wife loved her purse even with the obviously flawed rivets. She’s just nice like that and still wears it around today… even though those rivets are always staring back at me. I am happy to say that none of my rivets have looked that bad since, thanks to tips like these. As always, if I missed some tips let me know in the comments.
