It is probably one of the best feelings in the world when your leather knife is sharp and cuts through the leather like butter. Your cuts are easier, the look a heck of a lot better, and in general it’s a more enjoyable experience. I don’t experience this often though. And it’s because I’m lazy when it comes to sharpening my tools.
So in attempts to be a better leatherworker, and be a more helpful blogger, I’ve been forcing myself to get in the habit of sharpening my tools. Out of this time, I’ve decided to blog a series about keeping your tools sharp, that will cover, you guessed it, how to sharpen each of your leatherworking tools… that need to be sharpened (sorry burnisher).
For starters, most any knife that you order will not come sharpened. There are, of course, a few companies that break this mold, but generally this is not the case because it’s easier to ship things when they aren't deadly sharp. This tutorial will help you sharpen your new dull blade, and also maintaining that blade once it’s been sharpened.
The 15º Rule:
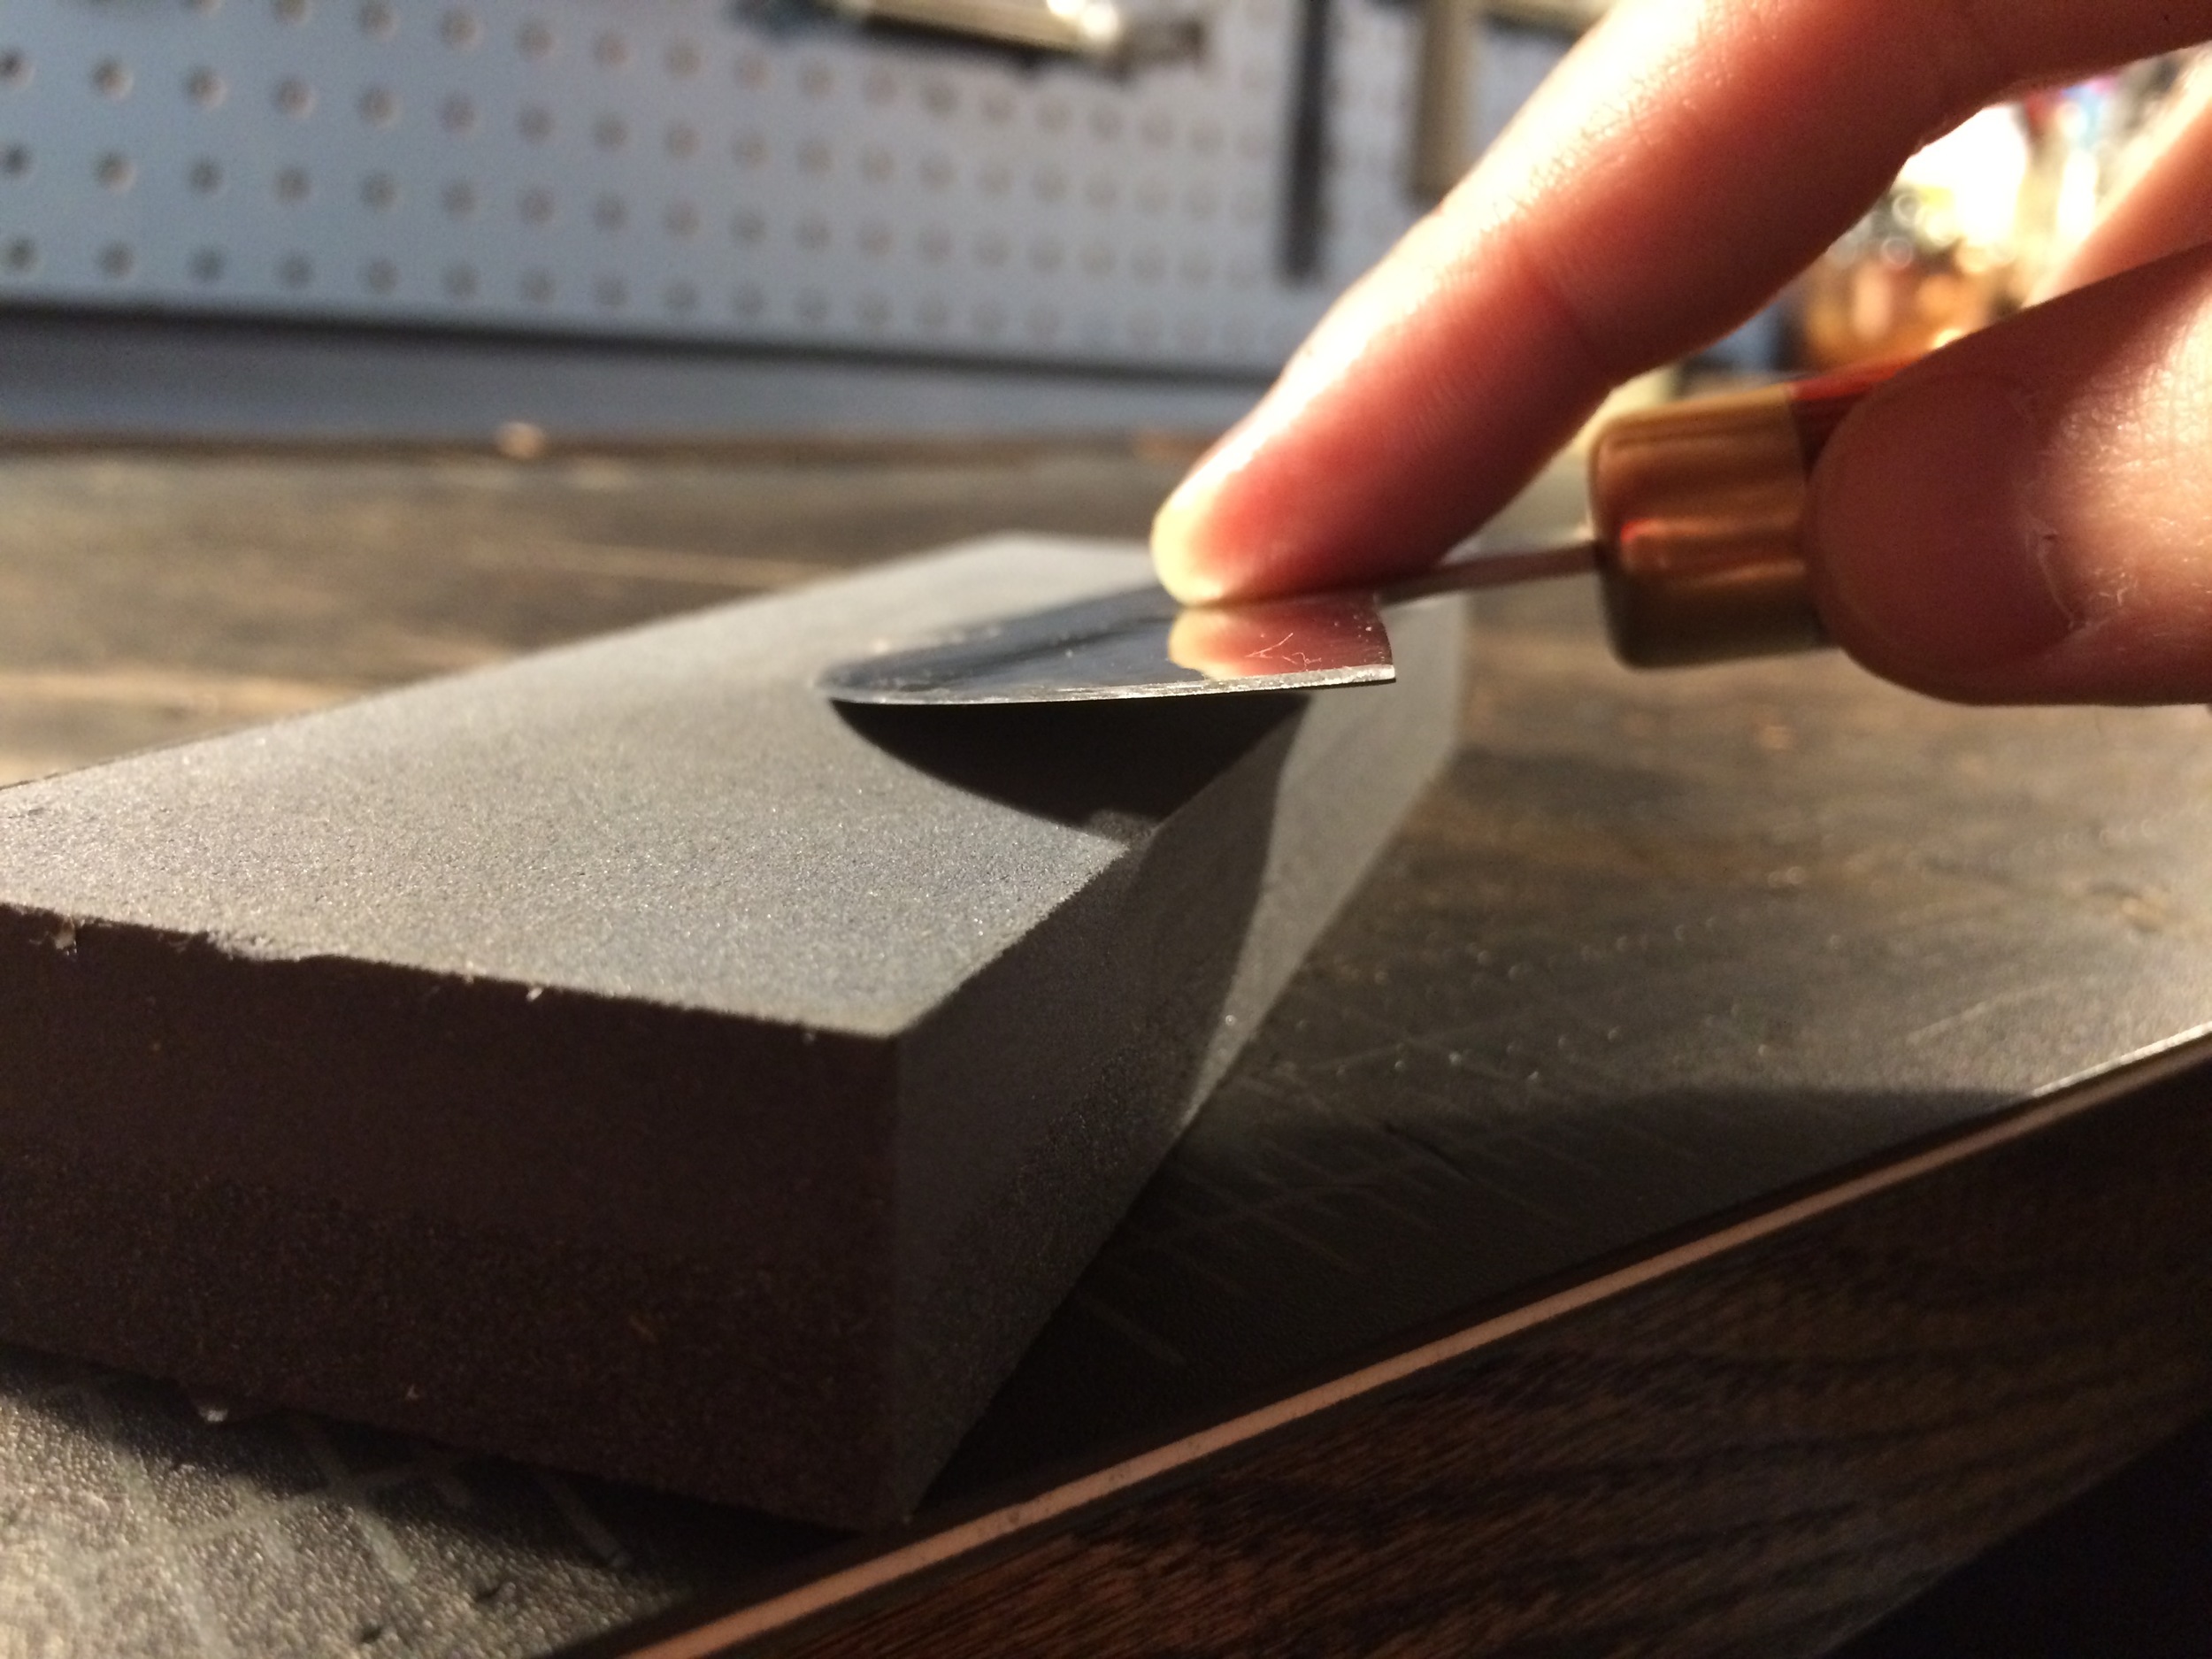
When sharpening or stropping, always keep the blade angled 15 degrees from the stone. Generally, the lower the angle, the thinner the edge will be, and the better the cut. I don't think it's a good idea to go much lower than 15 degrees because you run the risk of scratching the face of the knife. You also won't want your blade higher than 15 degrees. I imagine you could still get a decent cut out of it, but the knife will not cut near as well.
What You'll Need

- A knife to sharpen, duh.
- Oil for your sharpening stone. Not all stones use oil, make sure yours does
- A scrap piece of leather, usually 8oz or more
- Jewelers rouge
- A sharpening stone. My sharpening stone has two sides. A high grit side and a low grit side. You'll need to have a stone with two grits or two separate stones with different grits.
Sharpening your Knife
1. Create THE BURR ON THE RIGHT HALF of the blade
Start by using the coarser, or lower grit, side of the sharpening stone.
Set the middle of the knife on the left side of the stone, making sure to keep the blade 15º off the stone. Rotate the blade clockwise in small circles, as you slowly move the blade towards the opposite side of the sharpening stone. As you move the blade, slowly roll it towards the right point of the knife, so that the point of contact with the stone slowly moves down the edge of the knife. Repeat this process until you've created a burr on the right have off the blade (if you don't know how to find the burr, don't lose your mind just yet, just keep reading).

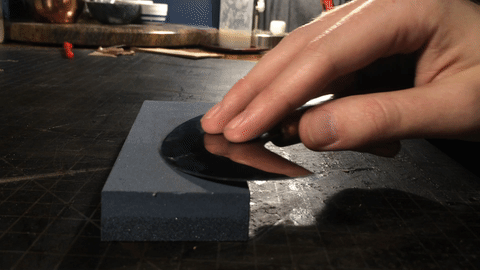
Rolling the blade as I go, moving the point of contact down the edge.
2. Creating a burr on the left half of the blade

After you've developed a burr on the right half of the blade, let's do the left. Set the middle of the blade on the right side of the stone. Rotate the knife counter clockwise this time, while moving the blade across the sharpening stone. As you move the knife across the stone, slowly roll the blade towards the point on the left side of the knife.
3. Finding the Burr
So what is a burr anyways? A burr is the thinnest part of the edge that has begun to roll over as you've sharpened it. A rolled burr doesn't create good cuts, but it's a very good indicator that you've sharpened one side of your blade enough, and it's time to move onto the next. The burr will always develop on the opposite side of the blade that you were just sharpening, because the downward force you are putting on the knife is causing the edge to roll over towards you (once it's thin enough).
Okay, so admittedly, this burr can be a little difficult to find, especially if this is your first time sharpening a knife. Here's a few ways to find it. Before checking it though, make sure to pay attention to which side of the knife you created the burr on.
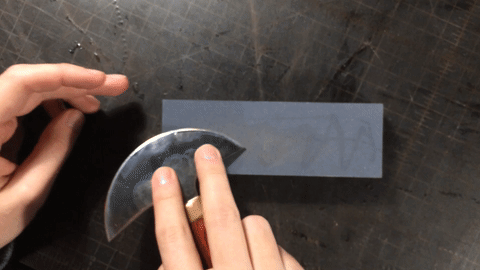
Run your thumb, very lightly (remember you're trying to make it sharp), across the top of the blade. If it glides right along with no resistance, there is no burr. One you start to feel some resistance, you'll know you have a burr. Unless you're really good, chances are there will be parts that have a burr and parts that do not. If that is the case, repeat step 1 and 2 until the burr runs across the entirety of the blade.
If you've done that, but still aren't sure if there's a burr or not, run your fingernail across the blade. Again, if it glides along, it's too dull and there's no burr. If it meets resistance, you've got your burr. It's unmistakable when you find the burr this way. If you're unsure at this point, you don't have a burr developed.
Some people find the burr by holding the knife up to the light and letting the glare hit the very edge. I've still not figured out how to find the burr this way, so all I'll just say is it's an option. Probably not a bad one either, since it doesn't run the risk of losing a finger.


4. Roll the burr over
This part is really important. If you don't roll the burr over, you're just going to grind it off when you start sharpening again. And that's going to make your knife more dull instead of sharp.
On the side of the knife you created the burr, which is the opposite side you just sharpened, set the knife on the coarse side of the stone. Using the same rolling motion you used in the previous method, run your knife across the stone. Where ever the edge is currently meeting the stone, you need to be pulling down into yourself. In other words, always be pulling the knife away from it's edge. It's a little hard to describe this motion, so check out the .gif. Make sure to do this motion about 20 times, or until the burr is no longer felt.

5. Repeat on the other side of the knife
You created a burr on one side of the knife, and then flatted it back out. Now it's time to sharpen the other side of the knife. Set the side of the knife you haven't sharpened, which will be the side that had the burr on it, and repeat steps 1+2. Since you've already sharpened one side of the blade really well, the burr should develop a bit faster this time.
Once you've found the burr, repeat step 4, but this time do it on the smoother, or finer, grit side of the sanding stone.
6. repeat entire process on the smooth/finer grit sanding stone
Hopefully you didn't think you were almost done, and if you did, at least your half way? Basically, you've got to repeat everything you've done, but this time is more about fine tuning instead of forming the edge itself.
Sharpening the left side, sharpen the right side, find the burr, roll it over, sharpen the other side of the blade (both left and right side), find the burr, and finally roll it over again.
After you've done that I do some light sharpening across the entire blade on both sides of the knife, just to smooth it out.
Again you'll be using the rolling motion from before, but this time you'll be dragging the knife across the entire sanding stone. The trick with this one is to make sure you start and stop at the very beginning and end of the blade, maintaining the 15º the entire time.
Maintaining Your Knife
If you're sharpening your knife for the first time, don't stop at the previous step, make sure you strop too.
Now that you've established a nice edge to the blade of your knife, chances are you won't need to repeat the previous processes again any time soon... if you maintain your knife. And even if your knife does get a bit dull, you will only need to redo the edge on a fine grit side of the sharpening stone.
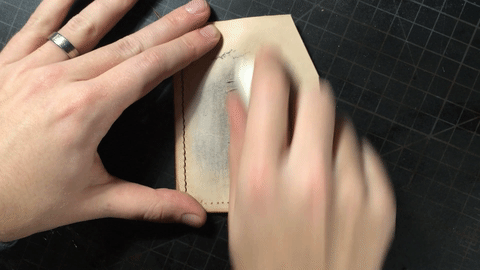
If you want to keep your blade sharp and making clean cuts, you should strop your knife every time you start to work. The good thing is that this step is pretty easy, and takes relatively little time.
Rub jeweler's rouge into a scrap piece of leather (preferably bigger than the one I used for this example... sorry).
Once the leather is loaded up with rouge, pull the knife downward, away from it's edge. Repeat this motion a few times, making sure you've hit all parts of the edge on both sides of the knife.

Time to Celebrate
For two reasons really. You knife is now going to make beautiful cuts and you are no longer going to be frustrated with a dull knife. And, what's more, you got through this entire tutorial with out losing any fingers... at least I hope. If not... better luck next time?
As always, I hope you found this tutorial helpful. Also, I'd really love to see what you guys are making, but I realize that it's not the easiest to share pictures with me here. So follow me on Instagram and share your pictures with me there. If it's some of the best of your work, I'll be sure to feature it, so your work can inspire other craftsmen.
