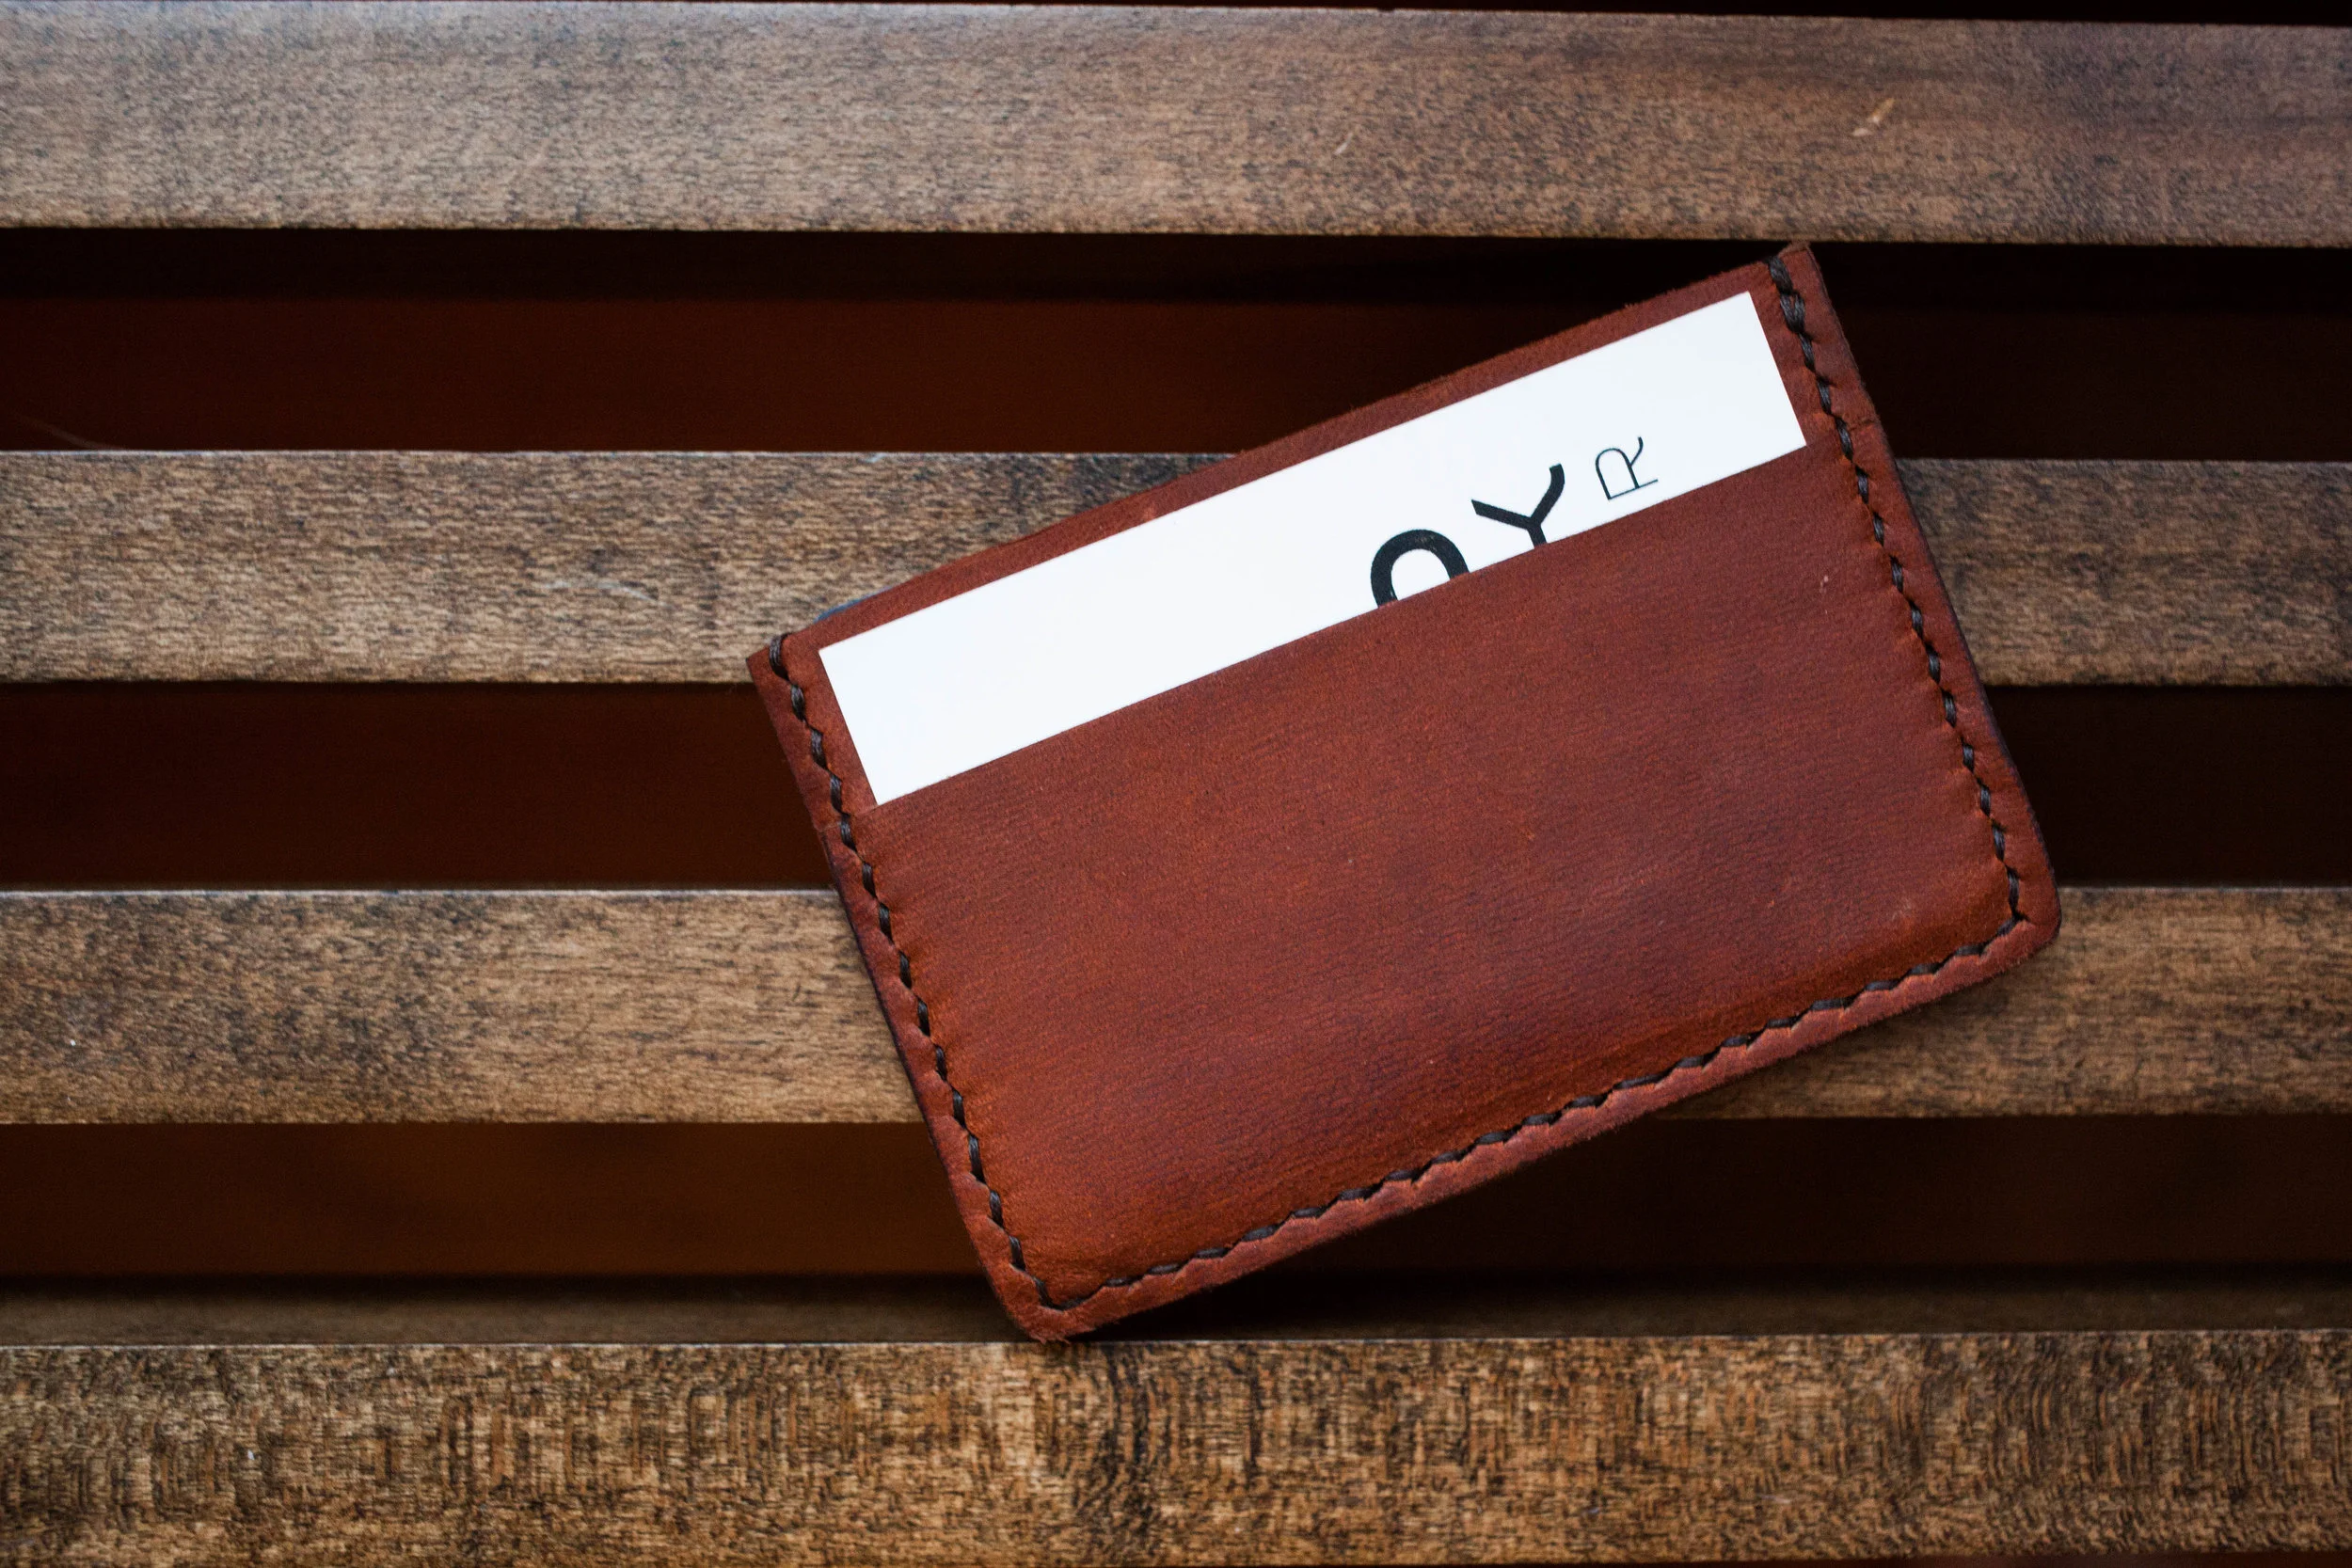
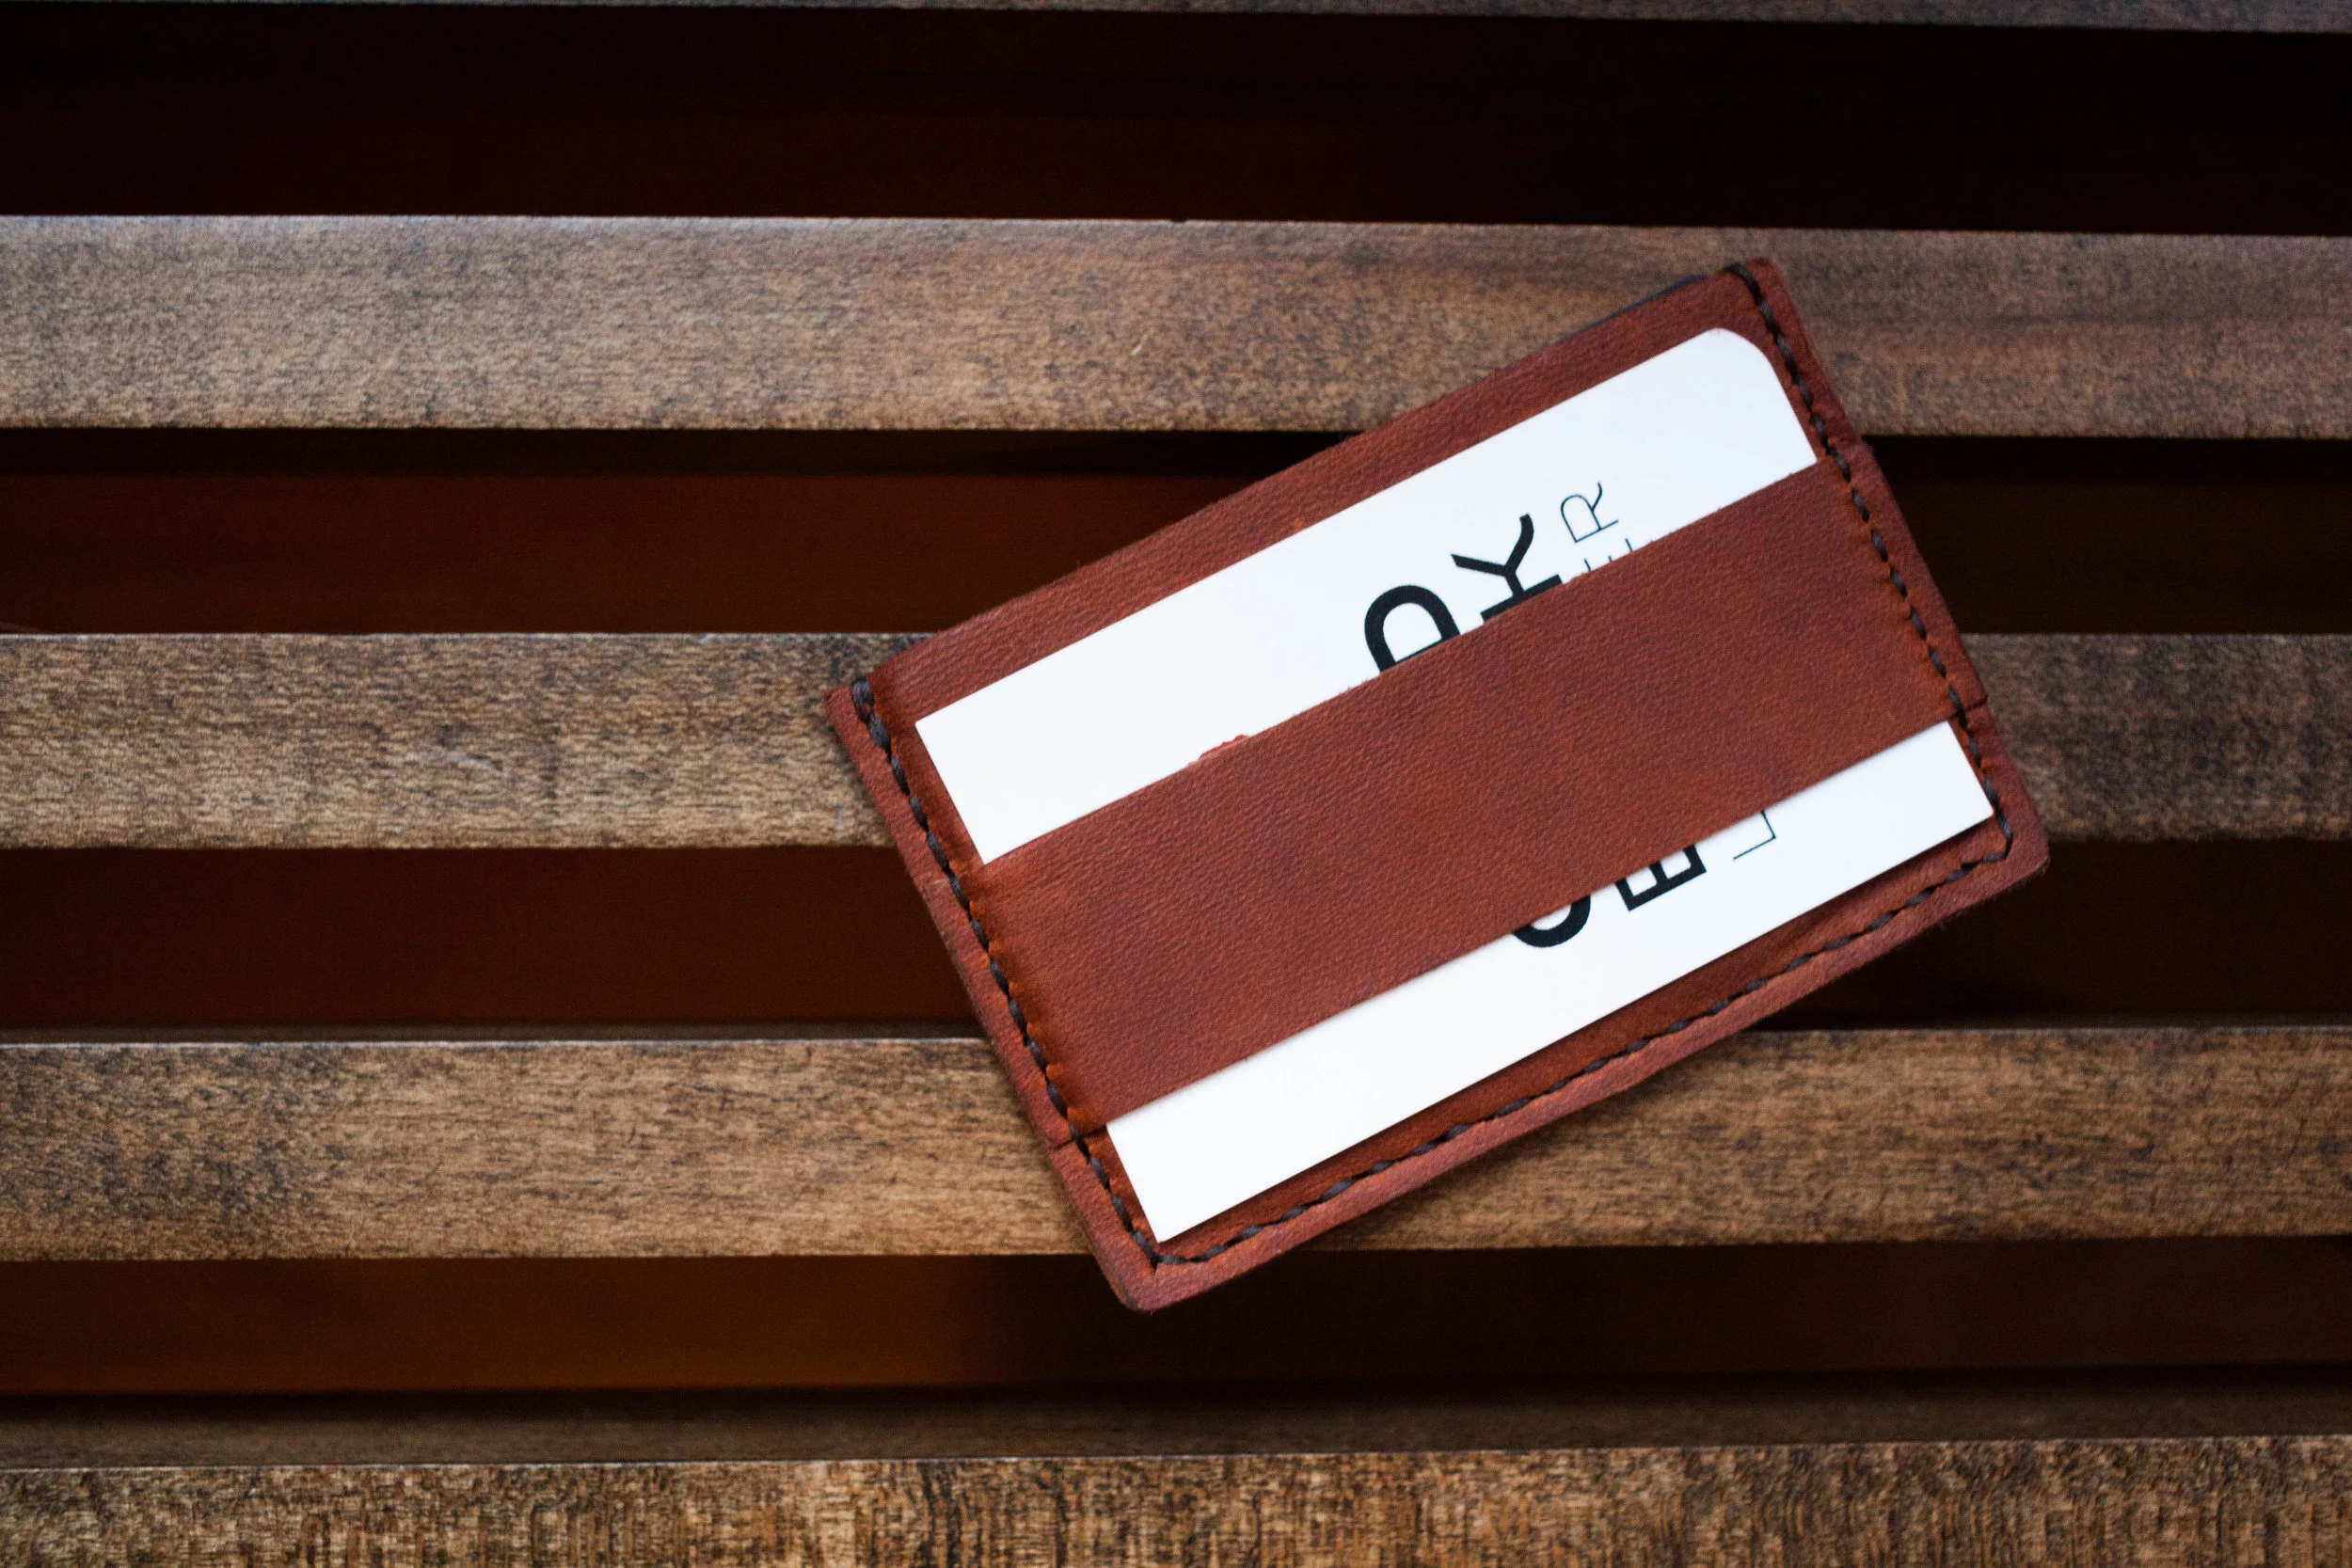

THE SLIM WALLET
Wallets too bulky for you? Yeah me too. The slim wallet is a three-piece wallet designed to hold 3-4 cards as well as a few bills, ensuring that you have room for the necessities with out the temptation to stuff your wallet with crap you don't need. Cards go in the front and bills can be folded under the strap on the back.
This project is a great project for someone just beginning leatherworking. It will help you learn: how to dye leather, how to cut leather, how to burnish edges, and how to saddle stitch. These four skills are skills used in almost every leatherworking project, and are skills that need to be developed to make quality leather items.
For this project you will need the following: 4oz leather, leather dye, leather finish, gloves, a leather knife, a scratch awl, diamond chisels, a divider, a cutting mat, a ruler, a hammer, a piece of canvas cloth, sponges, a craft sponge, leatherworking needles, thread, leather glue, 220 and 600 grit sand paper, and beeswax.

Step 1
What you need: gloves, 4oz leather, sponges, leather dye, and a leather finishing cream.
With your gloves on, quickly turn the bottle of dye over with the sponge pressed to the opening about three times to load the sponge up with dye. Do not press hard when you first put the sponge to the leather. At this point the sponge will have a lot of dye on it, so gently rub the sponge in small circles. As the dye disperses and the sponge becomes drier you can press harder to release the dye. Once the sponge starts creating streaks instead of a wash of full color, reload it with dye. Repeat this process until the leather is completely dyed.
After the dye has had 20-45 minutes to dry, apply the finish in the same manner with the another sponge. Typically the finish dries pretty fast and you should be good to go in just a few minutes. When dried, buff the surface of the leather with an old rag until the leather has a bit of a shine.
If you need more suggestions on how to dye leather, CLICK HERE.

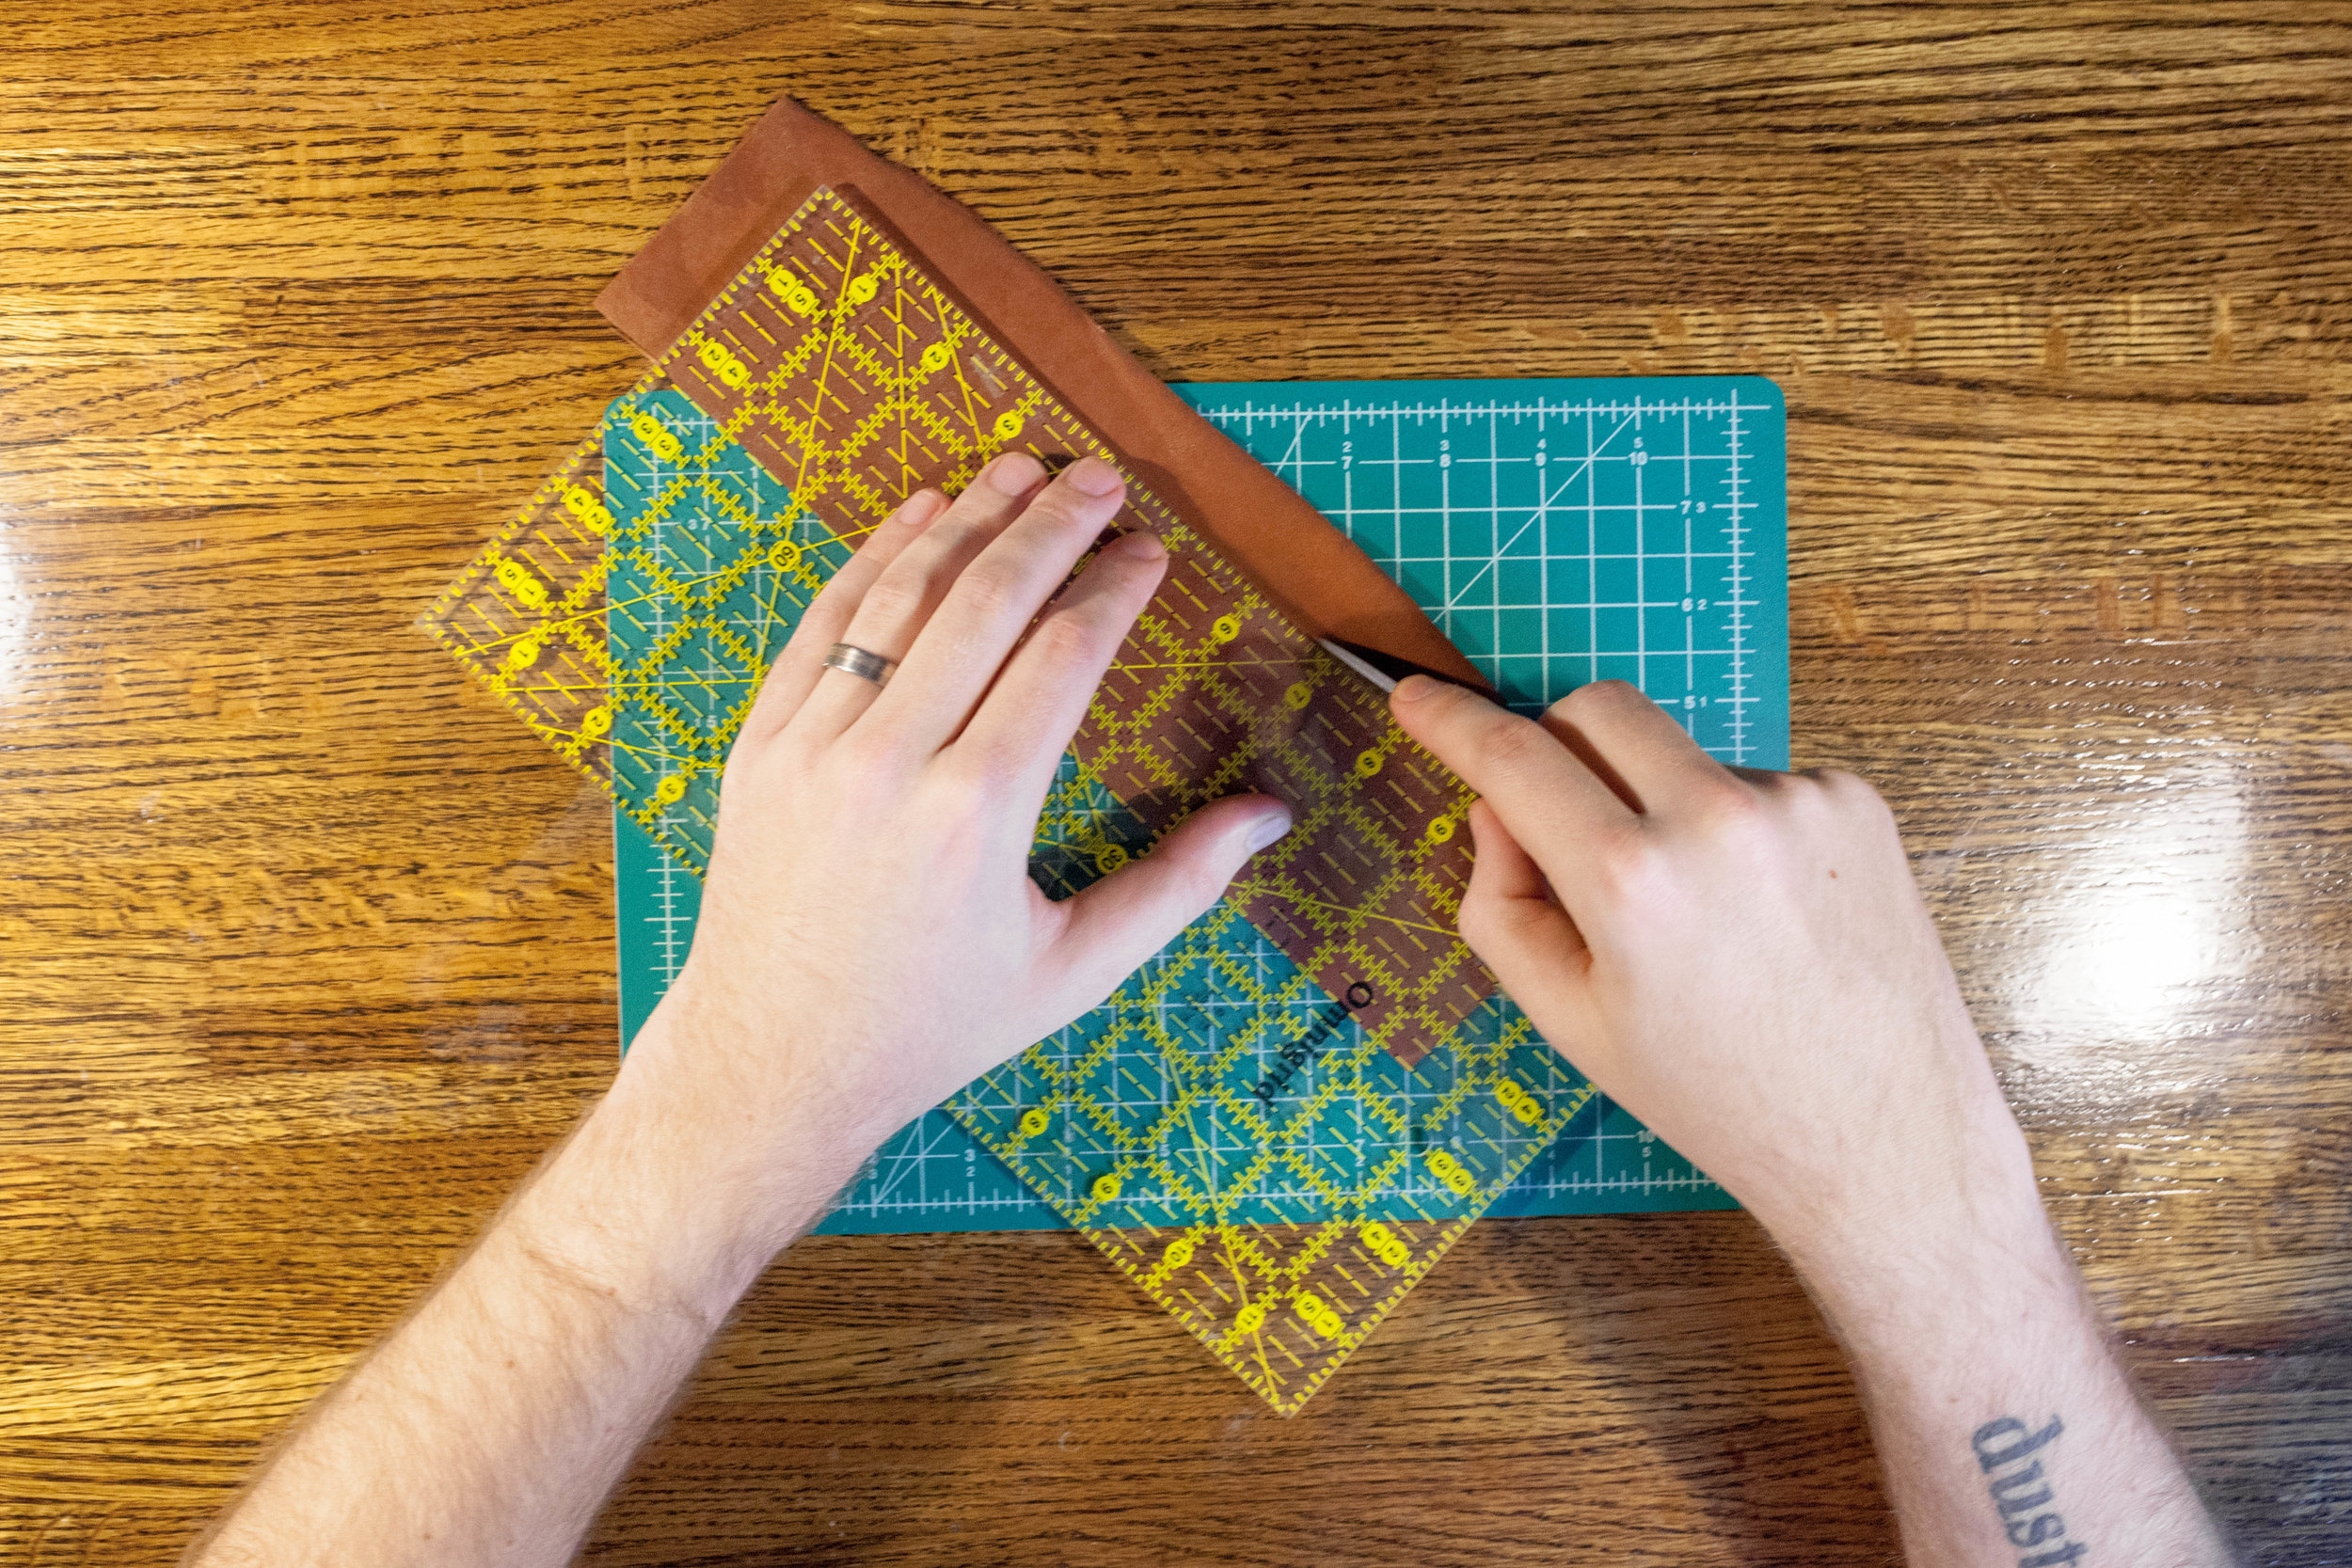
Step 2
What you need: a cut out template, finished 4 oz leather, ruler, scratch awl, and a leatherworkers knife.
Place all pieces of the template to make sure they fit. Then, using the scratch awl, trace each piece of the template onto the leather.
Once you've finished tracing, you should be able to see clear outlines of each piece. If any are not clear to you, set the template back on the leather and retrace.
Then place the ruler onto the leather and cut out each piece.
Cutting out leather seems simple, but can actually be a bit tricky. CLICK HERE for more tips on making good cuts.

Step 3
What you need: the front piece of the wallet, the back strap, 220/600 grit sand paper, a sponge, leather dye, water, a piece of cloth canvas, beeswax.
Before gluing the pieces together, the back strap must be burnished.
Getting a nice looking edge is a 3-step process. First is sanding. Sand the edges with the 220 grit (red) sand paper. If any of your cuts weren't prefect, this should smooth them over. Then sand again with 600 grit (black) sand paper. This will remove the lose fibers on the edge.
After the edges are sanded smooth, dye the edges by loading up the corner of your sponge with dye and running it along the edges. Try to keep the dye just on the edges.
Next dip your finger in a bit of water and run it along the edges until they are lightly wetted. Then rub a piece of canvas or wood slicker briskly across the edge to create heat. You'll know you're done when the edges start to make a tacky sound and shine.
Finally, apply some beeswax along the edges and hit the edges again with the canvas cloth or wood slicker.
For more help on burnishing, CLICK HERE.
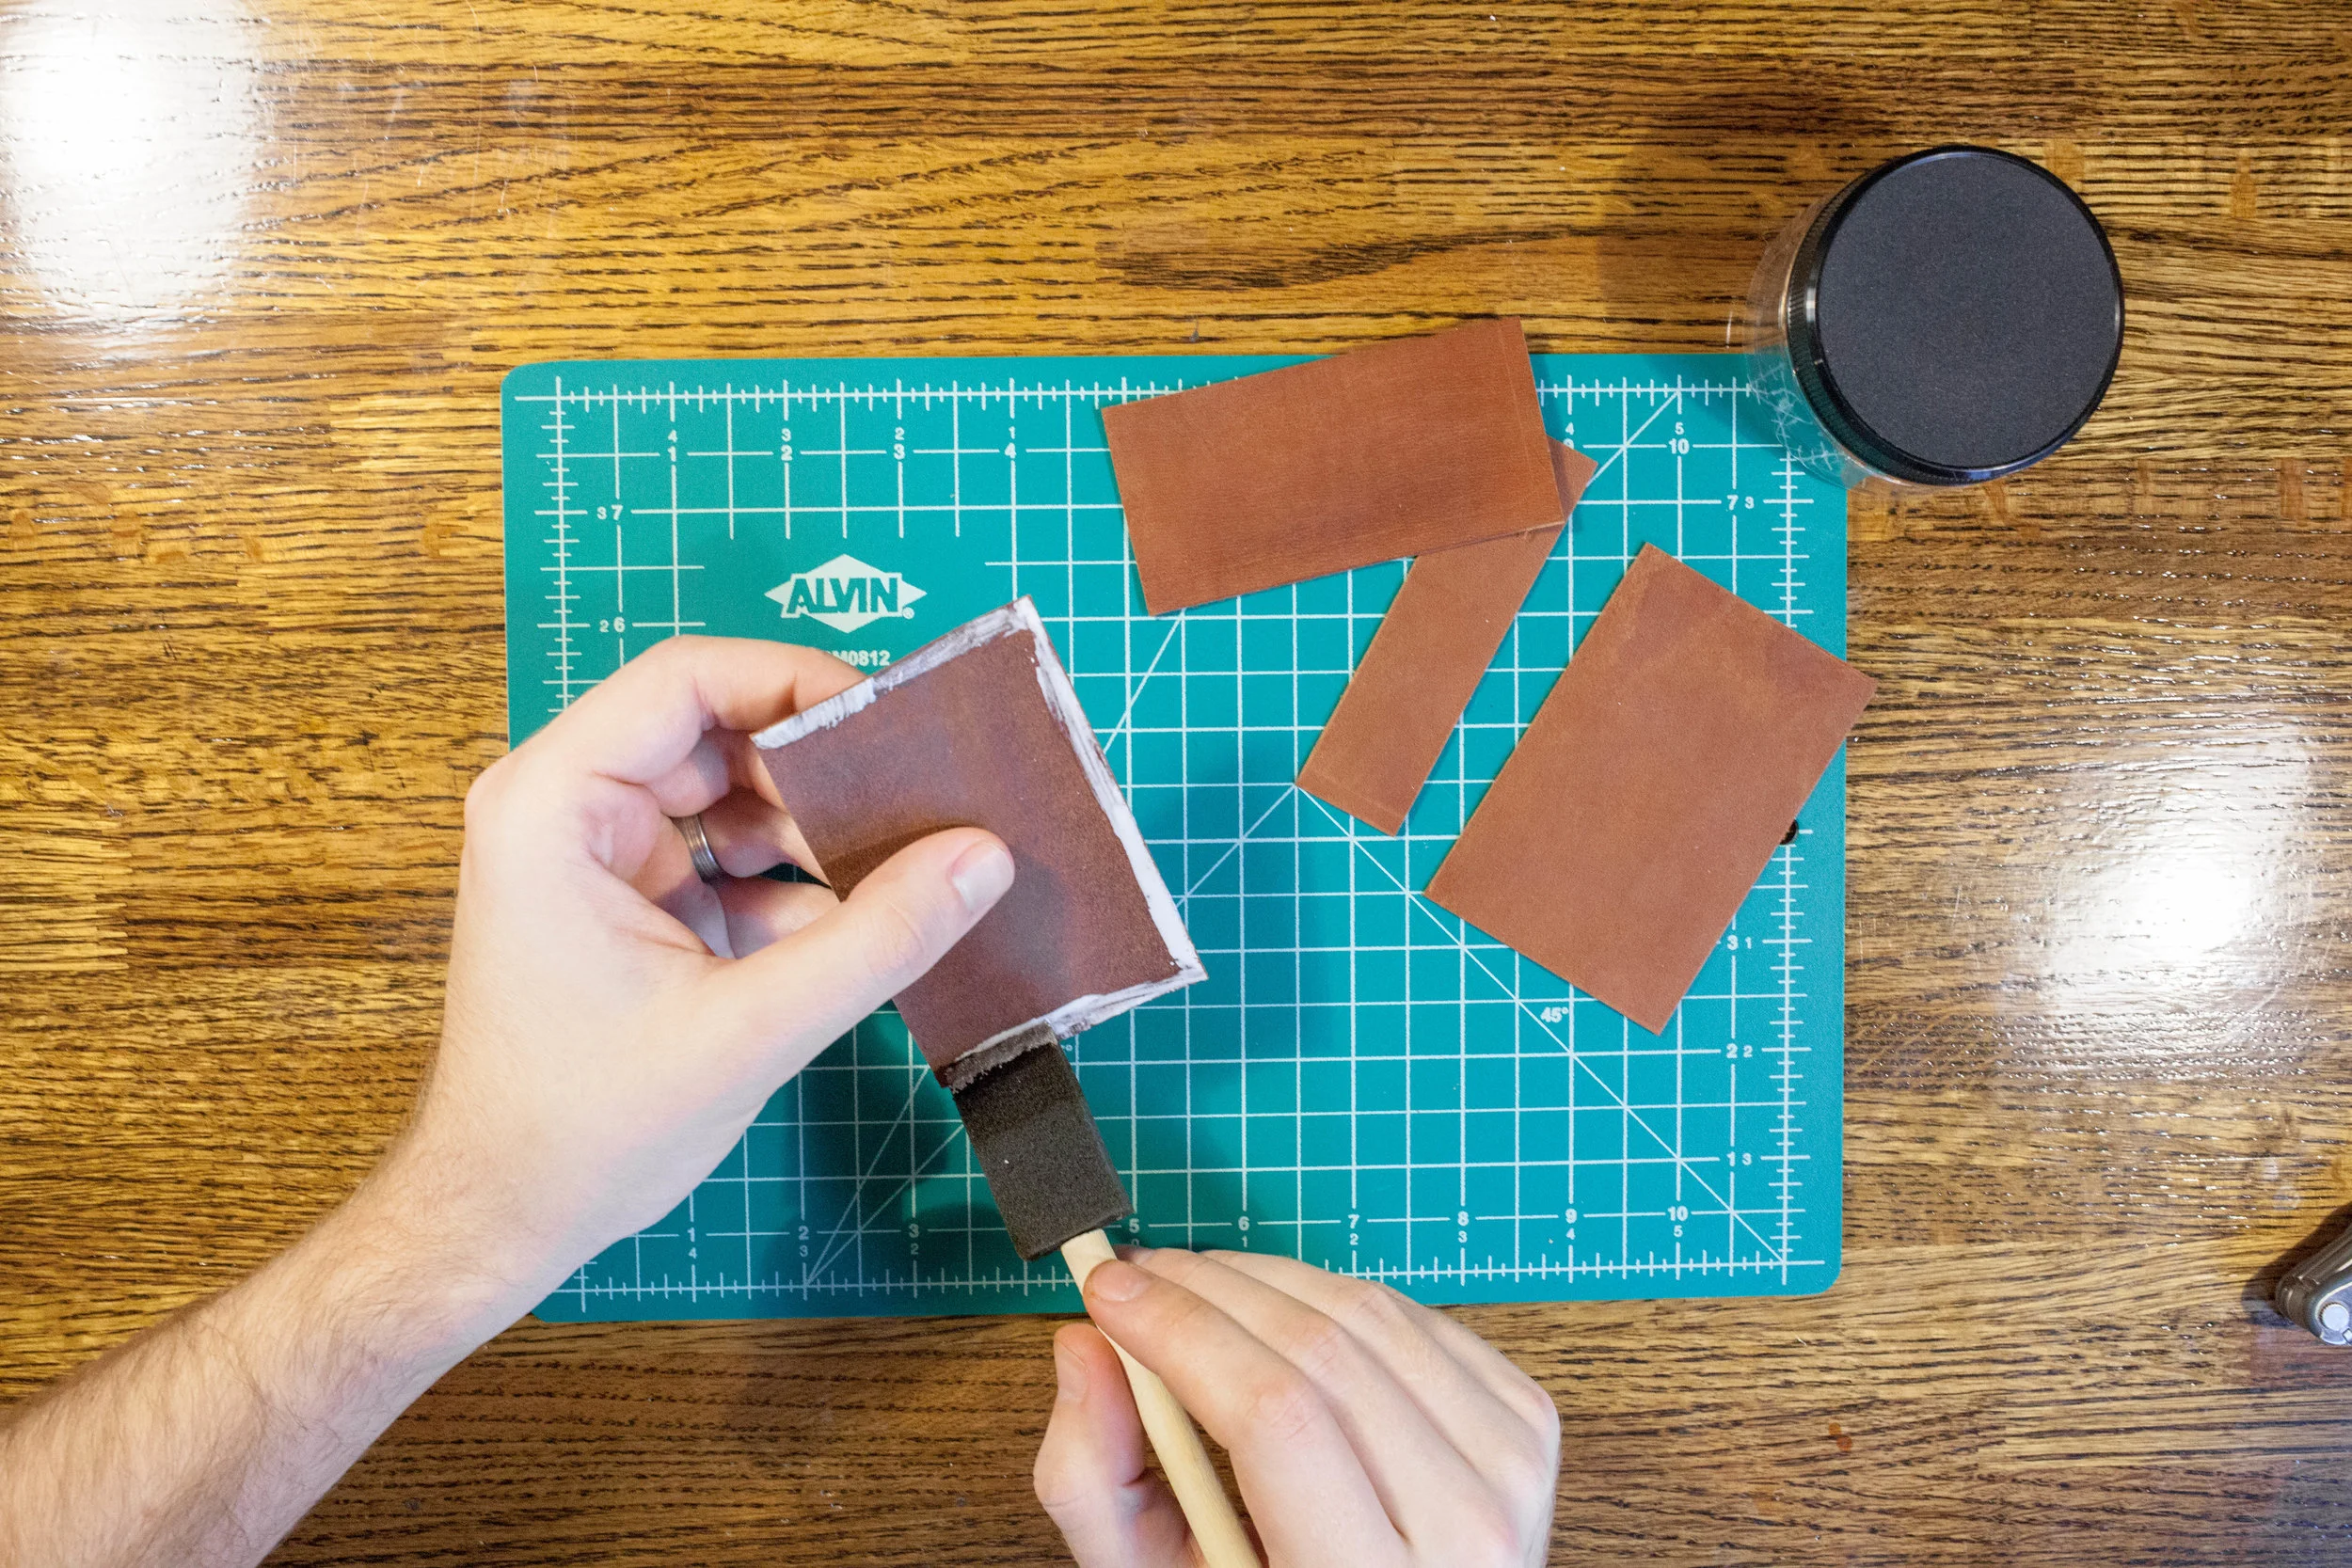
Step 4
What you need: leather glue, a craft sponge, all pieces of the wallet.
Using the craft sponge, apply a small (seriously don't over do it!) amount of glue to the edges of the project. The glue shouldn't go beyond where the stitching is going to go.
Also only make sure to glue the edges that are going to be stitched. If you glue an edge that is not supposed to be glued, you will not be able to get your cards into the wallet.
Once all the pieces have been placed together, apply a lot of pressure for about 30 seconds to help the glue adhere.

Step 5
What you need: the glued together wallet, a divider, diamond chisels (a 4-6 tooth, and a 2 tooth), a hammer, waxed thread, stitching needles, and scissors.
It takes about 5 minutes for the glue to dry. Once it has dried it's time to start the stitching process.
The first thing you'll need to do is mark your stitching lines. To do this, set the divider distance to the stitching distance notated on the template. Then run the divider around the edge of the slim wallet. Be careful when tracing over the strap on the back, it's easy to slip and have your stitching line go in further than you were hoping.
With stitching lines marked, it's time to start punching your stitching holes in the leather with the diamond chisels. To do this, set one tooth just over the edge of the leather, with the rest on the stitching line. Then hammer the chisel all the way through the leather, making sure to keep the chisel as perpendicular to the leather as you can. This should only take one good hit with a hammer. Remove the chisel and then set one tooth in the last hole of the holes you just made, with the rest of the teeth set on the stitching line. Then, when you come to a corner, switch to a chisel with only two teeth and slowly work your way around the corner. Continue this method until all the stitching holes have been created.
If you'd like some more help with creating the perfect stitching holes, so your stitching stays neat, CLICK HERE.
Next you'll need to thread your needles and begin your saddle stitching. This is something that is much easier to learn by seeing it done than reading about it. To see how it's done CLICK HERE.
To complete the project, you'll need to burnish the edges. Simply follow the directions for you used to burnish the inside edges: sand, dye, burnish, and wax.
And that's it, you did it! Not all who have attempted have made it this far... just kidding, they probably have. But, don't worry, you should still be proud of what you just made. Here's to you for making a killer wallet that's going to last for years to come.
Oh yeah, and don't forget to share you success with us by sharing a picture of your finished work with us on Instagram!